Uploading Leads In a CSV file to Lead Prosper using Postman
Importing leads from a CSV into Lead Prosper with Postman takes just a few steps. Below is a structured walkthrough to help you set it up correctly.
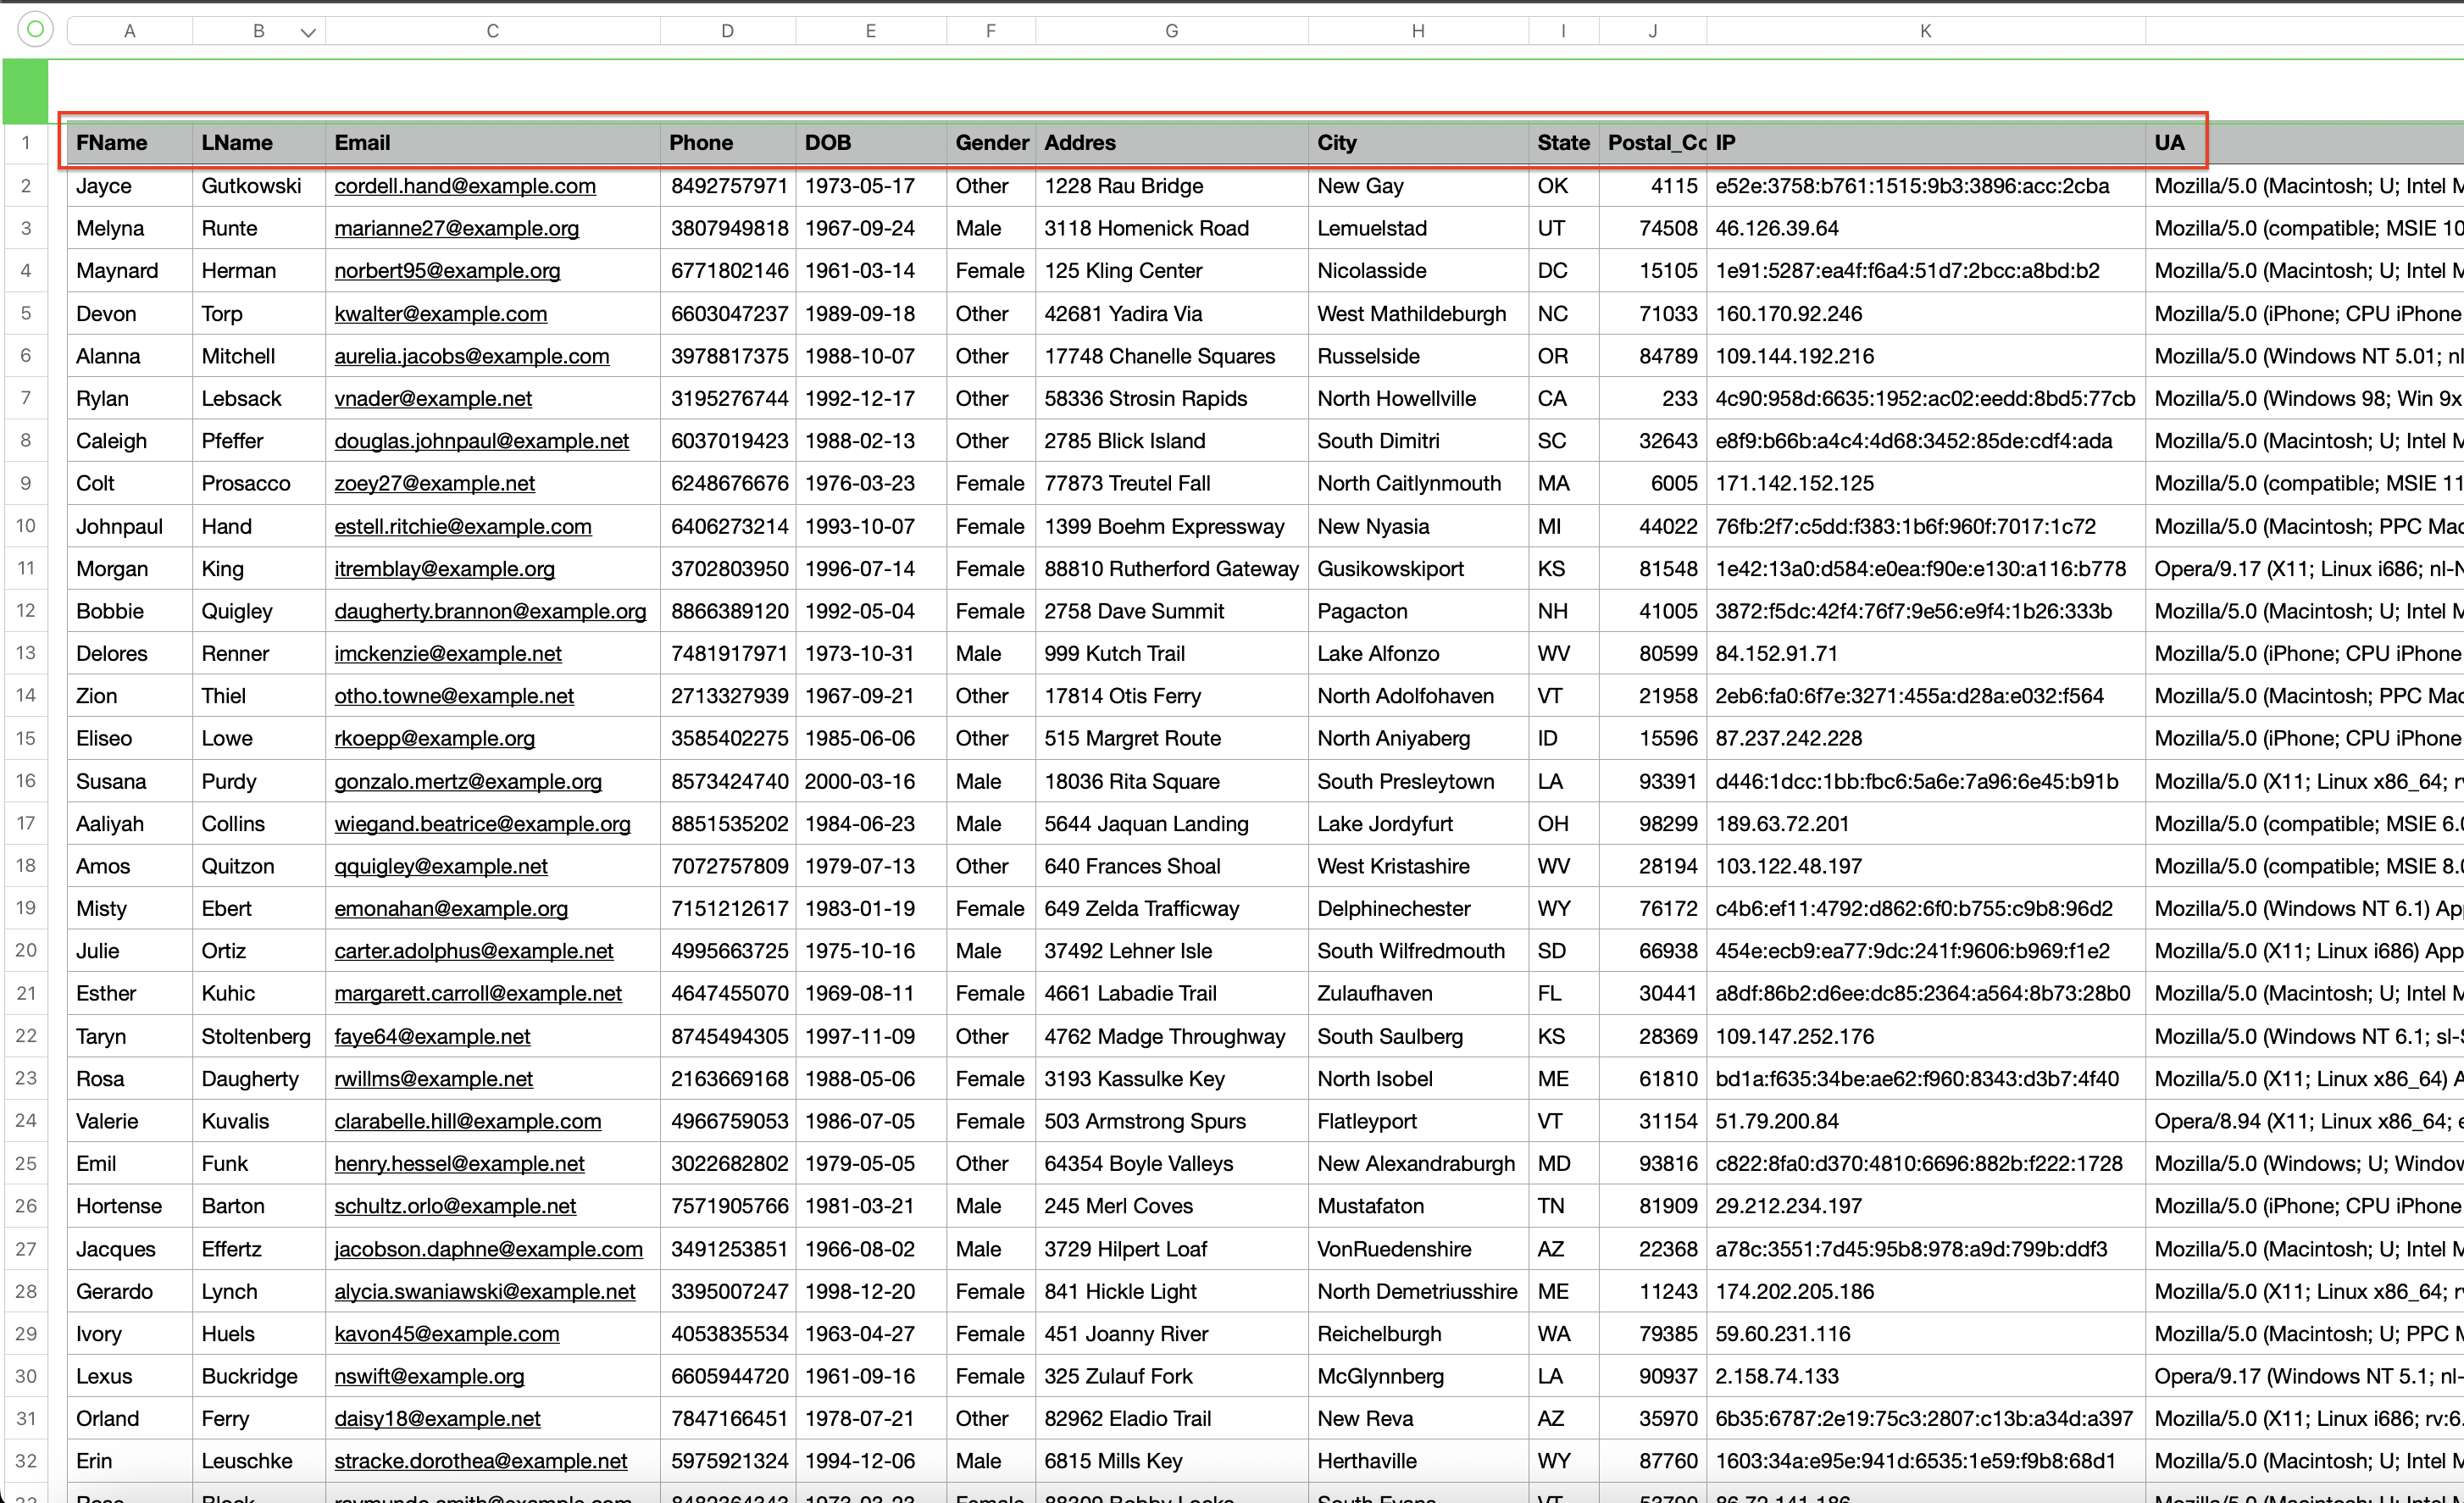
1. Prepare Your CSV File
- Open your CSV and make note of all the header names. These headers will be used to map data into your Lead Prosper payload.
- Review the data formats and values to ensure they match your Lead Prosper API specs.
- Example: Make sure dates, phone numbers, and state abbreviations follow the expected format.
- If corrections are needed, make them before moving on.
2. Set Up a Postman Collection
- Open Postman and create a new collection.
- Inside the collection, create a new request.
-
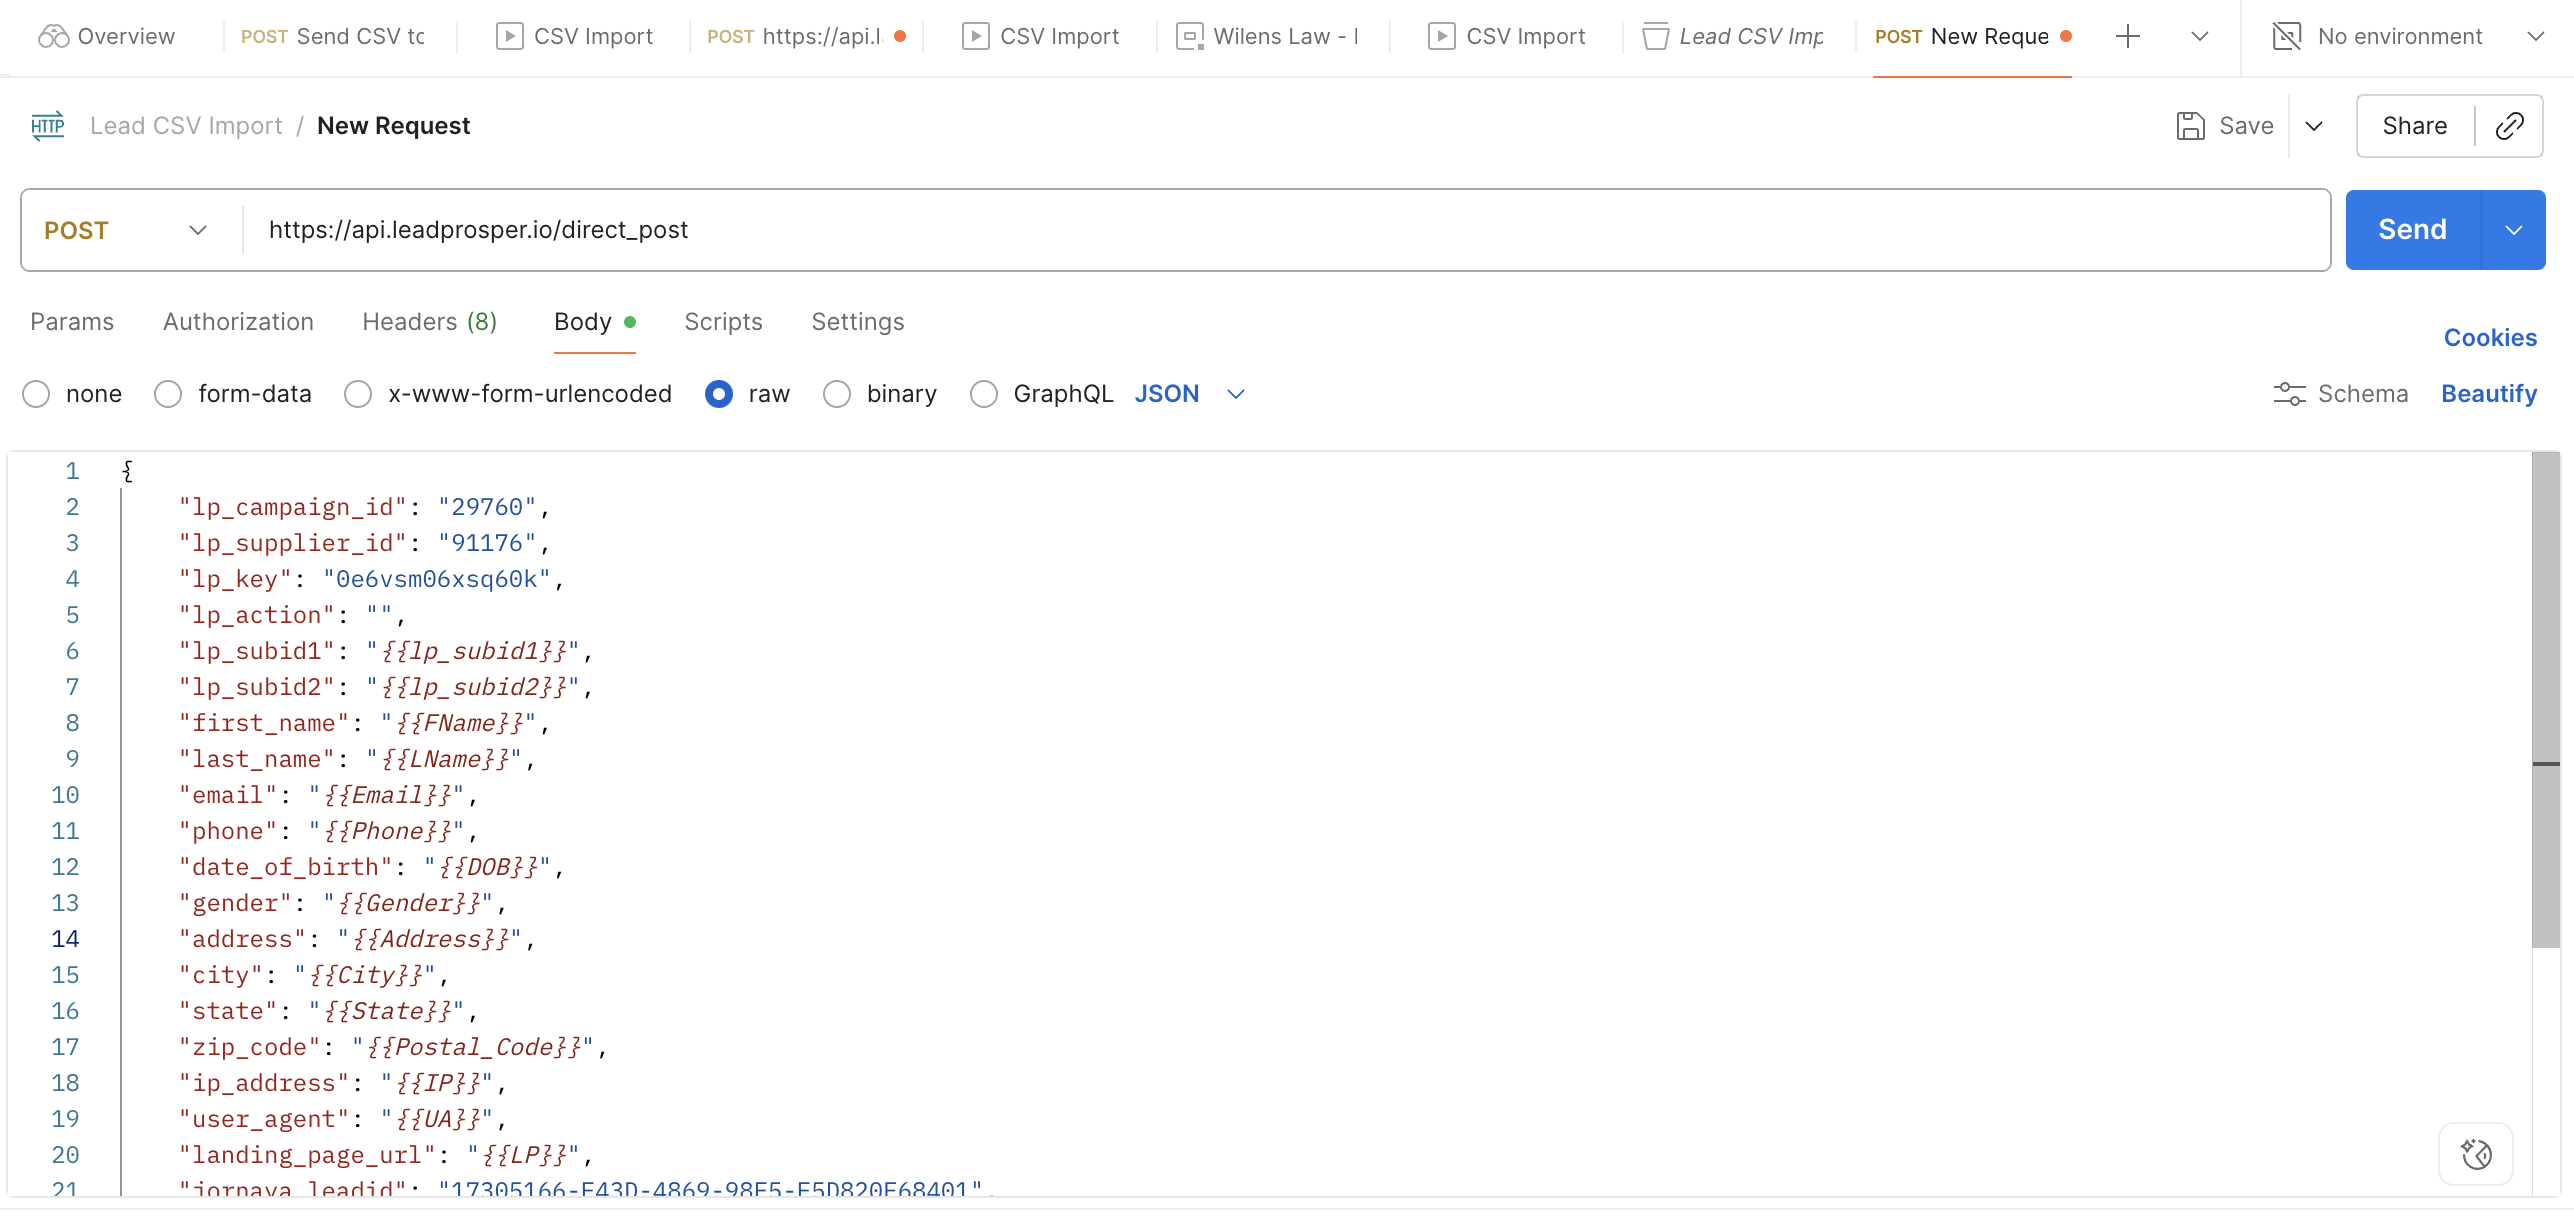
Set the body to:
raw > JSON.
-
- Open your Supplier API Specs, copy the example JSON payload, and paste it into the request body.

3. Map Your CSV Headers to the Payload
- Replace the sample values in the payload with your CSV headers.
- Use Postman’s variable format
{{HeaderName}}to connect each API field to the CSV column.- Example:
- If your Lead Prosper field is
first_nameand your CSV header isFName:"first_name": "{{FName}}"
4. Configure the Collection Runner
- Save your request and return to Collections.
- Select your new collection and click Run in the top right corner.
- In the Runner window, configure the following:
- Choose how to run → Run manually
- Iterations → Set to the number of rows you want to process at a time
- Delay → Set to
250ms - Advanced Settings → Enable:
- Turn off logs during run
- Keep variable values
- Run collection without using stored cookies
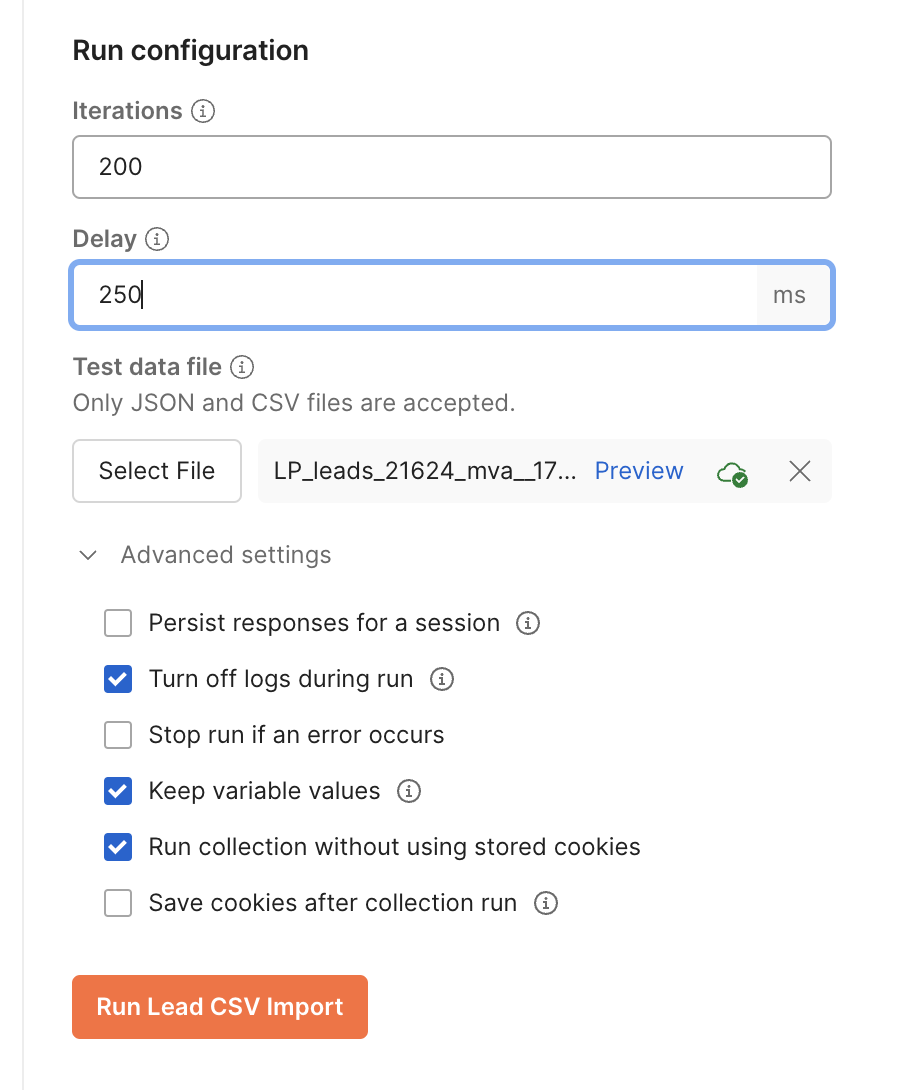
5. Import and Run Your CSV
- Click Select File and choose your CSV for import.
- A Preview window will appear showing your CSV data.
- Review this carefully to ensure headers and values look correct.
- When ready, click Run {COLLECTION}.
6. Review the Results
- A new tab will open and Postman will begin sending requests row by row.
- To verify responses:
- Click on any individual request in the list.
- The response will display on the right side so you can confirm whether the lead was accepted successfully.
Once your first import is complete, take a few minutes to review the responses and confirm that your data matched the Lead Prosper API specs correctly. If you notice errors, adjust your CSV headers or field mappings and rerun the collection. After everything looks good, you can reuse this same collection for future imports—just swap in a new CSV file and update the iterations as needed. This will give you a repeatable process for quickly loading data into your campaigns whenever you need.