Custom Headers In Lead Prosper Buyer Set Ups
Some buyers require authorization tokens, API keys, or other values to be passed as HTTP headers alongside your lead data. This article covers what custom headers are, when you need them, and how to configure them in Lead Prosper.
How Headers Work in Lead Prosper
When you select a payload type in the buyer configuration, Lead Prosper automatically adds the appropriate Content-Type header. You do not need to add this yourself. Headers like Content-Length and Host are also handled automatically and should not be added manually.
To add a custom header, go to your buyer's configuration, scroll down to the Custom Headers section, and enter the key and value.
Important: Never include quotation marks (" " ) in your header keys. Quotation marks will make the key invalid.
Common Header Types
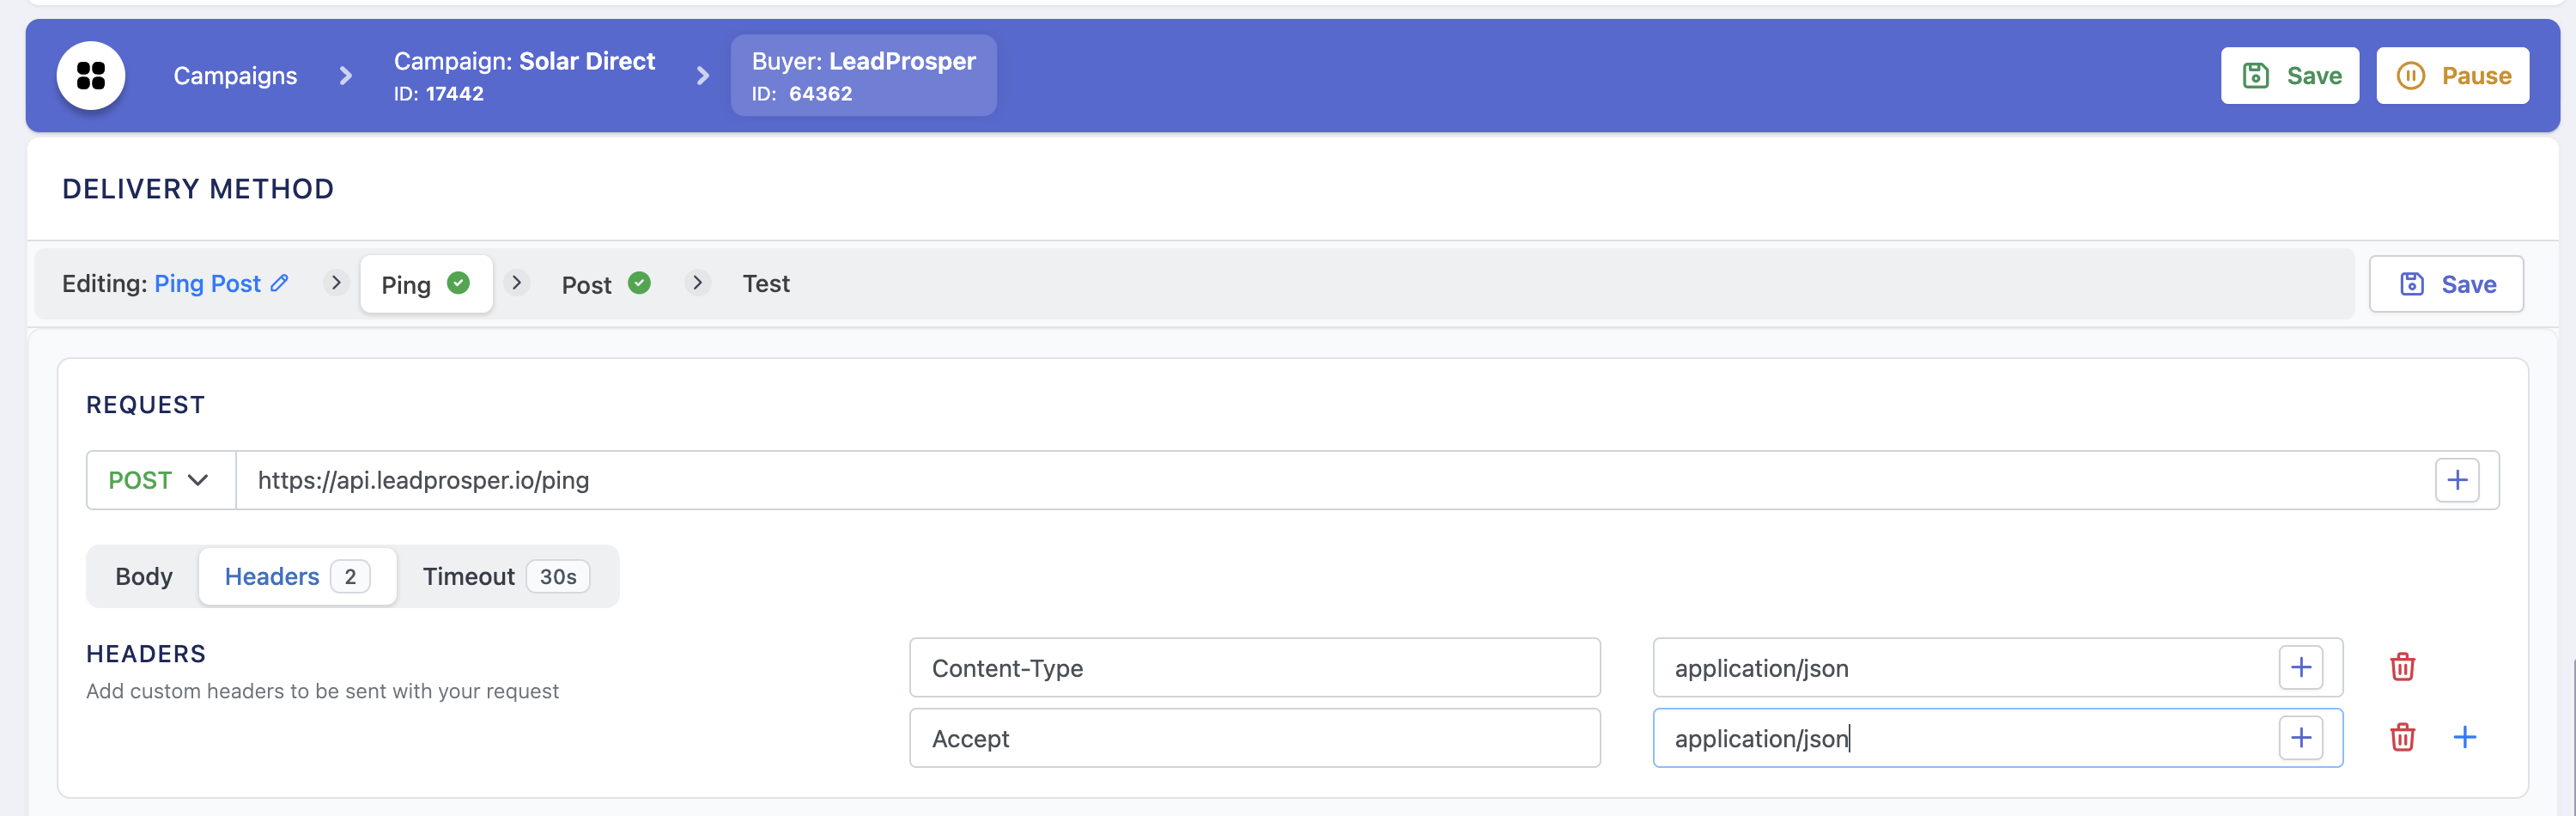
Accept Header
Most systems return an API response in JSON or XML by default, but some require you to specify the format explicitly using an Accept header. Without it, these systems may return an empty body response, which Lead Prosper cannot process. Other systems may have a default response format that you want to override.
To configure this, set the key to Accept and the value to the format your buyer expects:
application/jsonfor JSON responsesapplication/xmlfor XML responses
Authorization Headers
Some buyers include API keys or auth credentials inside the payload itself, but many require authorization details in the headers instead. There are several common formats.
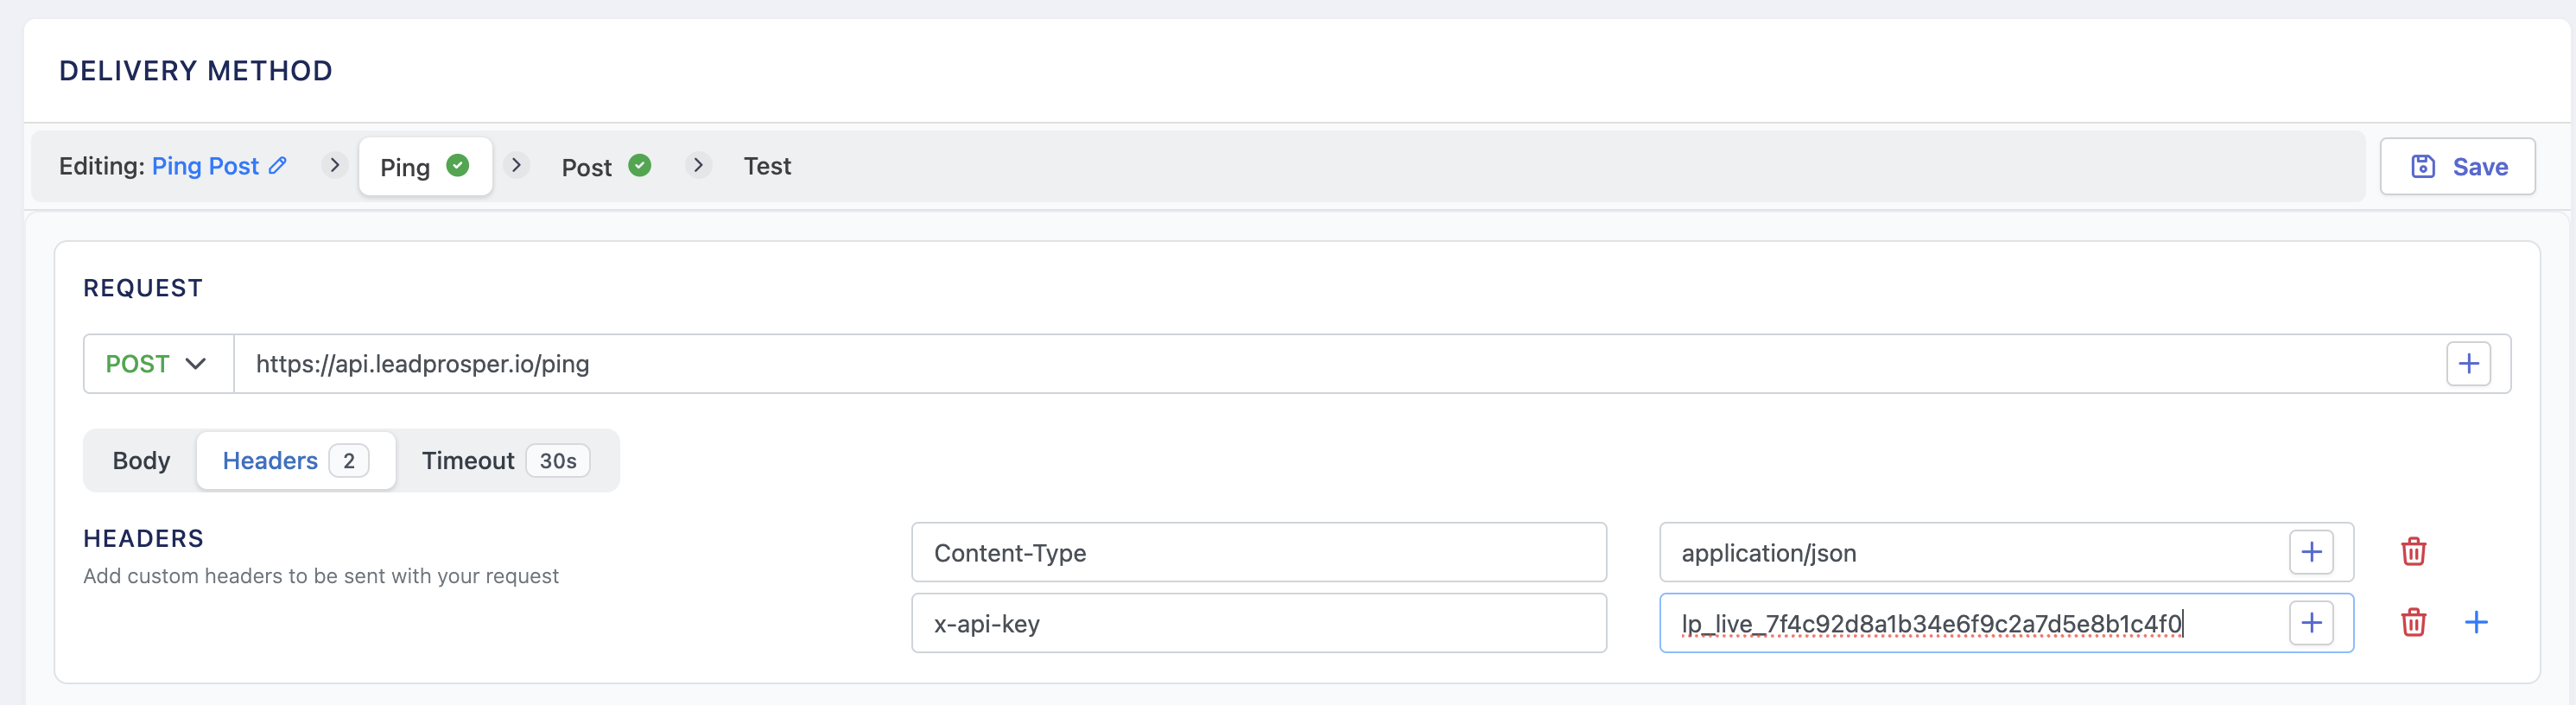
API Key Header
Some buyers use a custom key name for their API key. A common example:
- Key:
x-api-key - Value:
your-api-key-here
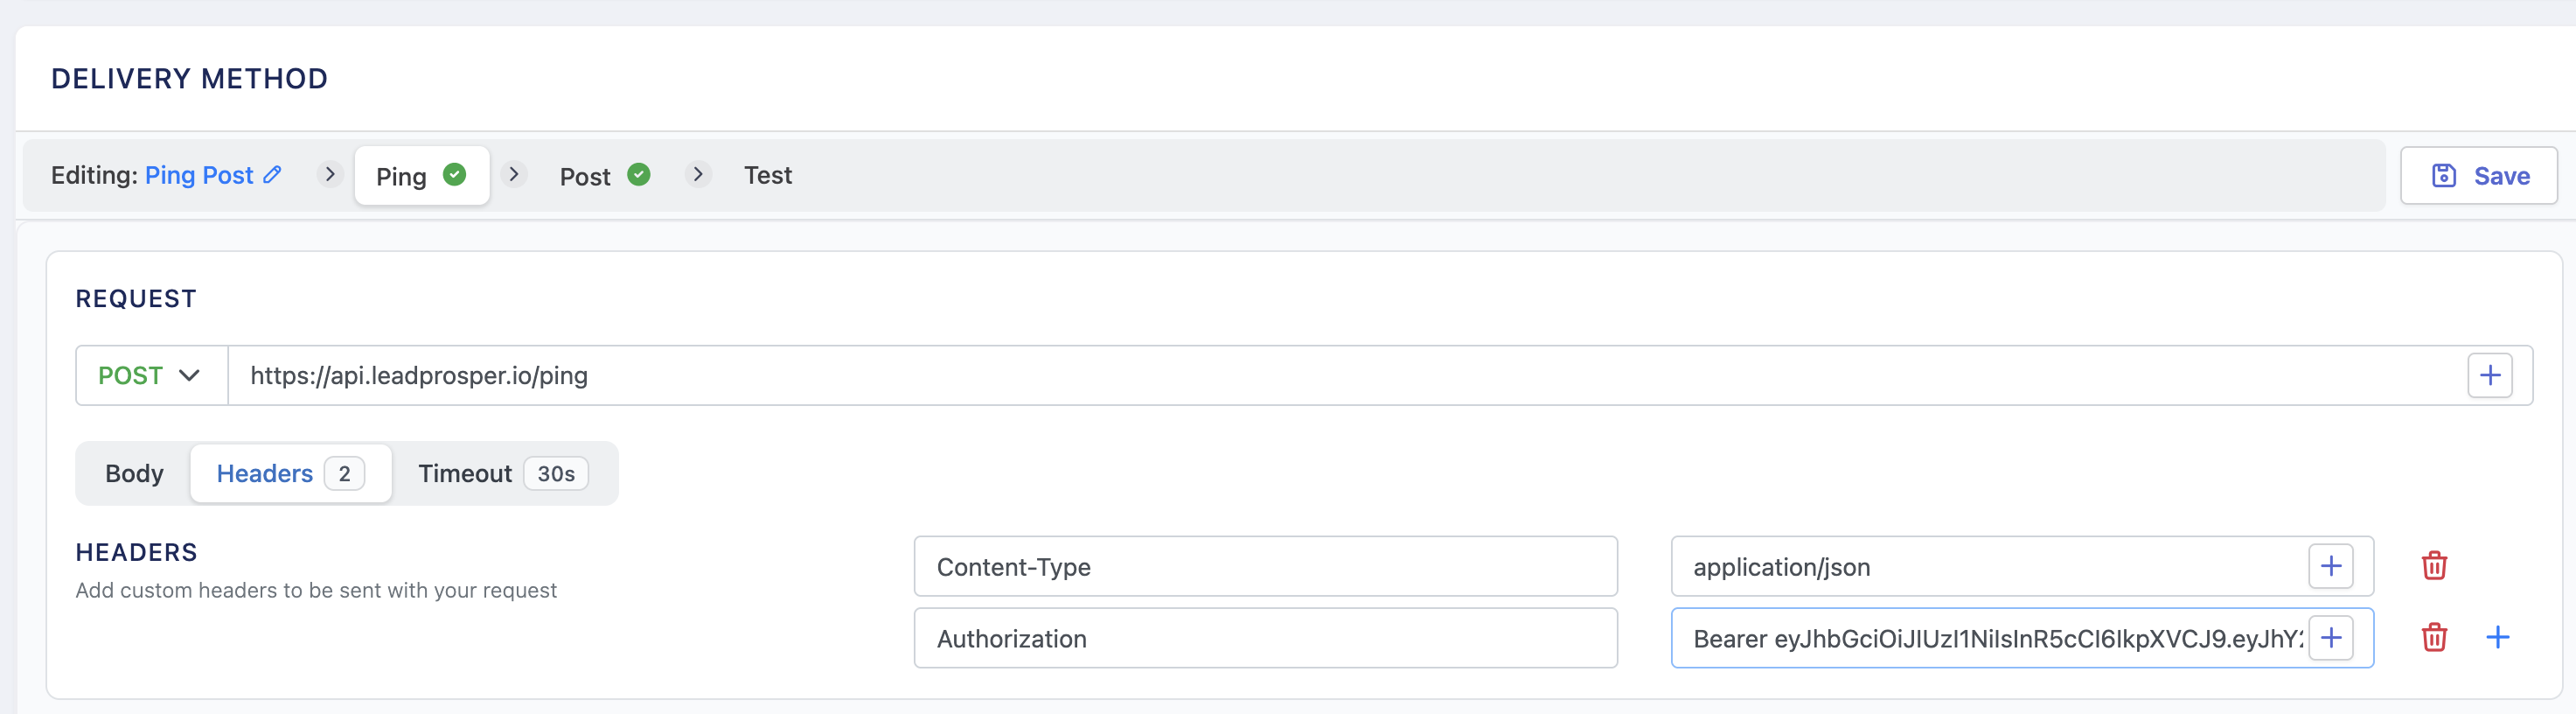
Bearer Token
If the buyer provides a bearer token, configure the header as:
- Key:
Authorization - Value:
Bearer TOKEN
Replace TOKEN with the actual token value provided by your buyer.
Basic Authorization
With Basic Authorization, the buyer provides a username and password instead of a token. The username and password must be Base64-encoded before they can be used in the header.
To encode the credentials:
- Go to a Base64 encoding website such as DebugBear
- Enter the username and password in the format
username:password. - Click encode.
- Copy the encoded output.
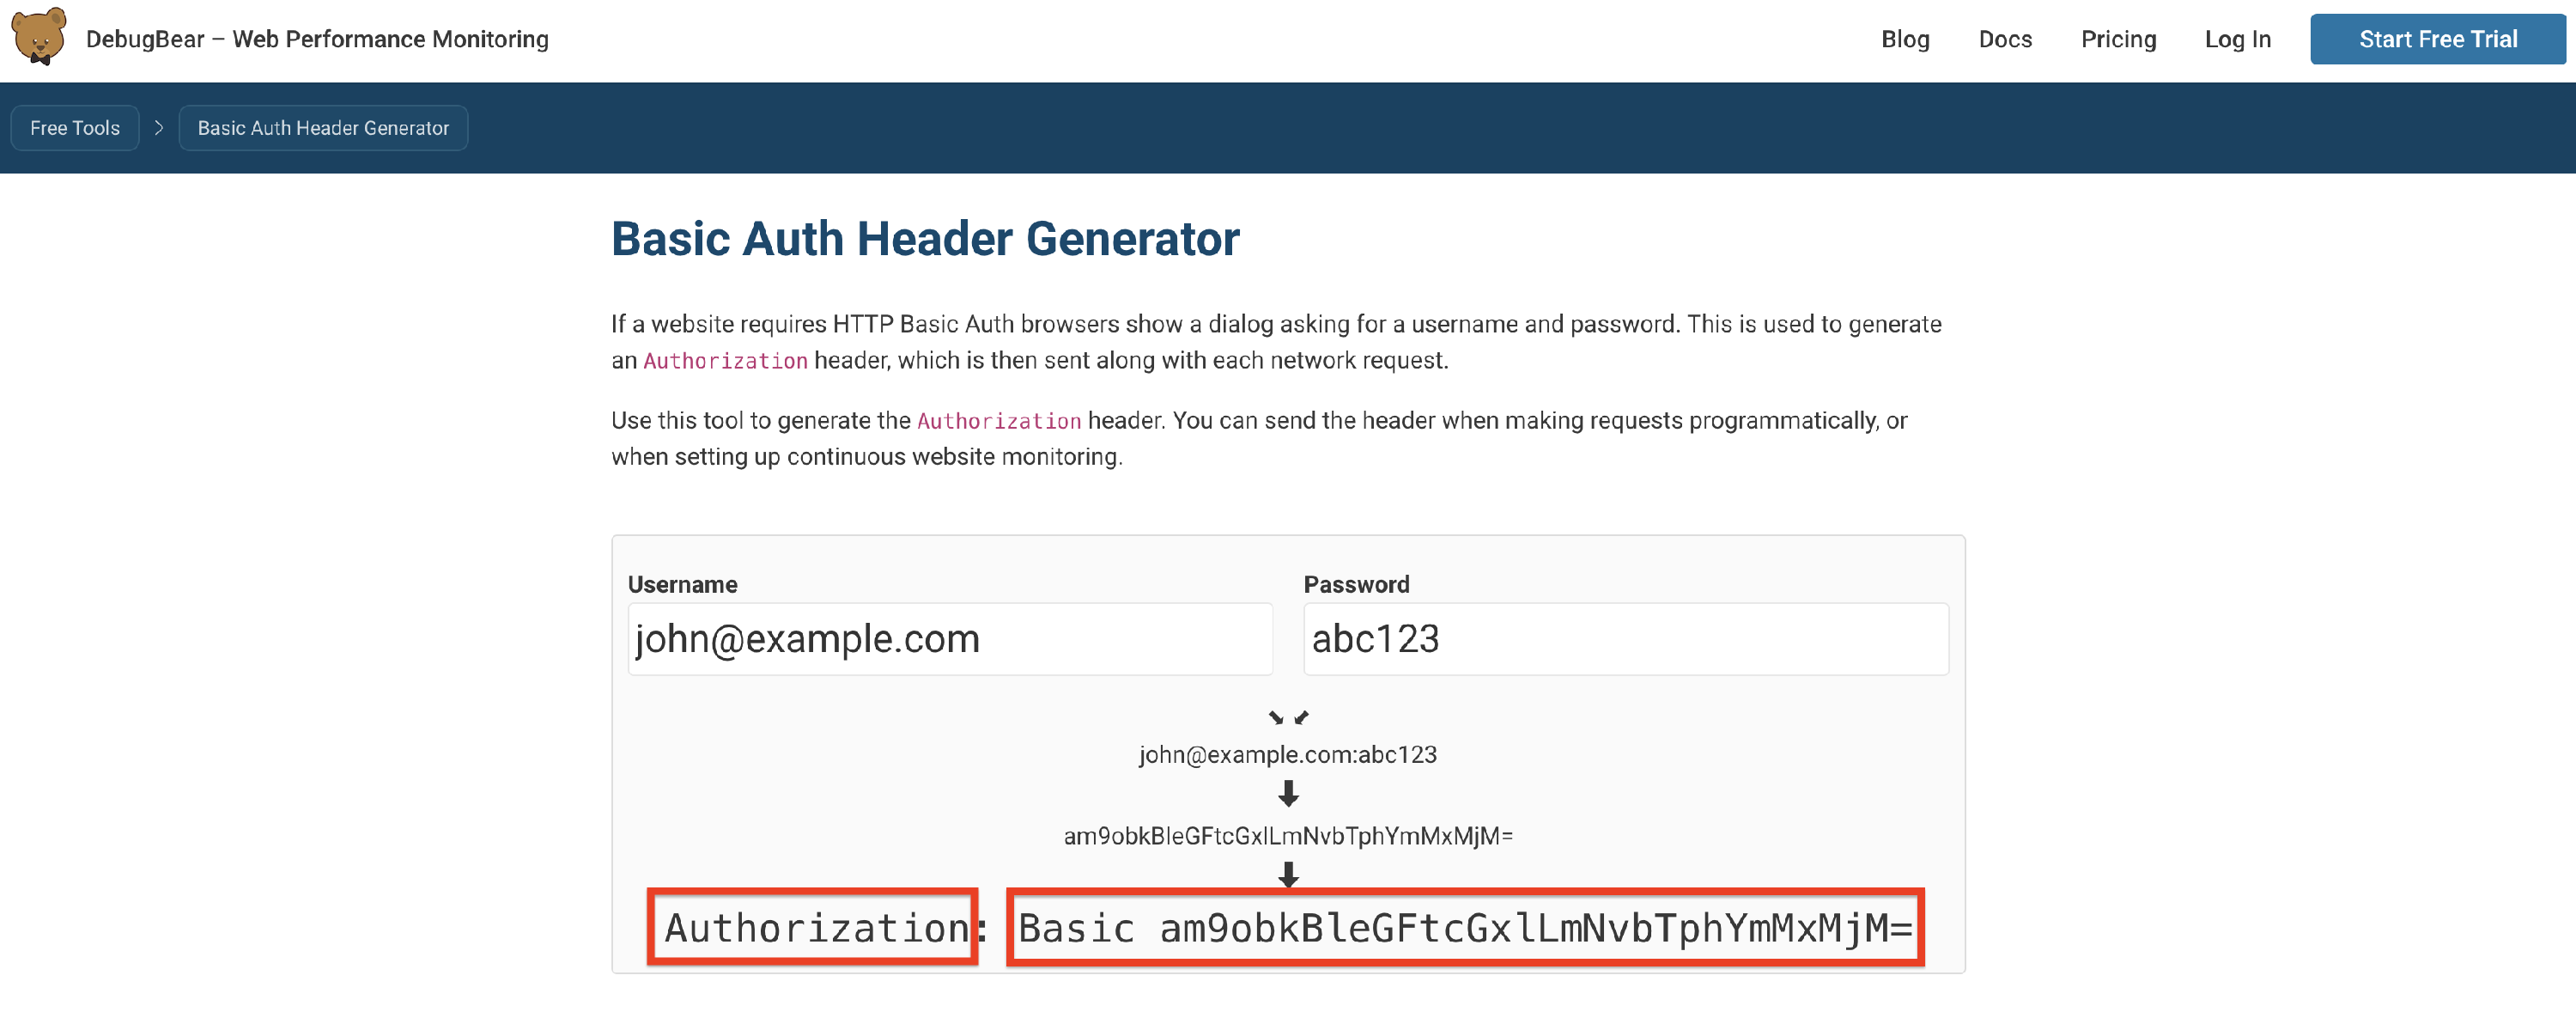
For example, if the username is API and the password is mysecretpassword , encode the string API:mysecretpassword . The encoder will return a Base64 value.
Then configure the header as:
- Key:
Authorization - Value:
Basic ENCODED_VALUE
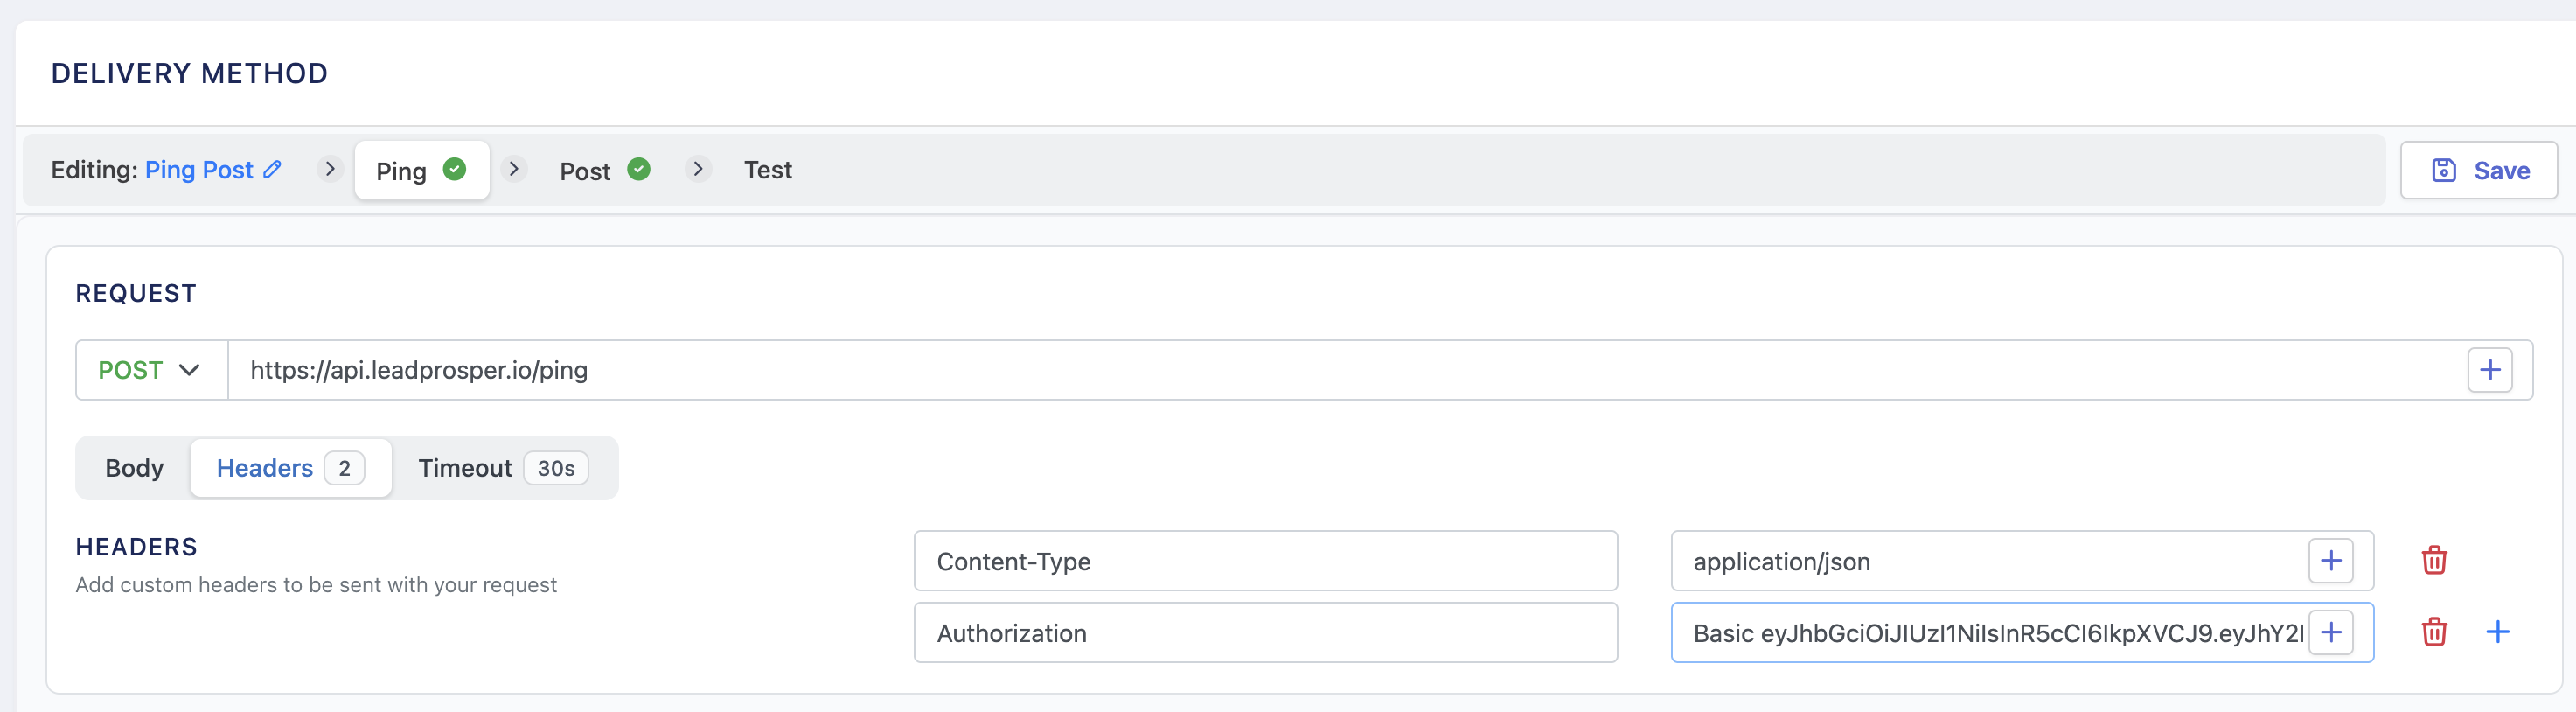
Replace ENCODED_VALUE with the Base64 string from the encoder.
Dynamic Authorization via Ping Post
Some Direct Post buyers require you to acquire a token or authorization value from an initial API request before you can submit leads. In these cases, you can use a Ping Post setup to handle the two-step process:
- Set the buyer up as a Ping Post buyer instead of Direct Post.
- Use the Ping step to make the initial API request and retrieve the token.
- Use the
{{lp_ping_response:KEY}}shortcode to extract the required value from the Ping response. - On the Post step, configure the buyer as you normally would and include the
{{lp_ping_response:KEY}}shortcode to pass the dynamic authorization value into the appropriate header or payload field.
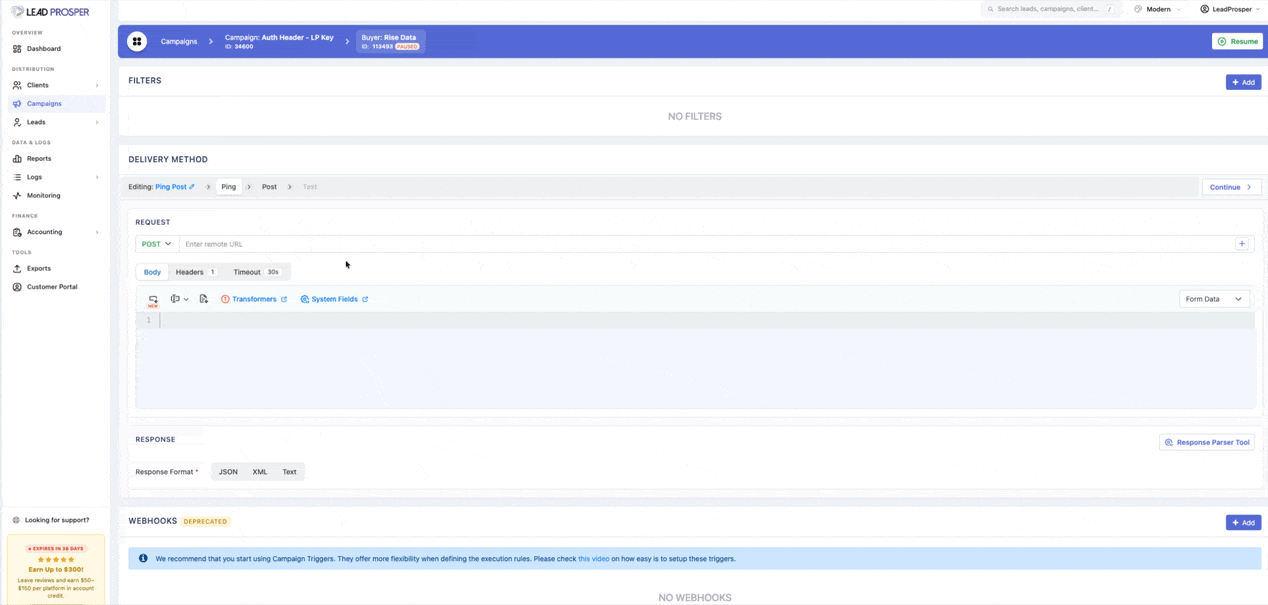
This allows Lead Prosper to automatically acquire and use a fresh token for each lead submission.
For a video walkthrough of this topic, see the Custom Headers tutorial.
If you have questions, use the support button in your Lead Prosper account or email support@leadprosper.io.