.png)
Maximizing Lead Prosper's Internal Support Area
Lead Prosper's Support area now lives directly inside the platform, giving your team a single place to manage every conversation with us — from general platform questions to Campaign and Buyer setup requests, technical troubleshooting, billing, reporting, and feature feedback. Instead of routing requests through email, you open a ticket, track its status in real time, tag the exact Campaign, Buyer, Supplier, or Lead you're asking about, and get updates without ever leaving the app. Because your ticket history stays tied to your account, both your team and ours have the full context needed to resolve issues quickly — no repeating yourself, no digging through old email threads.
Below is how it works.
Your Inbox
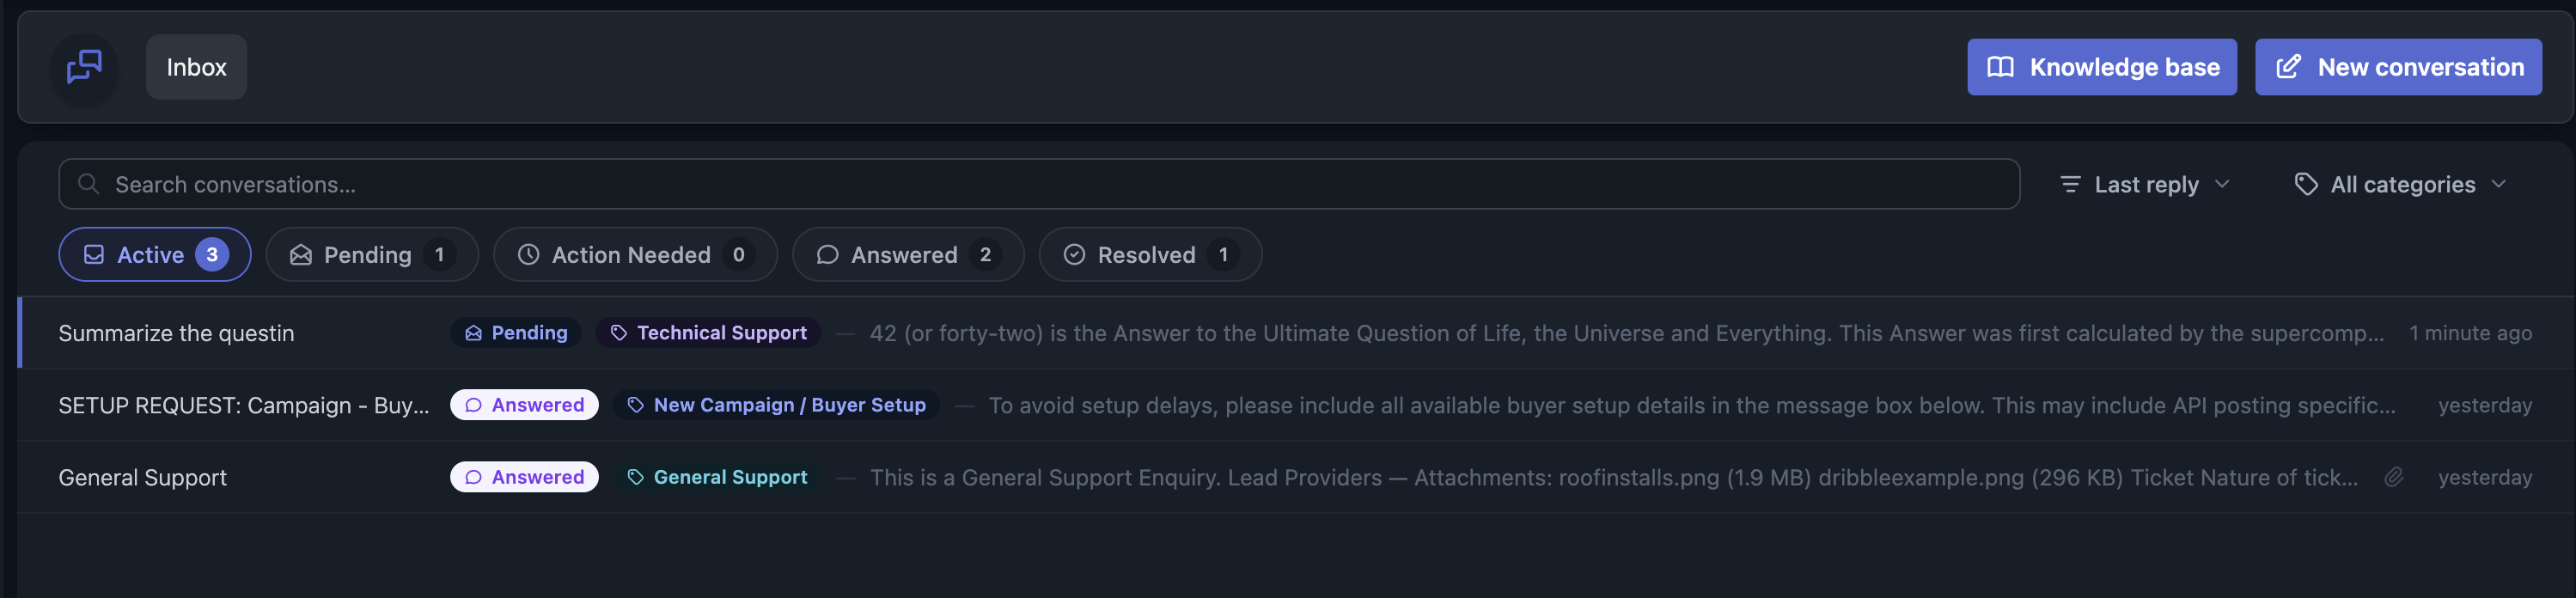
When you open Support, you land on your inbox — the list of all your open tickets and conversations. Each ticket carries one of the following statuses:
- Active — The ticket is actively being worked on by Support.
- Pending — The ticket is waiting on a response from Support.
- Action Needed — The last response was from Support, and the ticket is waiting on a reply from your team, or for someone on your team to mark it Resolved.
- Answered — The last response was from Support, and it's been some time since a response from your team has been sent.
- Resolved — The ticket has been closed, either by your team or by Lead Prosper Support.
Searching Tickets
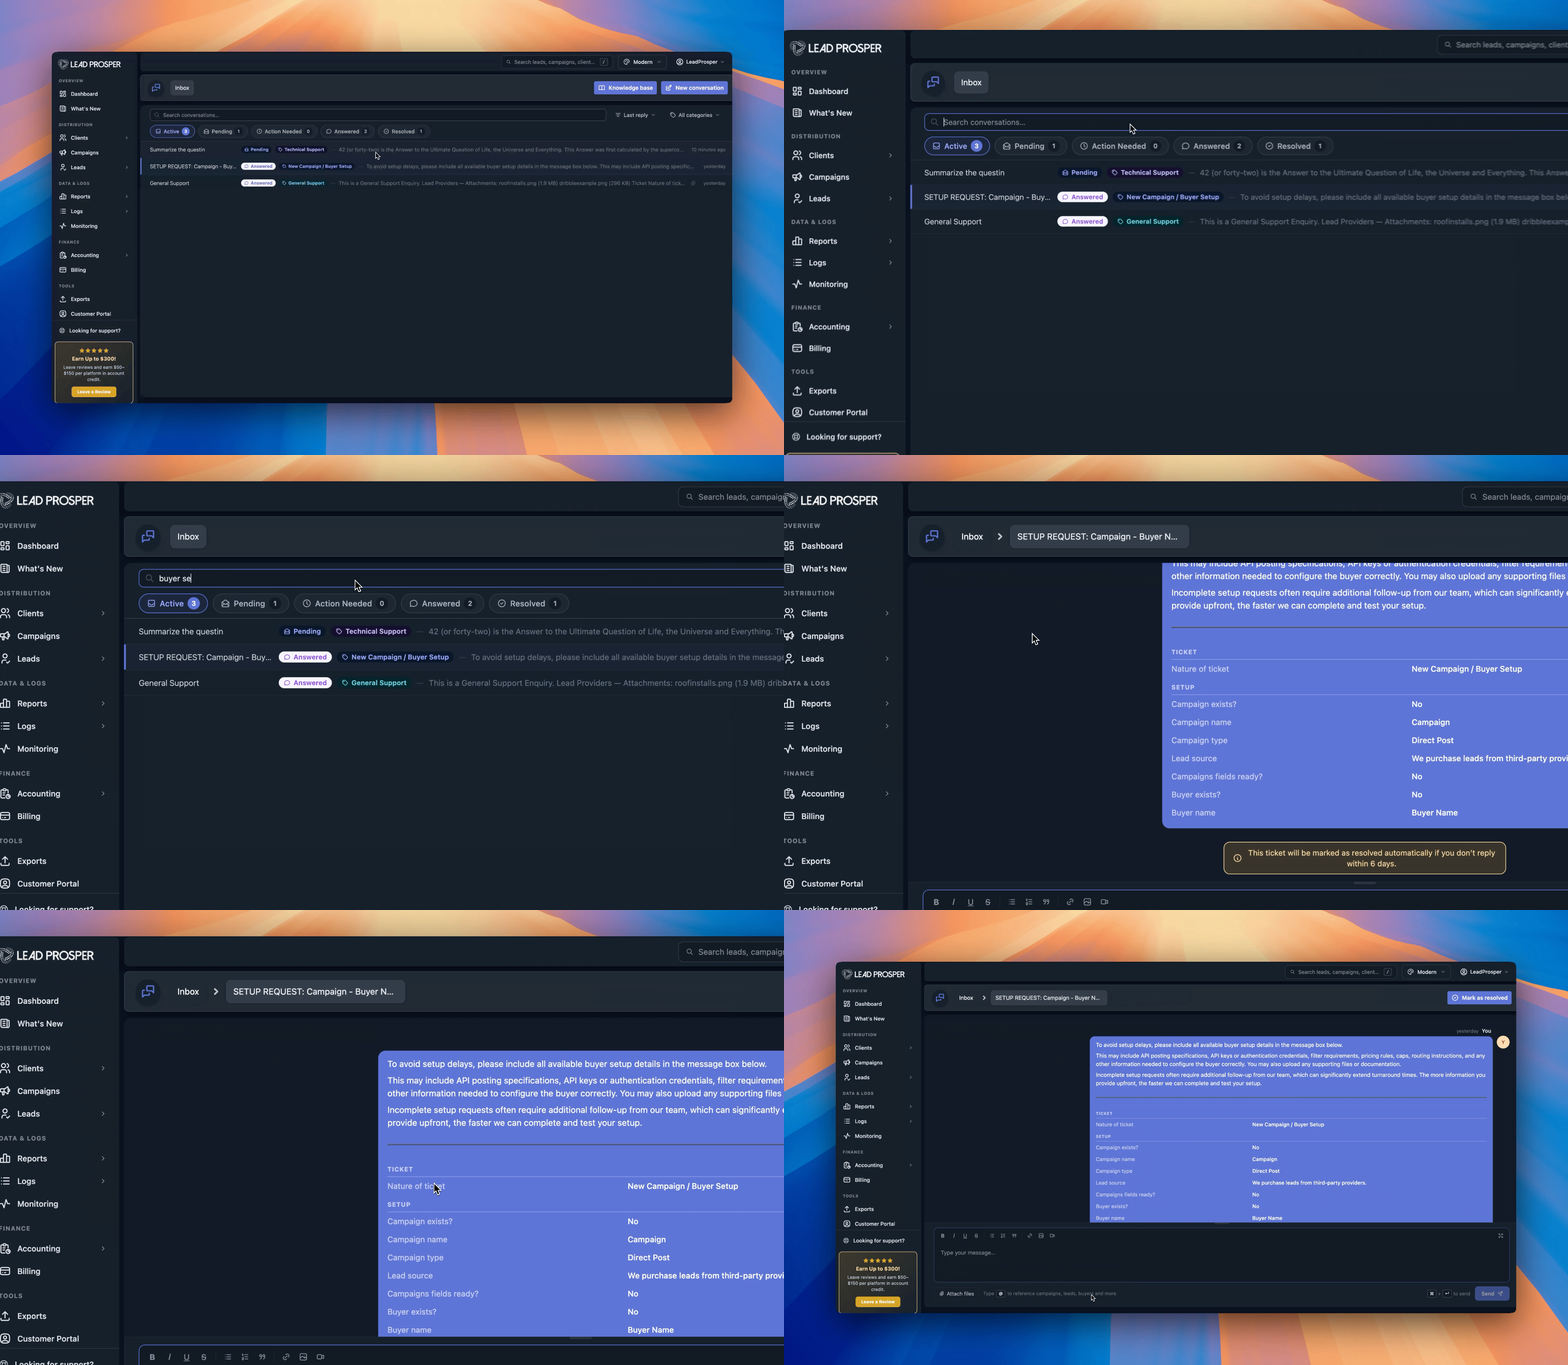
Use the search bar in the Support area to search across all tickets on your account. This is useful for finding older conversations — platform questions and answers, past Buyer setup specs, or anything else you need to reference again.
Sorting and Filtering Conversations
In the Support area, you can sort your list of conversations by Last Reply, Newest First, or Oldest First. You can also filter conversations by category: General Support, New Campaign / Buyer Setup, Technical Support, Reports, Data, and Metrics, Billing, and Feature Requests & Feedback.
Ticket Categories
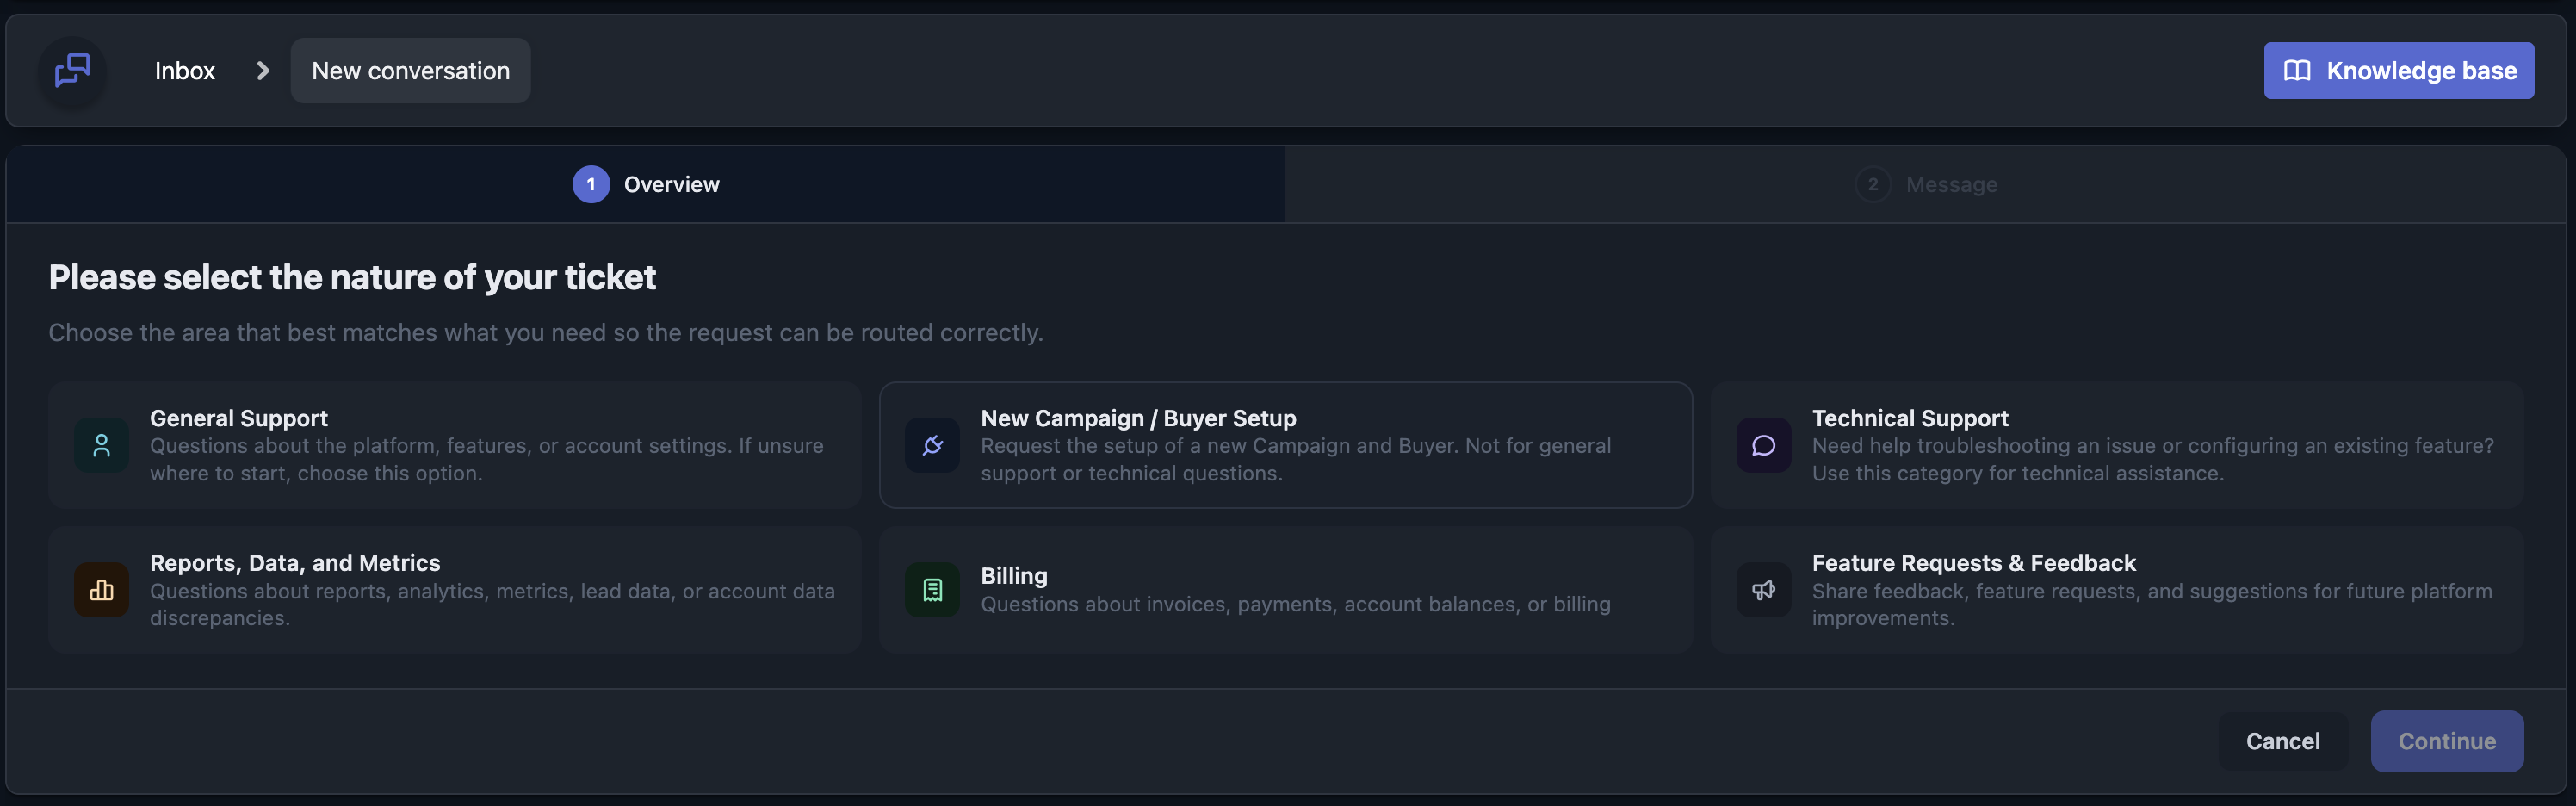
Every ticket is assigned to one of six categories:
- General Support — Questions about the platform, features, or account settings. If you're not sure where to start, choose this option.
- New Campaign / Buyer Setup — Request the setup of a new Campaign and Buyer. Do not use this category for general support or technical questions — it's specifically for setup requests.
- Technical Support — Having issues with campaign settings, or need help troubleshooting an issue with a lead Buyer? Use this category to get direct help from Lead Prosper Support and resolve technical questions.
- Reports, Data, and Metrics — Questions about reports, analytics, lead data, metrics, account data, logs, and more.
- Billing — Billing and accounting questions, including invoices, payments, and account balances.
- Feature Requests & Feedback — Share feedback, feature requests, and suggestions for future platform improvements and enhancements.
Opening a New Ticket
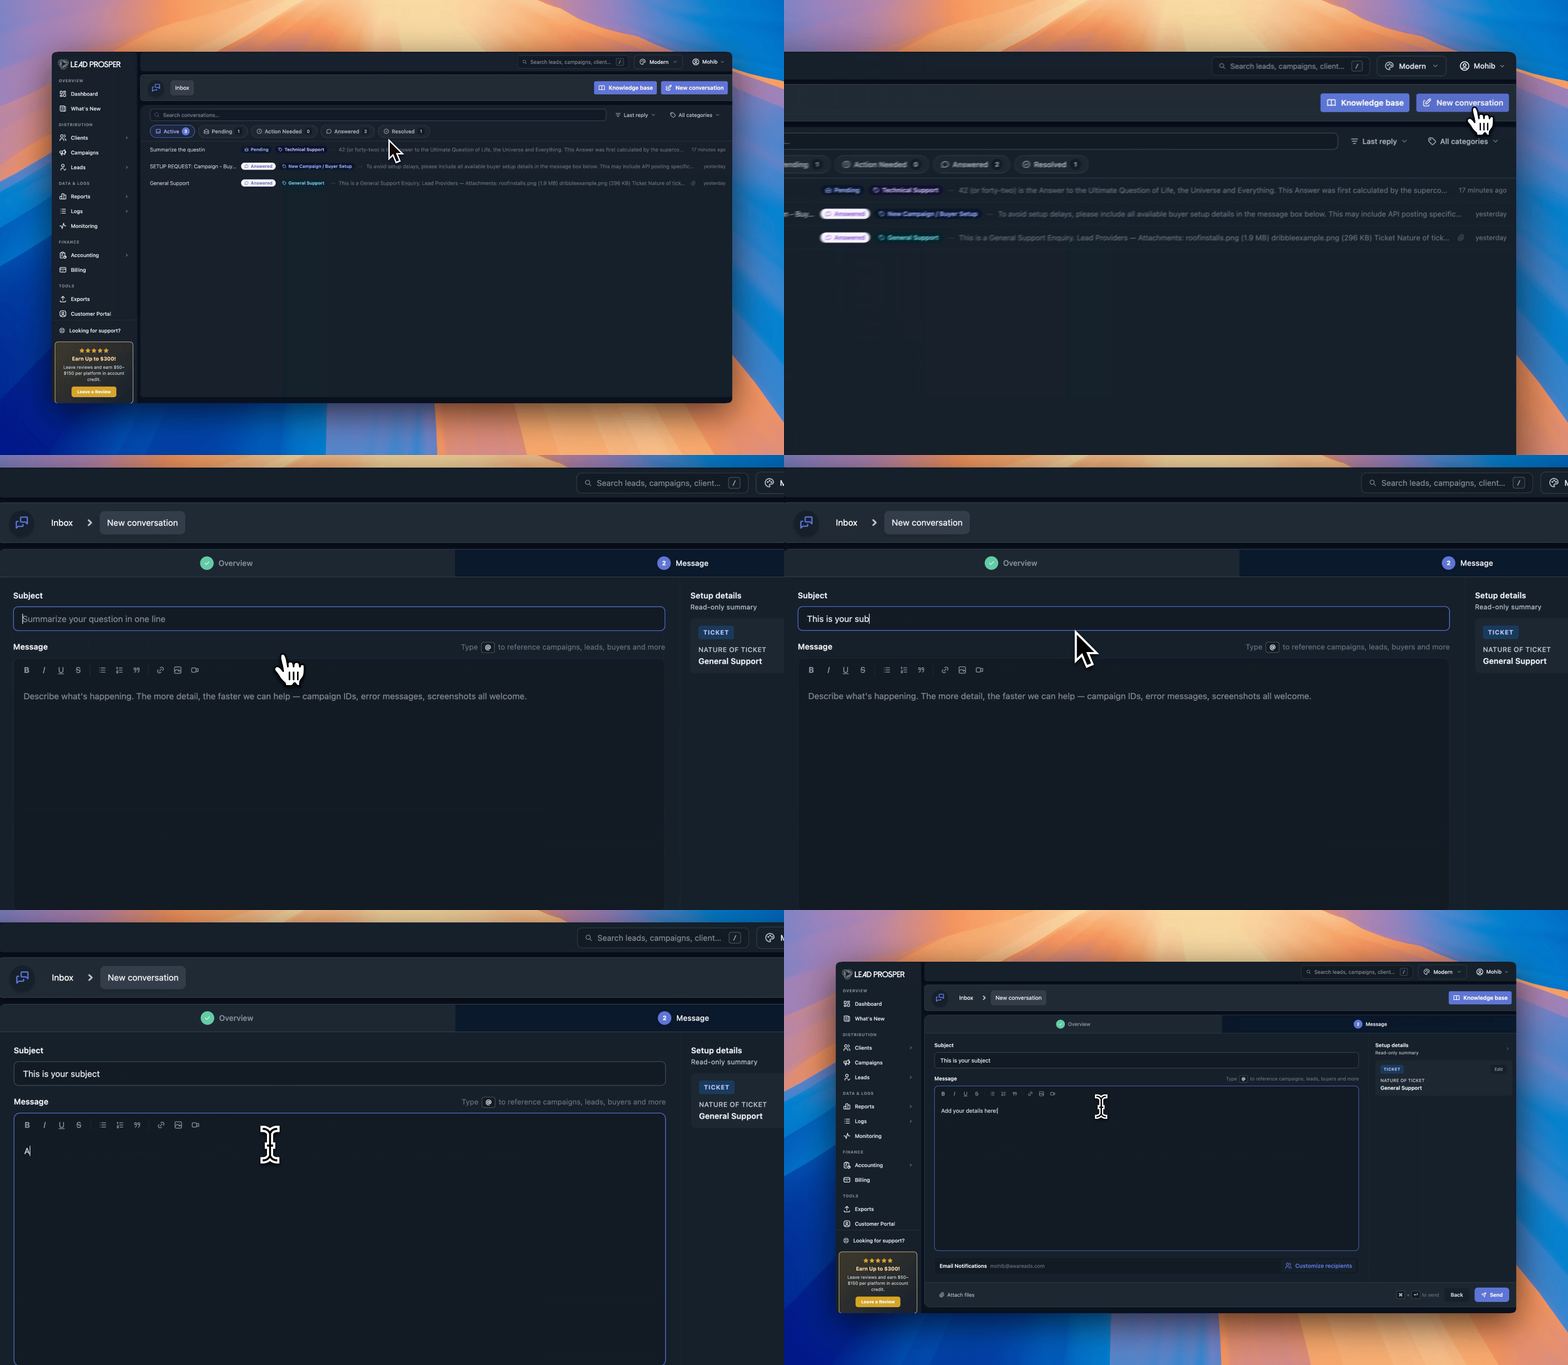
To start a new Support request you need to create a new ticket. You can start a new ticket / conversation when you are in the new Support area by selecting the "New Conversation" button in the top right hand area of the platform.
Creating A General Support, Reports/Data/Metrics, Billing, and Feature Requests & Feedback Ticket
These four categories share the same ticket creation flow:
- From the Support area, select New Conversation.
- On the Overview page, select your category:
- General Support
- Reports, Data, and Metrics
- Billing
- Feature Requests & Feedback
- Add a subject line.
- Enter your message with as much detail as possible. To link an existing Campaign, Buyer, Supplier, or similar, type @ in the message body and search for it.
- Use Attach Files to upload API specs, screenshots, videos, or anything else that would be of value to the team.
- To include additional contacts on the conversation, add them under Email Notifications. Select team members through the Add a Teammate dropdown, or manually add an email address.
Creating A New Campaign / Buyer Setup Ticket
- From the Support area, select New Conversation.
- On the Overview page, select New Campaign / Buyer Setup.
- Fill out the questionnaire with as much detail as possible — the more details you provide, the faster the team can complete the setup.
- Does the campaign already exist?
- Campaign Name: the name of the campaign you want created
- Campaign Type: Direct Post Campaign or Ping Post Exchange
- How are leads sourced for this campaign? Choose whether you generate your own leads, purchase leads from third-party vendors, or both.
- Do you already have a list of campaign fields and values you'd like your suppliers to send?
- Yes — provide the list of field names and values
- No
- Does the buyer already exist?
- Yes — select the buyer from a dropdown
- No — enter the new Buyer Name
- Does the campaign already exist?
- Enter your message with as much detail as possible. To link an existing Campaign, Buyer, Supplier, or similar, type @ in the message body and search for it. To avoid setup delays, include all available buyer setup details in the message box, such as:
- API posting specifications
- API keys or authentication credentials
- Filter requirements
- Pricing rules
- Caps
- Routing instructions
- Any other information needed to configure the buyer correctly
- You can also upload supporting files or documentation. Incomplete setup requests often require additional follow-up from our team, which can significantly extend turnaround times — the more information you provide upfront, the faster we can complete and test your setup.
- Use Attach Files to upload API specs, screenshots, videos, or anything else that would be of value to the team.
- To include additional contacts on the conversation, add them under Email Notifications. Select team members through the Add a Teammate dropdown, or manually add an email address.
Creating A Technical Support Ticket
- From the Support area, select New Conversation.
- On the Overview page, select Technical Support.
- Select the campaign from the dropdown.
- If you have an exact Lead ID, copy and paste it into the form — this makes debugging much easier for the team.
- Enter a subject line. The easiest approach is to summarize the issue you're having.
- Enter your message describing the issue, with as much detail as possible. If you have images or screen recordings, use Attach Files to upload them.
- To include additional contacts on the conversation, add them under Email Notifications. Select team members through the Add a Teammate dropdown, or manually add an email address.
Replying To Conversations
Once a ticket is created, staying in consistent contact is the most important factor in getting it resolved. The faster you respond to Support's questions with answers and details, the faster your ticket gets resolved.
One way to make tickets easier for support is to use the @ symbol to search and tag Campaigns, Buyers, Suppliers, and Leads related to your item. Use the @ symbol in your message to search for and tag a Campaign, Buyer, Supplier, or Lead related to your ticket. Tagged items are linked directly in the ticket, giving both you and Support one-click access to the exact item being discussed. Tag as often as you can — it keeps the right items easy to find and avoids confusion over which item you're referencing.
For example, if you're unsure why a specific Buyer didn't accept a Lead, copy that Lead's Lead ID. Back in your message, type @ and paste the Lead ID to tag it. Support can then open the Lead directly with a single click instead of searching for it manually.
Tagging makes troubleshooting Campaign and Lead issues faster and more accurate, so use it whenever you can.
Best Practices For Support Tickets
In best efforts to get all tickets resolved in a quick and timely manner we ask that you try to adhere to these guidelines of best practices when creating and working support tickets.
- Include As Much Details As Possible
If you are asking a question about a specific Campaign, Buyer, Lead, etc. please be sure to include as much detail as possible. This includes giving as much detail into the issue as you can to explain what the problem is, tagging the correct assets in the ticket, including as many images and screen recordings that highlight what the issue is, and anything else that can help Support agents answer the tickets with minimal back and forth questioning.
- Add Team Members
If you have multiple team members working on the ticketed item then please be sure to add them to the ticket by adding them under Email Notifications when creating the ticket. Having all team members on the ticket helps to ensure any questions asked by Support can be seen by the team members best suited to answer the question without wasting time relaying messages between members.
Getting the Most Out of Support
The fastest path to a resolved ticket comes down to a few habits: respond promptly, provide as much detail as possible up front, tag the right Campaigns, Buyers, Suppliers, and Leads, and loop in any teammates who can help answer questions. Support is built directly into the platform so that everything you need — your open tickets, your ticket history, and direct access to our team — is right where you're already working. The more context you give us, the faster we can get you back to running your business.