Utilizing Third Party Integrations To Validate & Check Leads In Real Time
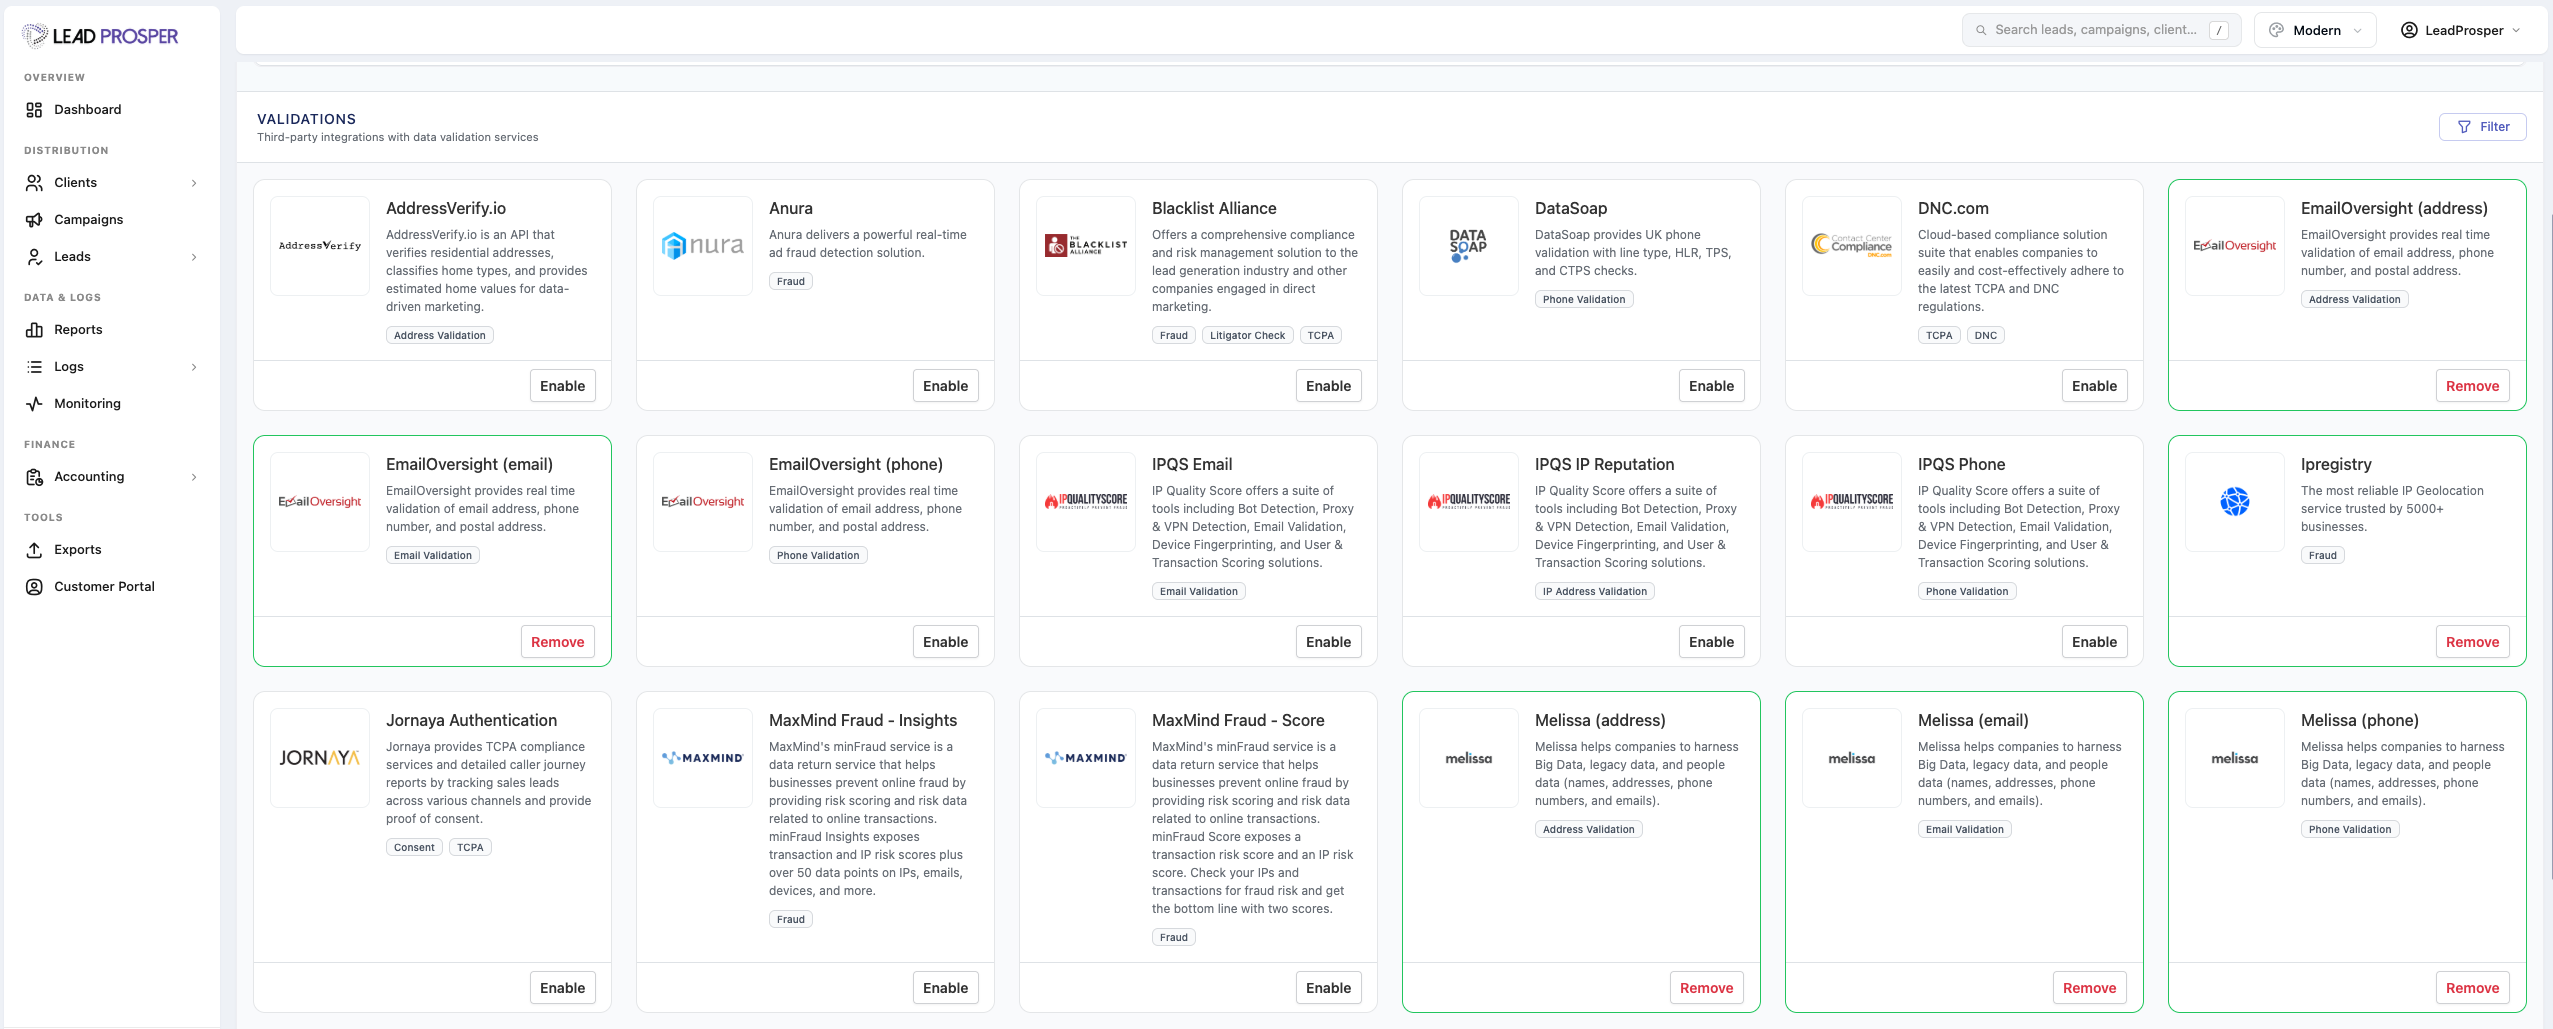
Third-party validations are real-time checks that run on incoming leads to confirm they are valid and legitimate before delivery. Lead Prosper integrates with several validation providers that cover address, email, and phone validation, fraud prevention, TCPA/consent verification, DNC/litigator checks, Reassigned Number Database lookups, and more.
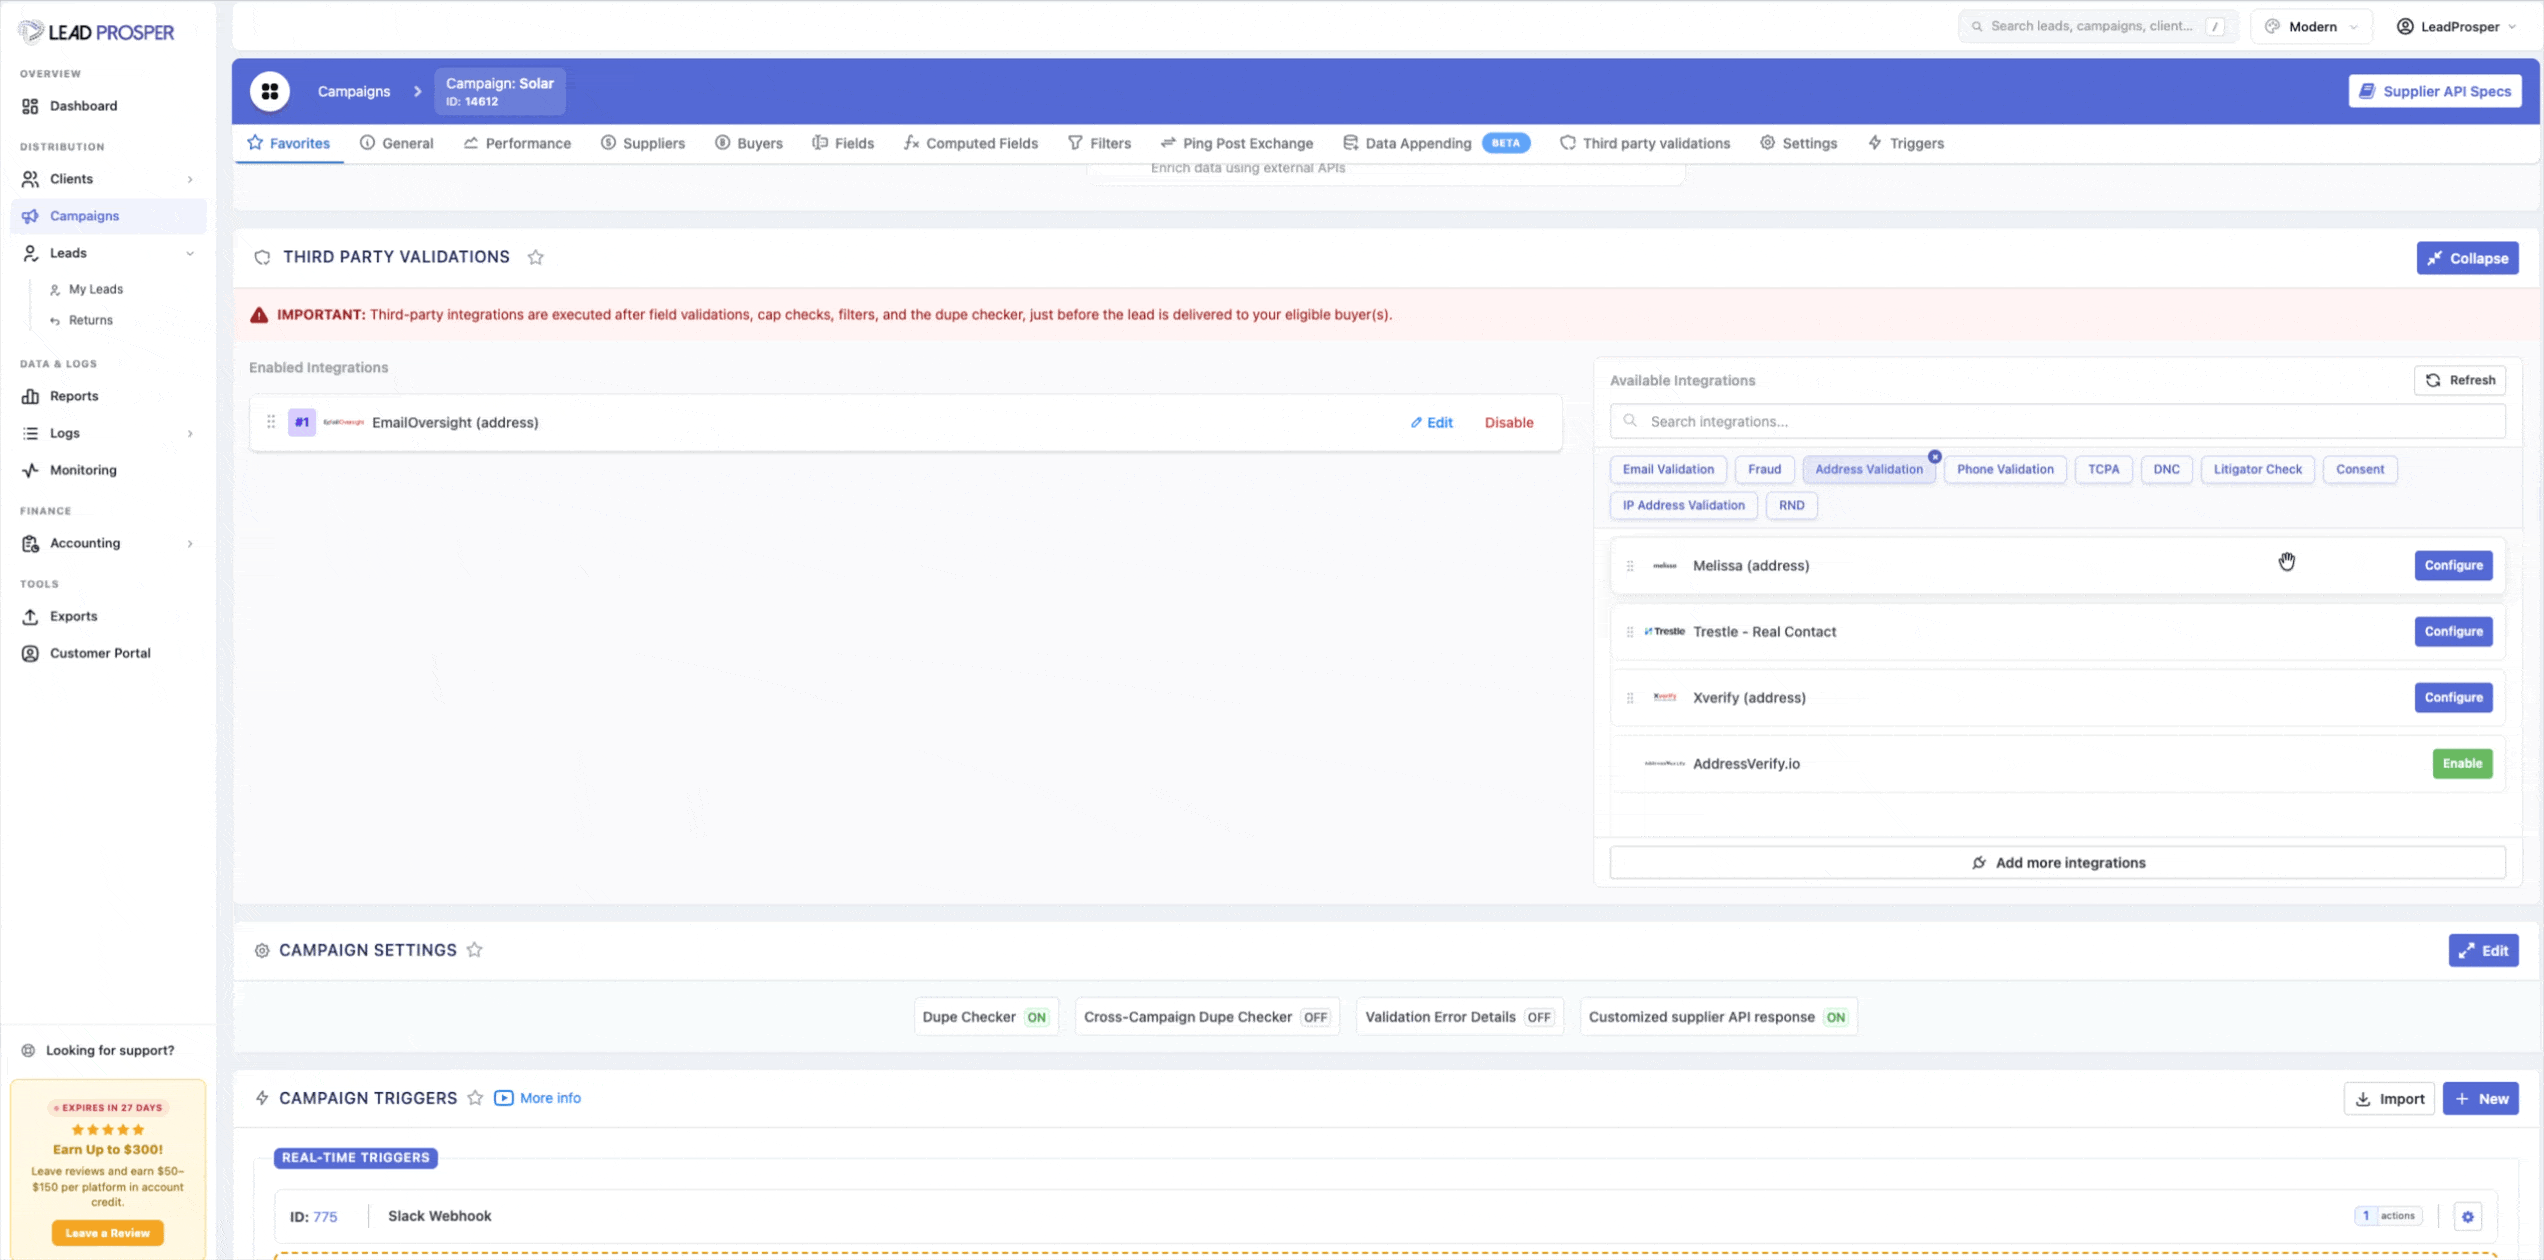
Validations execute after field validations, cap checks, filters, and the dupe checker — just before the lead is delivered to your eligible buyer(s).
Enabling an Integration
Before you can use a validation on a campaign, you need to enable the integration in your account. There are two ways to do this:
-
From the Integrations page — Go to your main menu > Integrations. Find the integration you want and click Enable.
-
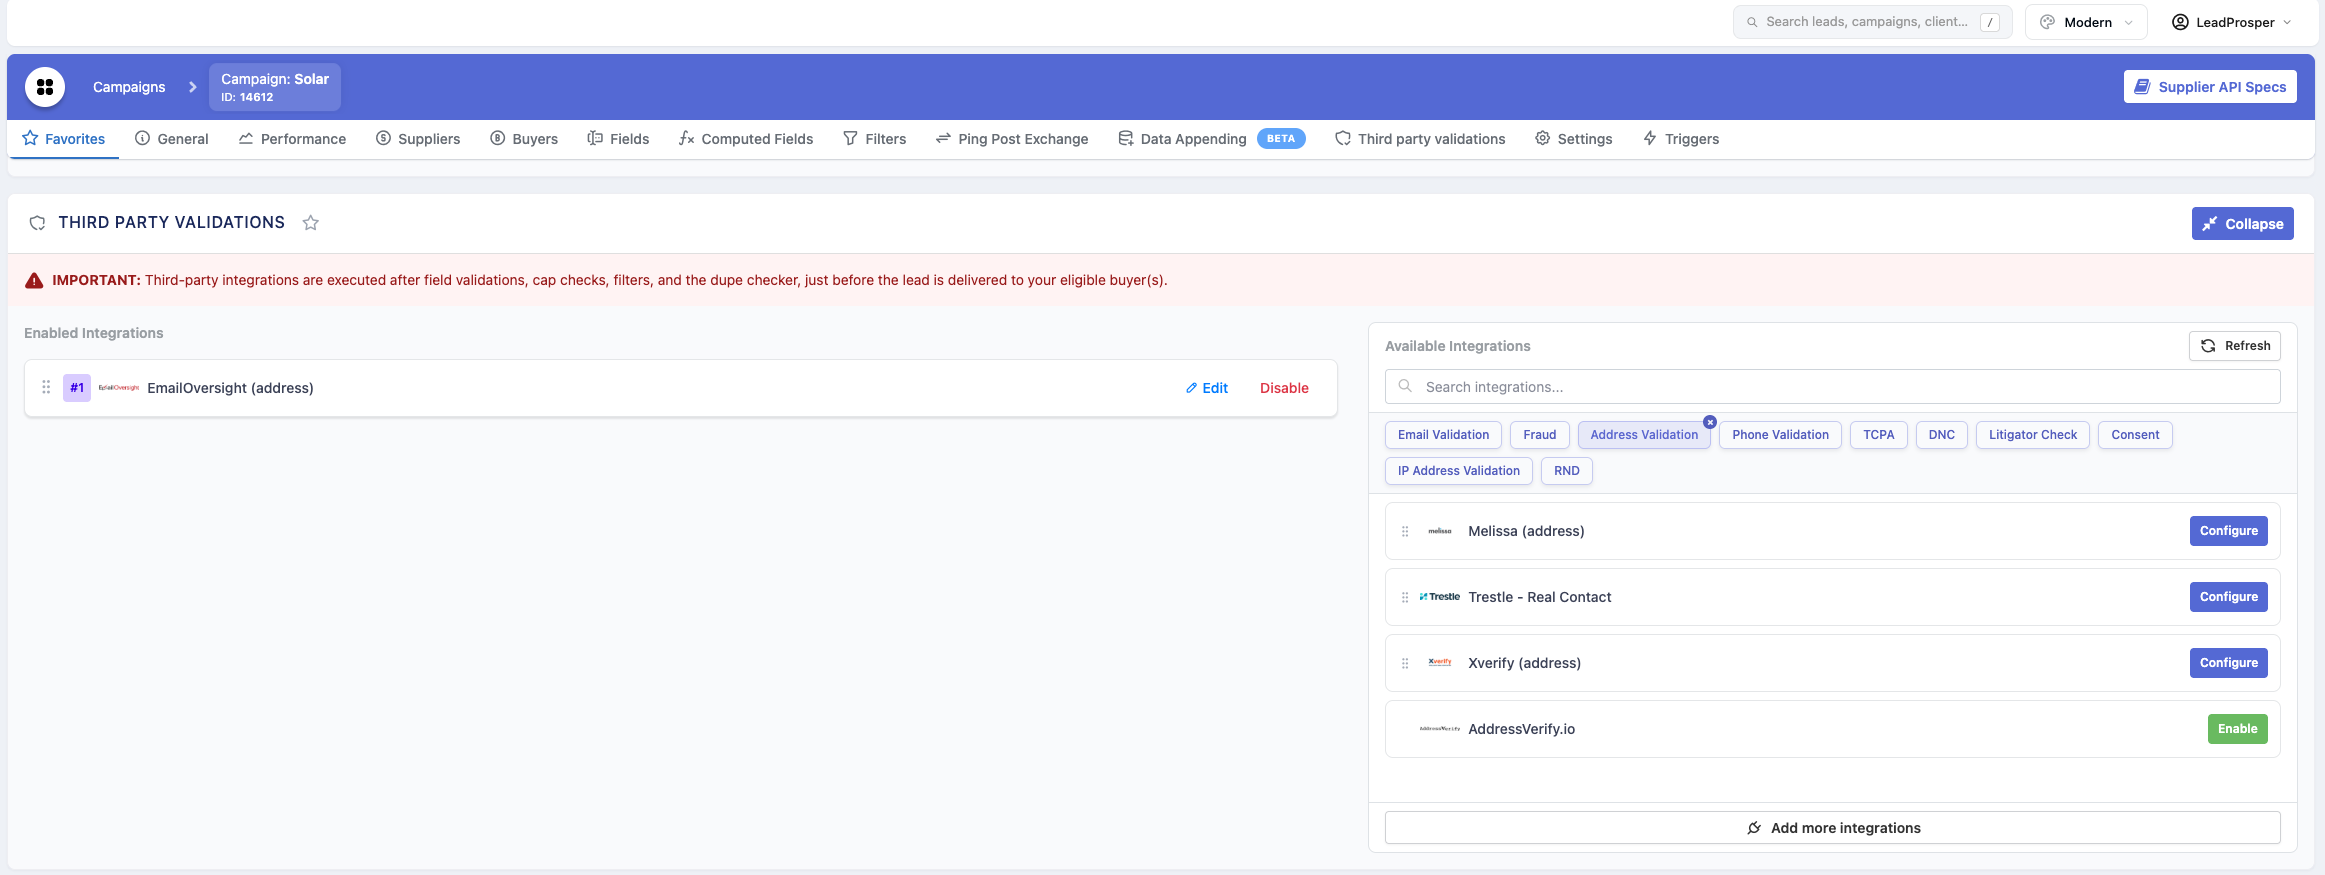
From Campaign Settings — Go to the Third Party Validations area in your campaign. If the integration you want is not yet enabled, you can enable it directly from here.


Pricing Options
When enabling an integration, you may see one of two setup / pricing options depending on the provider:
- Your Own Account — You enter your own credentials (typically an API key) to link the integration to your account with that provider. When using your own account, you are charged only on the provider's side. Lead Prosper does not charge you for validations run through your own provider accounts.
- Lead Prosper Account — Some integrations (such as XVerify and EmailOversight) let you use the Lead Prosper account. You do not need to sign up with the provider directly, and you benefit from bulk volume pricing. Lead Prosper charges you per validation at the agreed-upon bulk rate.
Configuring Validations on a Campaign
Integrations are configured on a per-campaign basis. After enabling an integration, go to each campaign where you want to use it and configure it there.
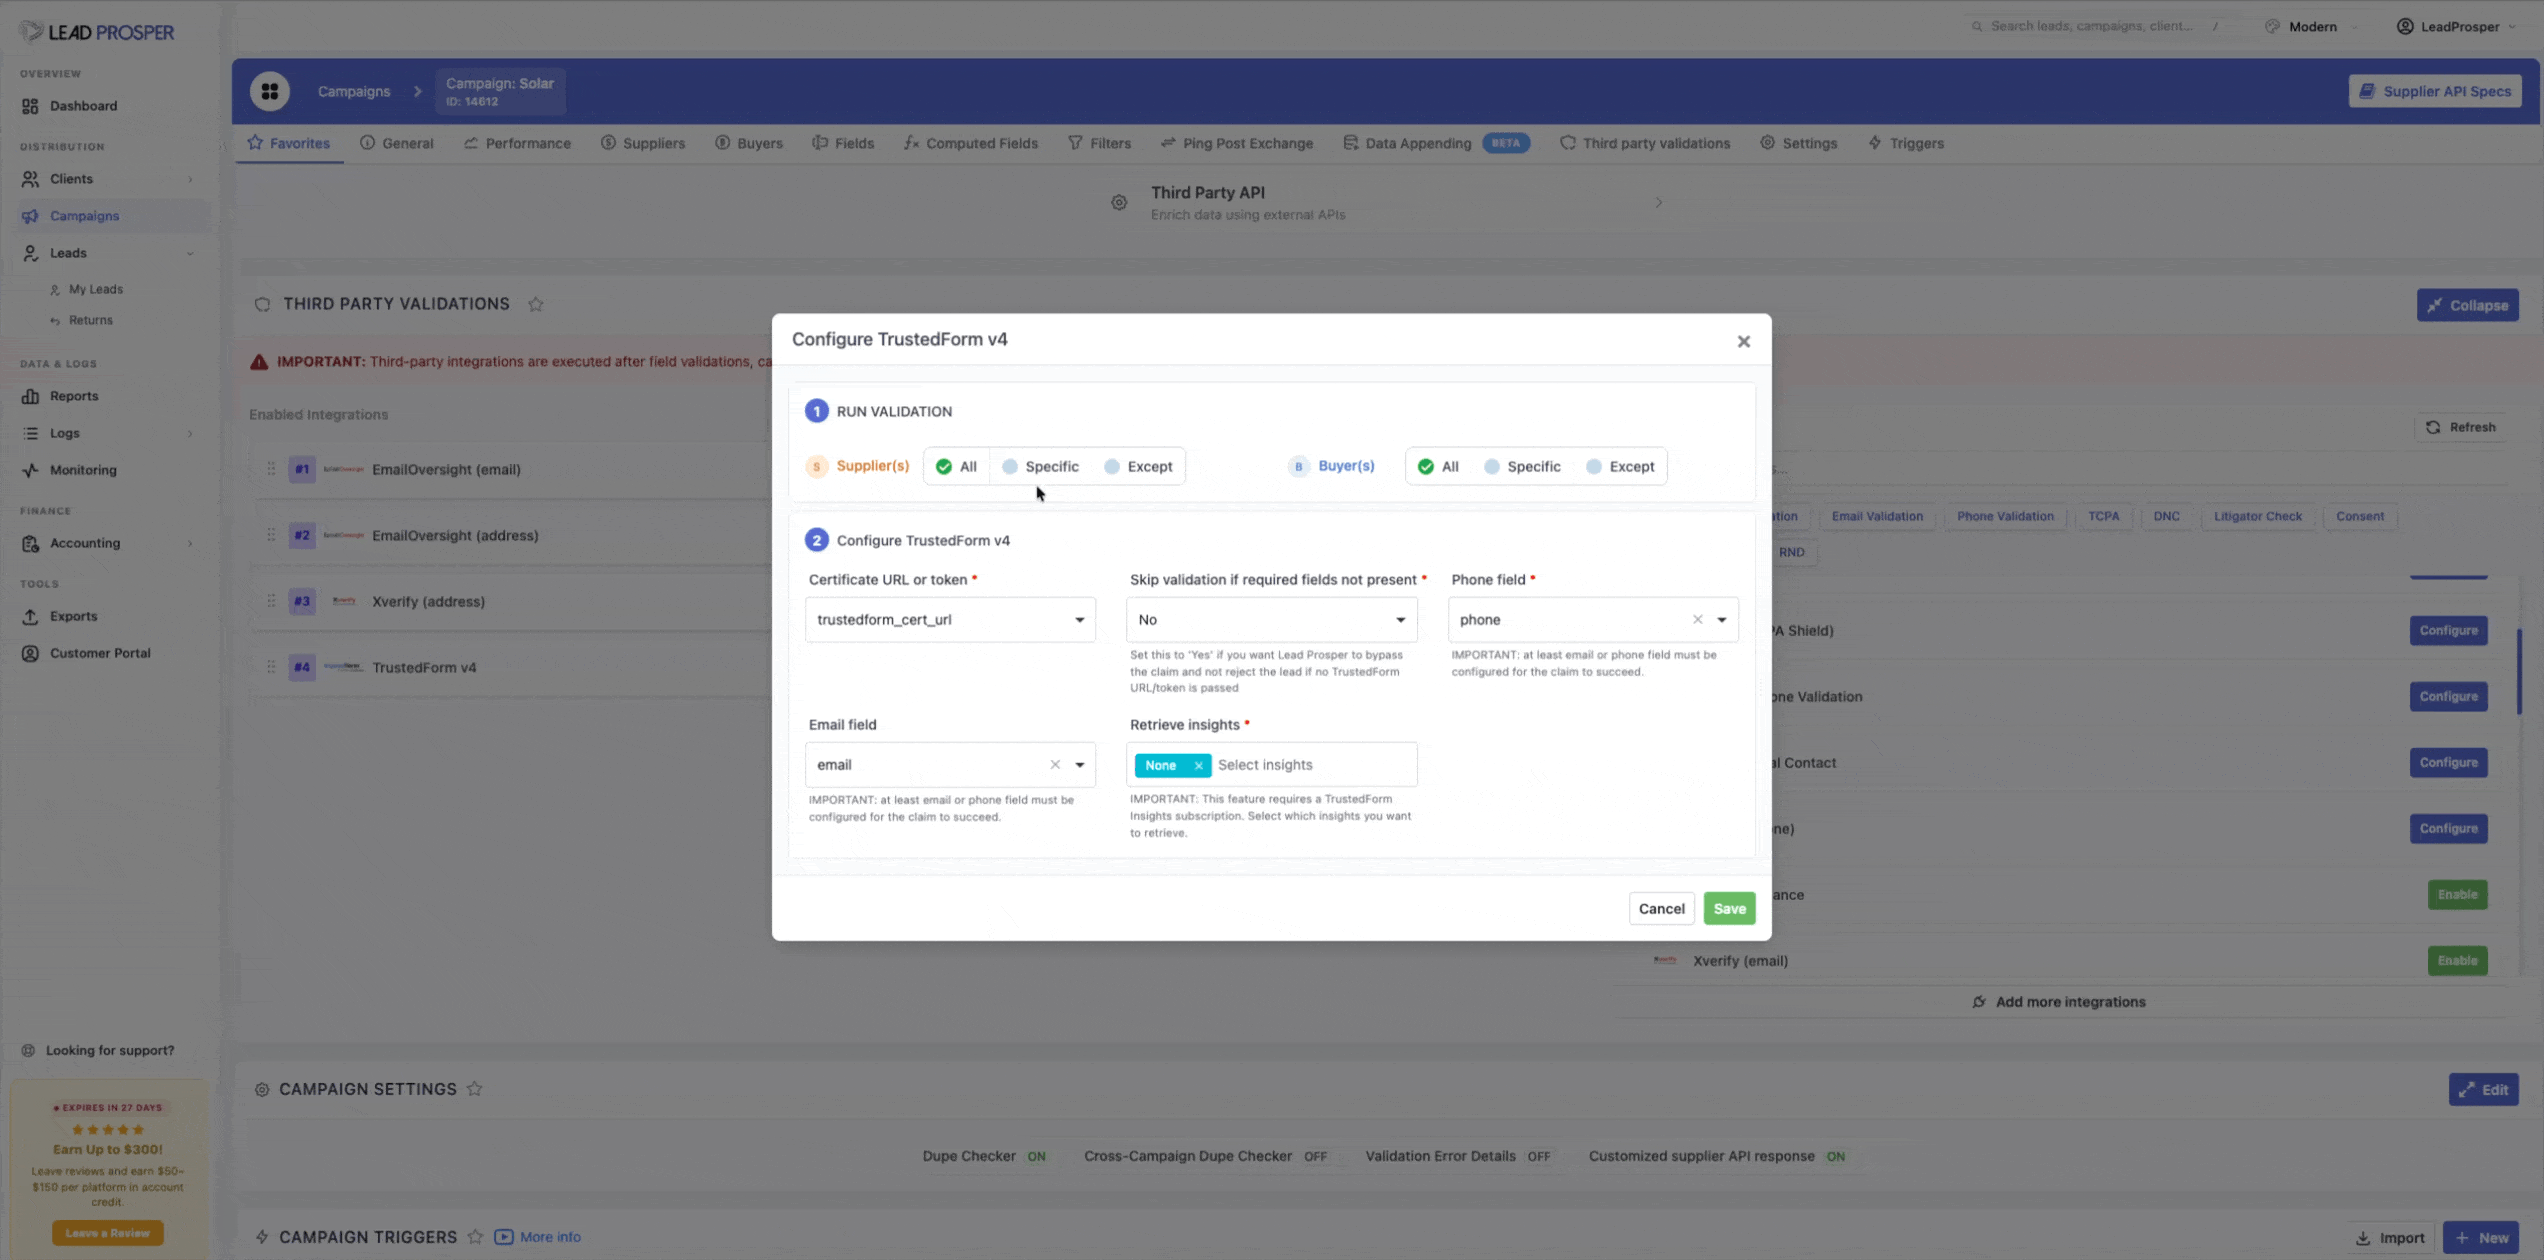
In Campaign Settings, navigate to the Third Party Validations area. You will see a list of your enabled integrations. Click an enabled integration to open its settings modal, where you will find:
- Provider-specific settings — These vary by provider and may include validation strictness, field mappings, custom rules, or other parameters. Some integrations work out of the box with no additional configuration, while others require field mappings or custom parameters.
- Account information
- Supplier and buyer filtering controls (described below)
Reordering Integrations
Integrations execute in the order they appear in the enabled list, from top to bottom. To change the order:
- Grab the drag handle on any enabled integration.
- Drag it to the desired position.
- Release to drop it in place.
The new order is saved automatically.
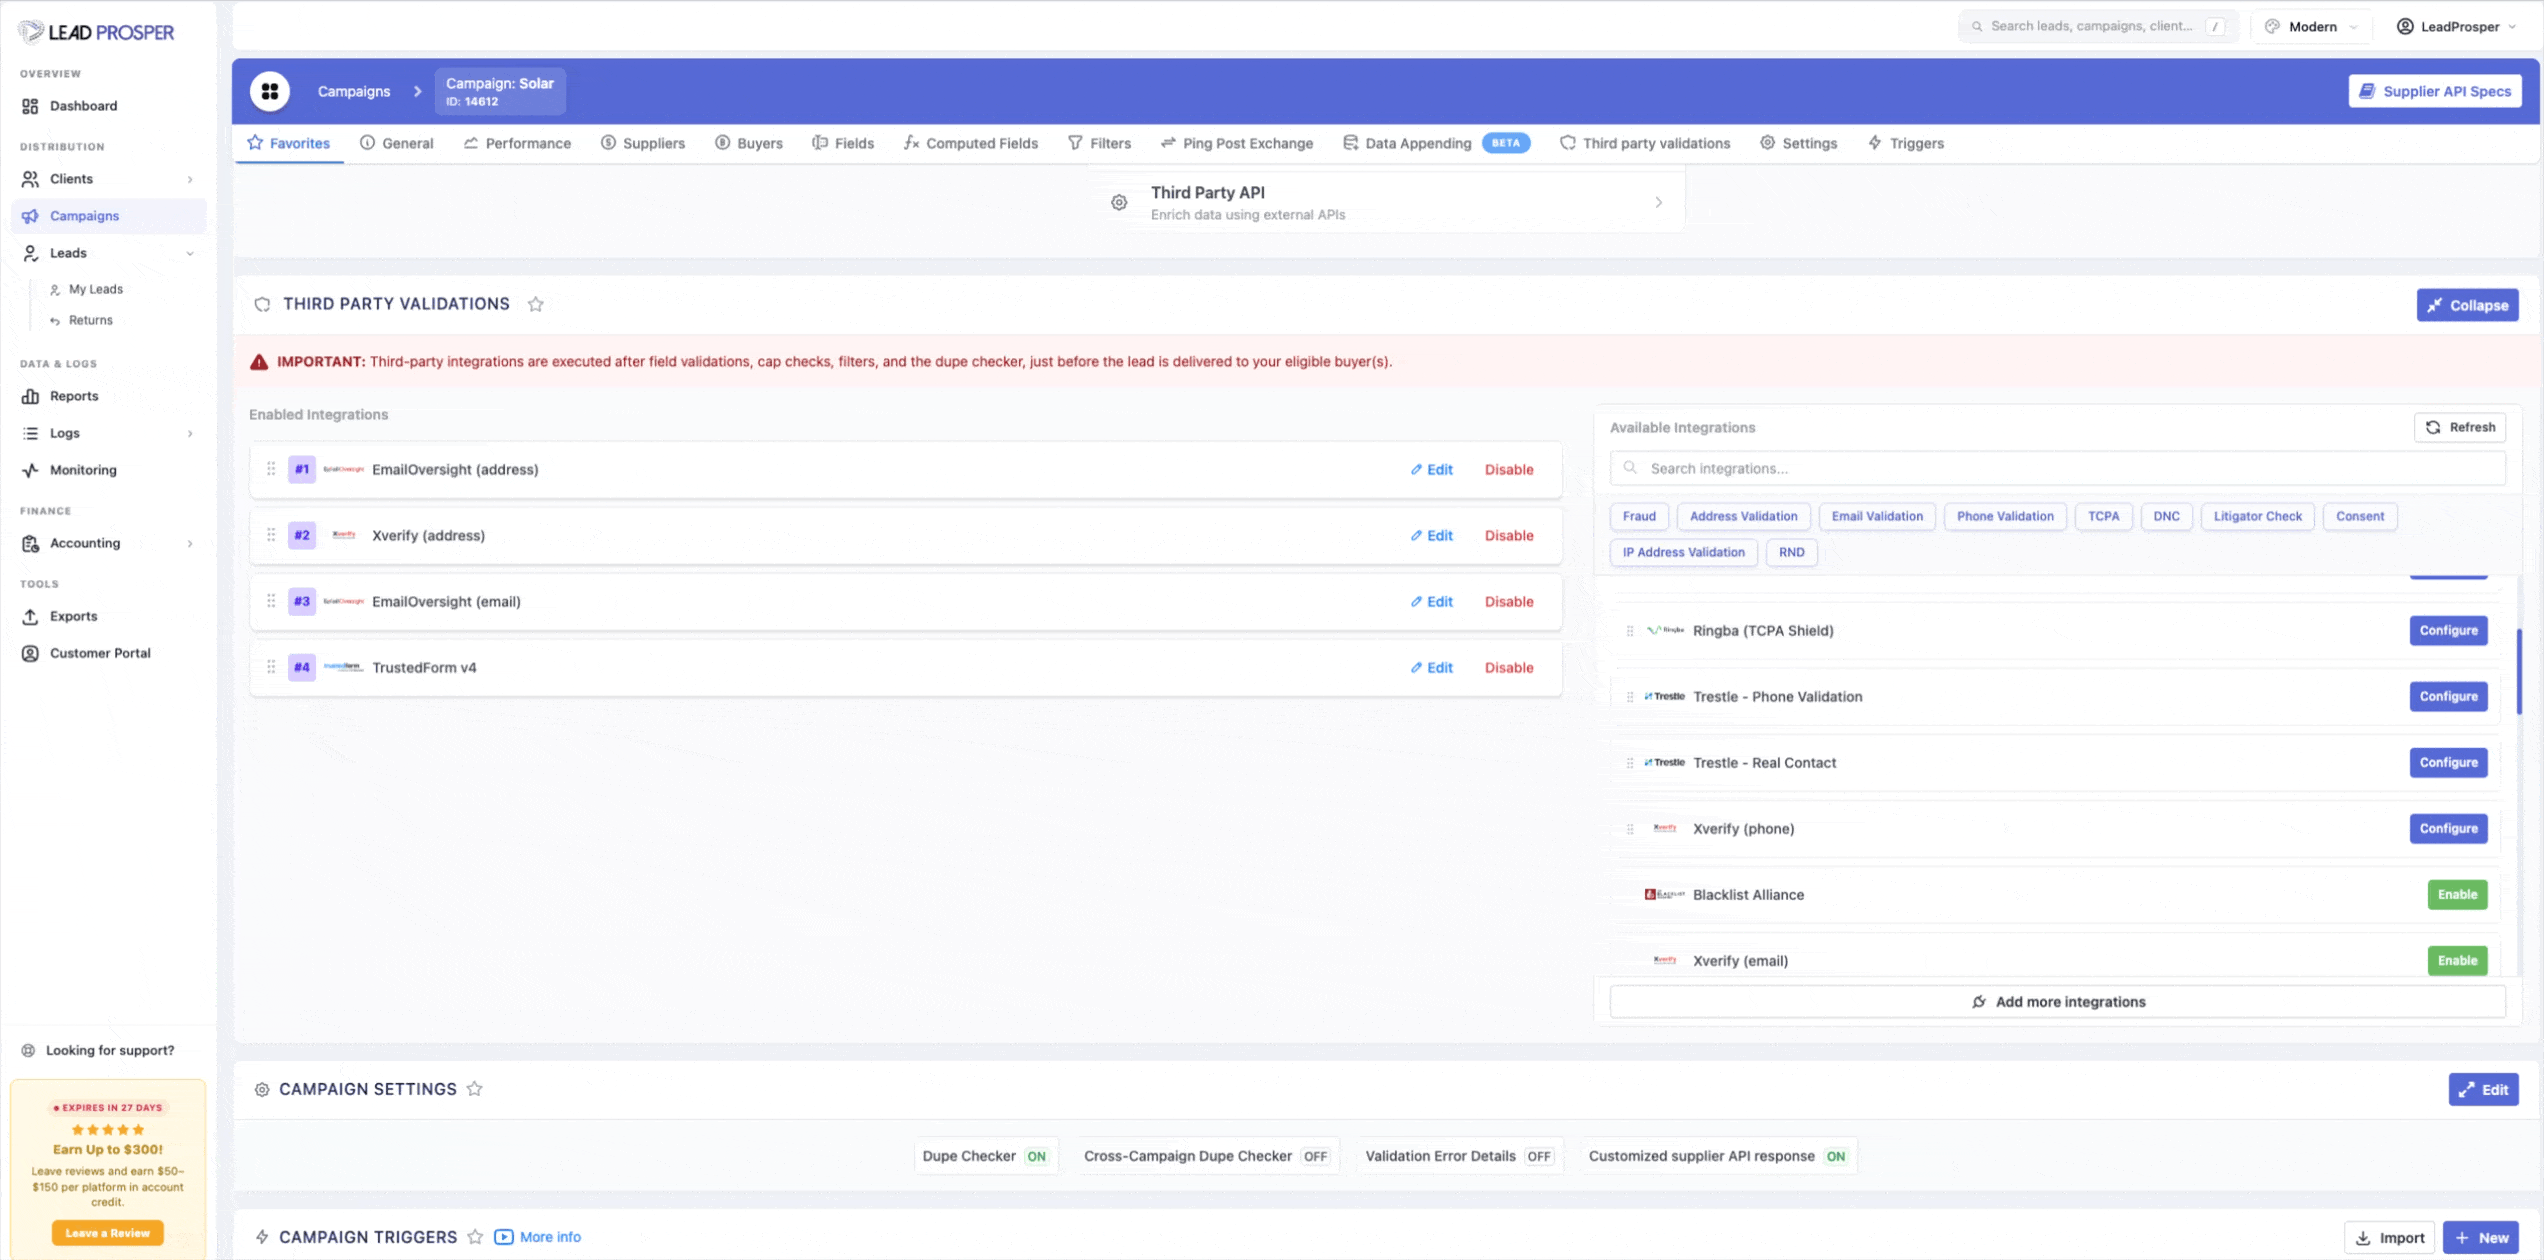
Why Order Matters
Integrations run sequentially. If an earlier integration rejects a lead, all subsequent integrations are skipped. Use this to your advantage:
- Put cheaper checks first — Run low-cost validations before expensive ones to save money on leads that would be rejected anyway.
- Put faster checks first — Reduce overall processing time by catching bad leads early.
- Prioritize critical checks — Ensure your most important validations always run, regardless of what happens downstream.
Example: If you have both a $0.001 email syntax check and a $0.05 phone verification, putting the email check first means you only pay for phone verification on leads with valid emails.
Supplier and Buyer Filtering
Each validation can be scoped to run only for specific suppliers or buyers. This is configured in the integration's settings modal.
Filter Modes
For both suppliers and buyers, three modes are available:
| Mode | Behavior |
|---|---|
| All (default) | The validation runs for every supplier/buyer. No filtering applied. |
| Specific | The validation only runs for the selected suppliers/buyers. All others are skipped. |
| Except | The validation runs for everyone except the selected suppliers/buyers. |
How to Configure Filtering
- Click the Edit button on an enabled integration to open its settings modal.
- In the Run Validation section, locate the Supplier and Buyer filter controls.
- Select the filter mode (All, Specific, or Except).
- If you chose Specific or Except, use the dropdown to select the connections.
- Save to apply.
Use Cases
- Run TrustedForm only for specific suppliers — Some suppliers already provide TCPA compliance. Use "Specific" mode to only validate leads from suppliers that don't.
- Skip email validation for internal test buyers — Use "Except" mode on your email validation to exclude your test buyer connections.
- Different validation stacks per supplier — Enable multiple instances of the same provider type with different supplier scopes to apply different settings per source.
Supplier and buyer filtering is available when your campaign has multiple supplier or buyer connections. For single-connection campaigns, the filter controls are hidden since they would not have any effect.
Validation Error Details
Validation Error Details is a campaign-level setting that adds rejection reason information to supplier API responses when a lead is rejected by a third-party validation. Instead of returning a generic error, suppliers receive the provider name and/or a description of why the lead failed — reducing support requests and helping suppliers fix data quality issues at the source.
Enable it in Campaign Settings under the Validation Error Details toggle, where you can choose which fields to include (provider_name , description ) and scope visibility to all suppliers or specific ones. Note that enabling this feature reveals which validation providers you use and the specific rejection reasons, so consider whether that information is appropriate to share with each supplier. This setting only applies to validation rejections — other rejection types and accepted leads are unaffected.
To learn more about returning Validation Error Details to Suppliers please refer to this article.
Important Notes
- Changes apply to new leads only. Reordering or changing filter settings does not retroactively affect leads already processed.
- Auto-saved. Order changes and integration configurations are saved automatically. There is no need to manually save the campaign after reordering or configuring integrations.
- Execution order within the pipeline. Integrations run after field validations, cap checks, and filters — just before the lead is delivered to your eligible buyer(s).
- Integration pricing. Costs vary by provider and account type (Lead Prosper account vs. your own). Check each provider's pricing before enabling.
If you have questions about configuring your validation integrations or need help optimizing your validation order, reach out to our support team.