Enabling 2-Factor Authentication For Added Security In Your Lead Prosper Account
Two-factor authentication (2FA) adds a layer of protection to your Lead Prosper account by requiring a verification code sent via SMS each time you log in. This article covers how to enable, disable, and update your 2FA settings.
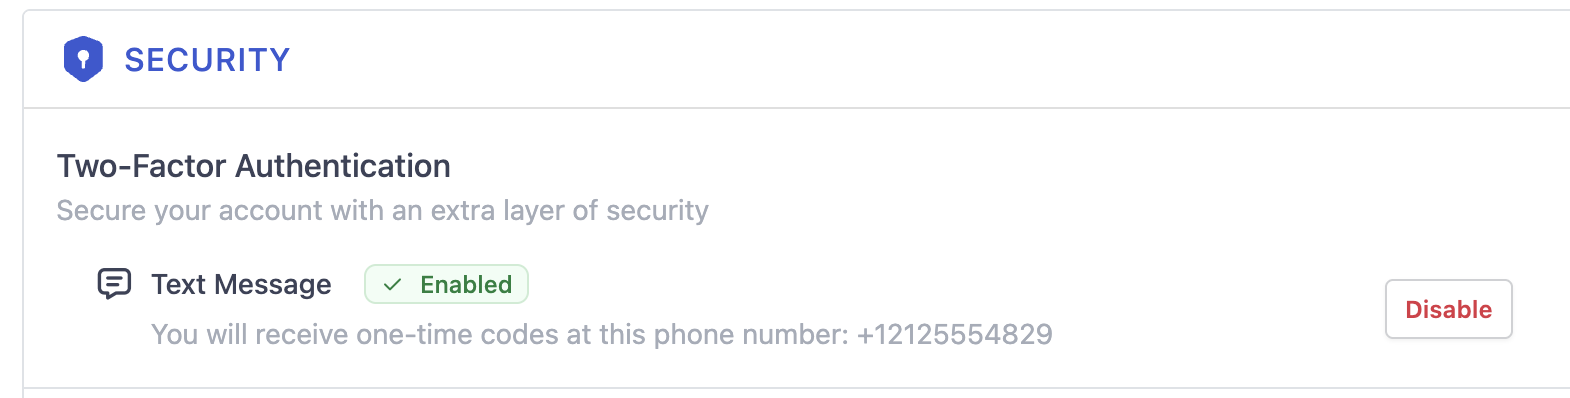
Enable Two-Factor Authentication
- From the main menu, select Account Settings.
-
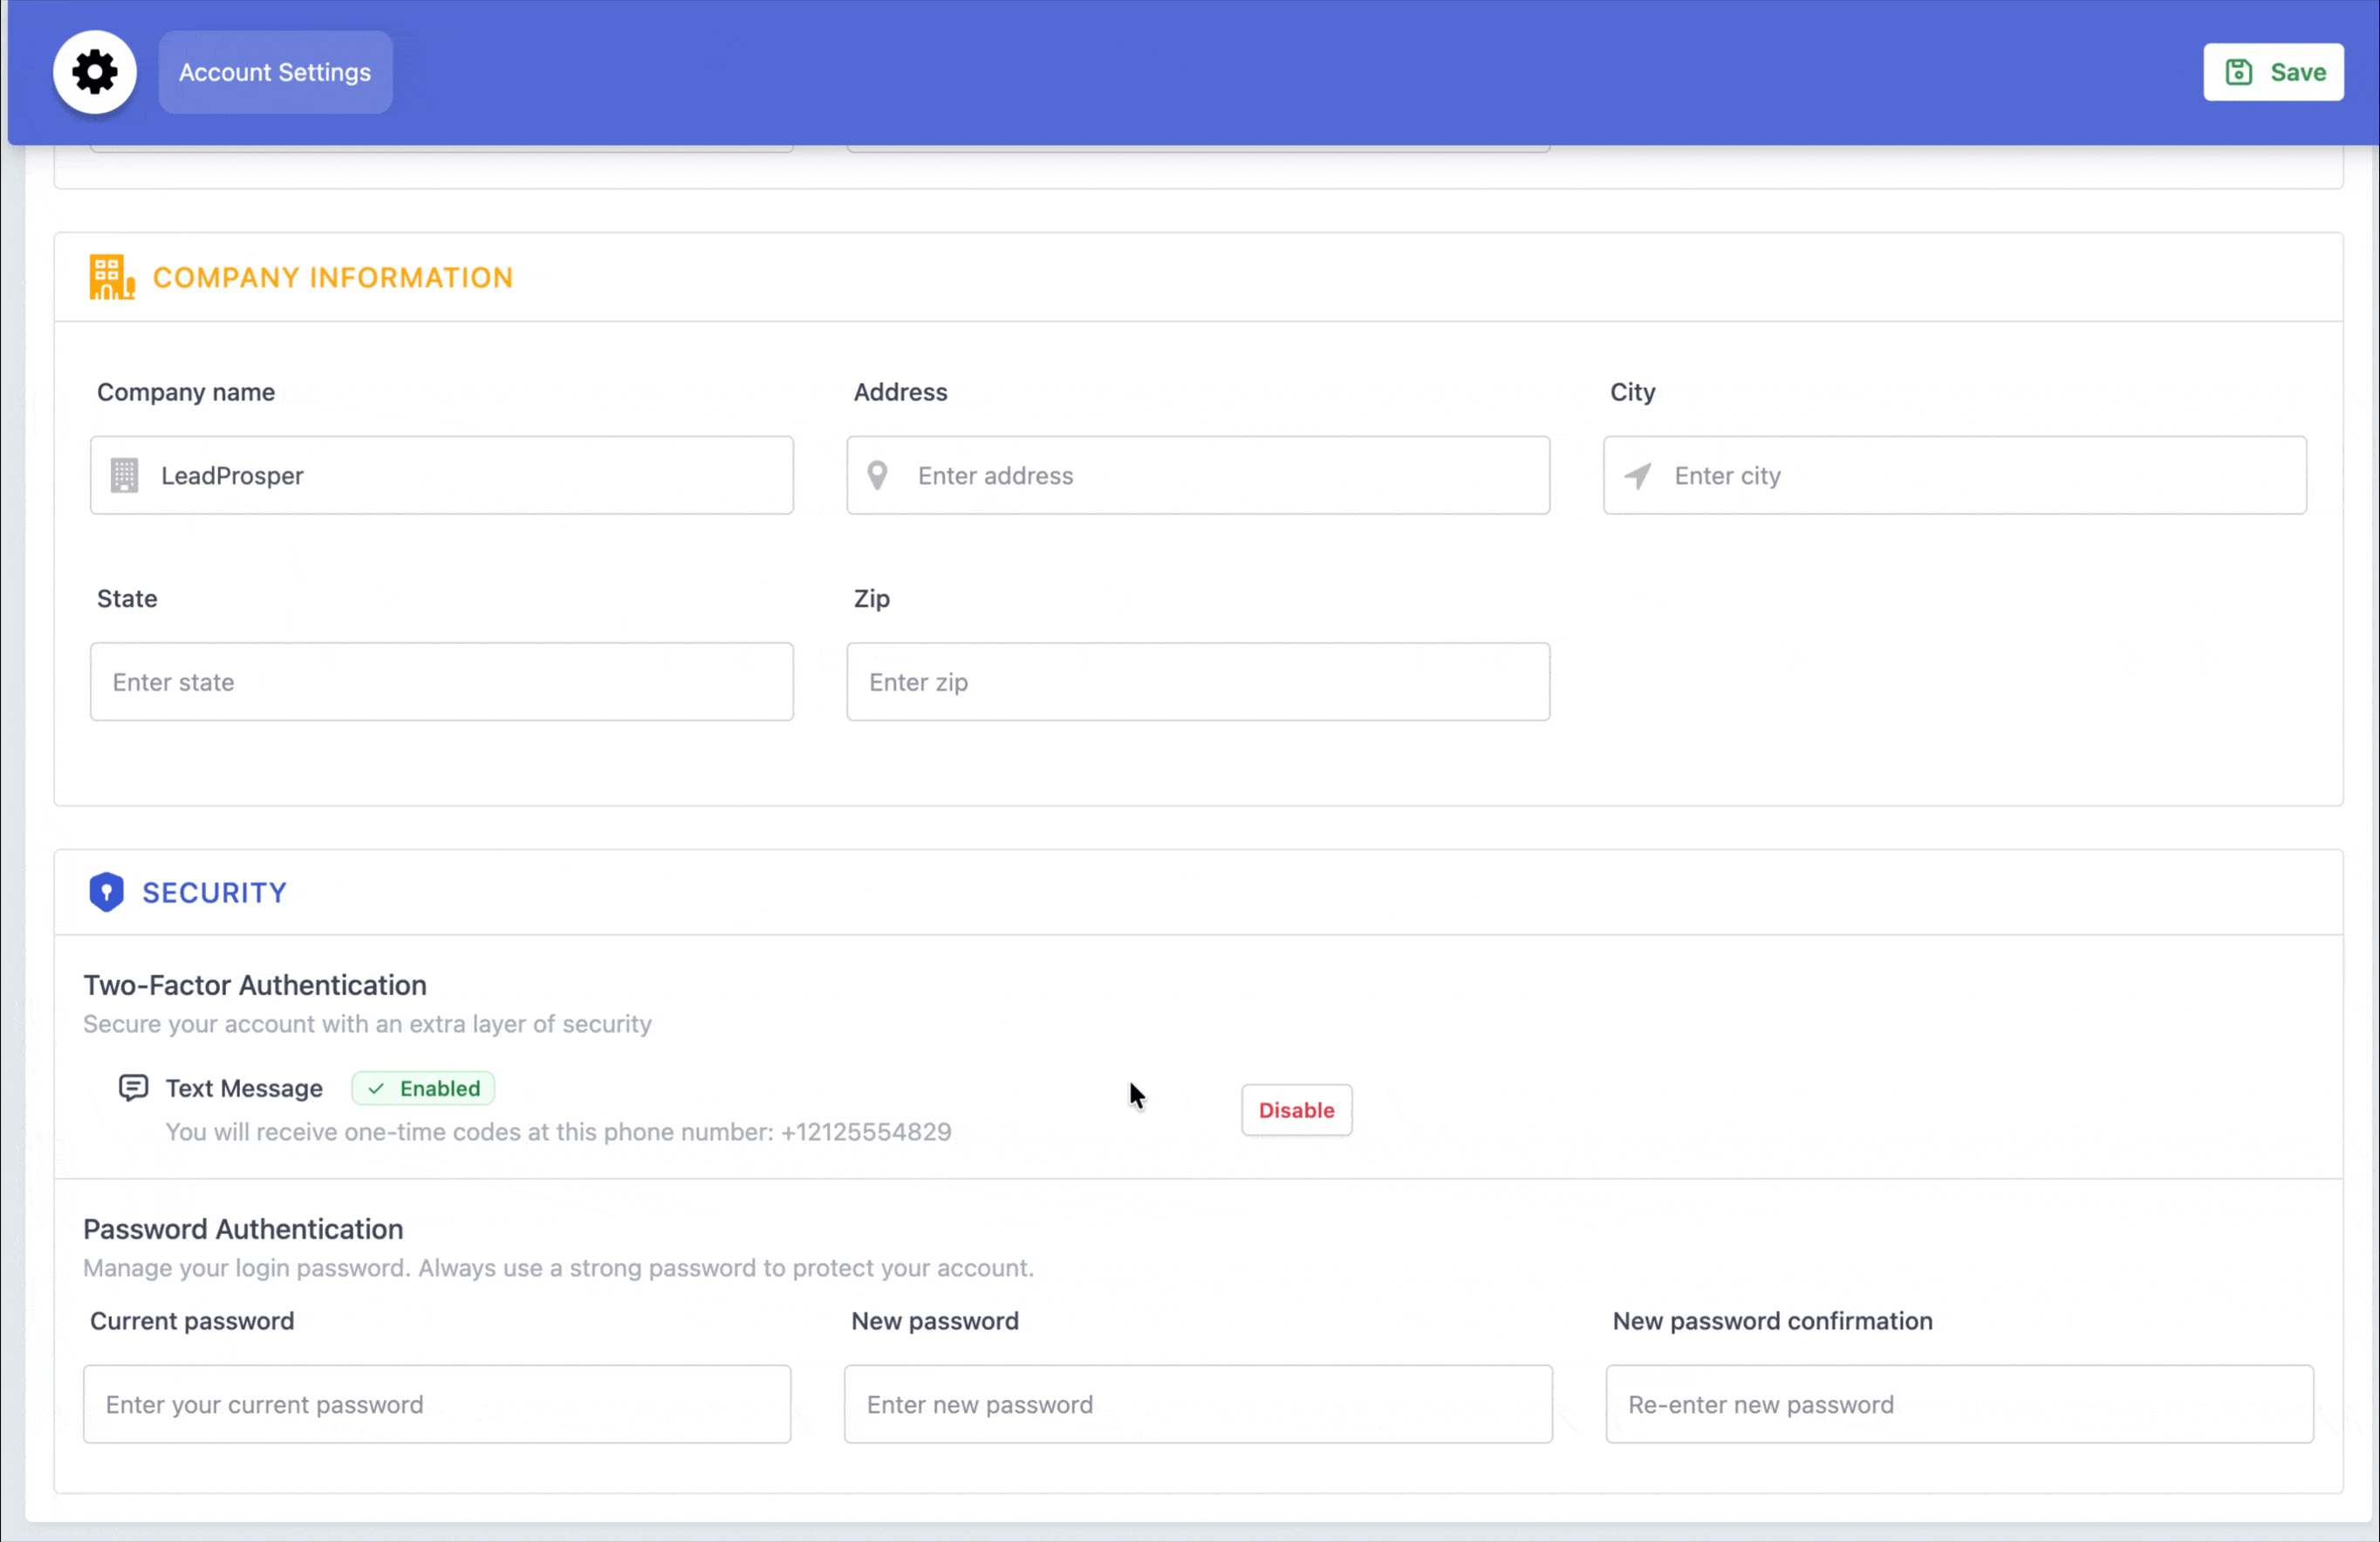
On the Account Settings page, scroll down to Security > Two-Factor Authentication and under Text Message, select Enable.
-
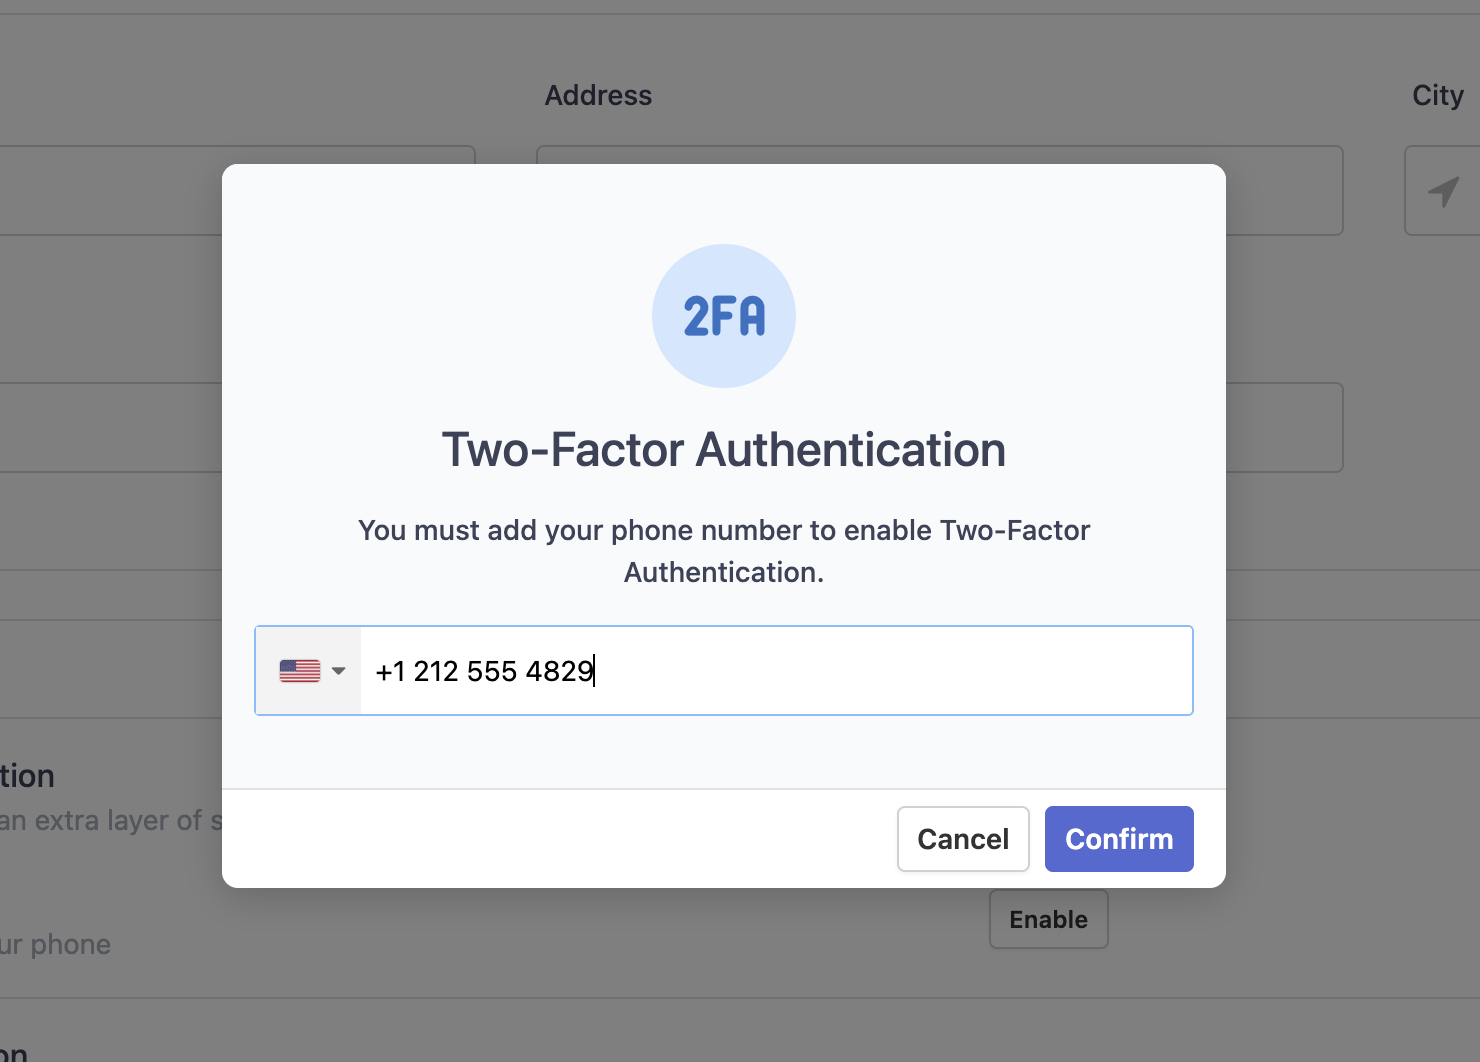
In the pop-up that appears, choose either your account's designated phone number or a different phone number to receive 2FA SMS messages, then hit Confirm.
-
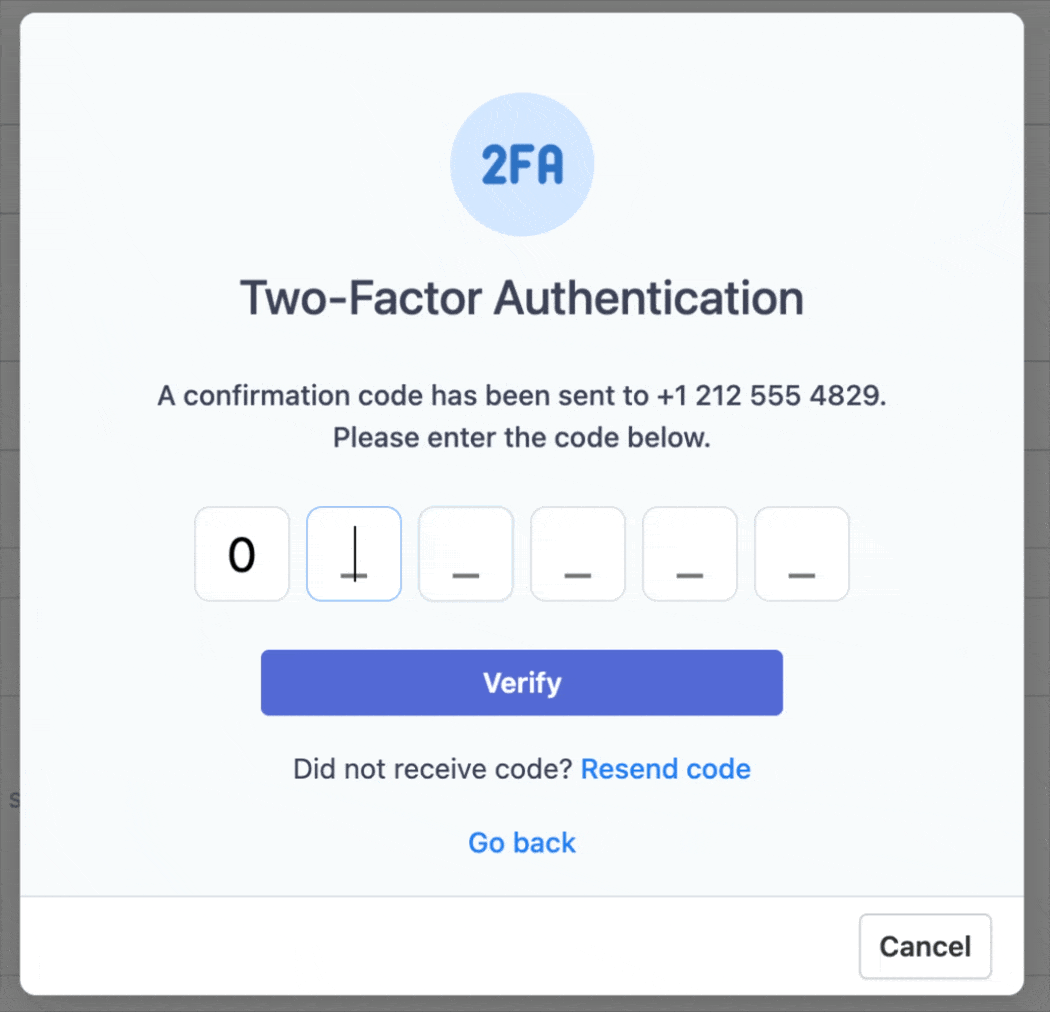
You will receive an SMS containing your Lead Prosper verification code.

- Return to the verification code pop-up and enter the 6-digit code from the SMS message.
-
Hit Verify.


Once verified, two-factor authentication will take effect after your current session ends.
Disable Two-Factor Authentication
To disable 2FA, go to Account Settings > Security and under Text Message, select Disable. Your account will revert to basic login protection settings.
Change Your Two-Factor Phone Number
To update the phone number associated with your 2FA settings, disable two-factor authentication first, then repeat the enable steps above with your new phone number.
Confirming Your Settings
To confirm two-factor authentication is active, look for the green Enable flag under Security > Two-Factor Authentication on the Account Settings page.
The entire process takes less than a minute and is one of the most effective ways to keep your account secure. If you run into any issues or have questions, reach out to support@leadprosper.io.