Account Settings Overview
Your Lead Prosper account has a wide range of account settings that you can manage from the top right menu in your account - including:

Account Settings
The Account Settings area allows you to update and control the account specific settings for your Lead Prosper account. This area is broken down into four sections - Profile Info, Current / Timezone, Company Information, and Security.
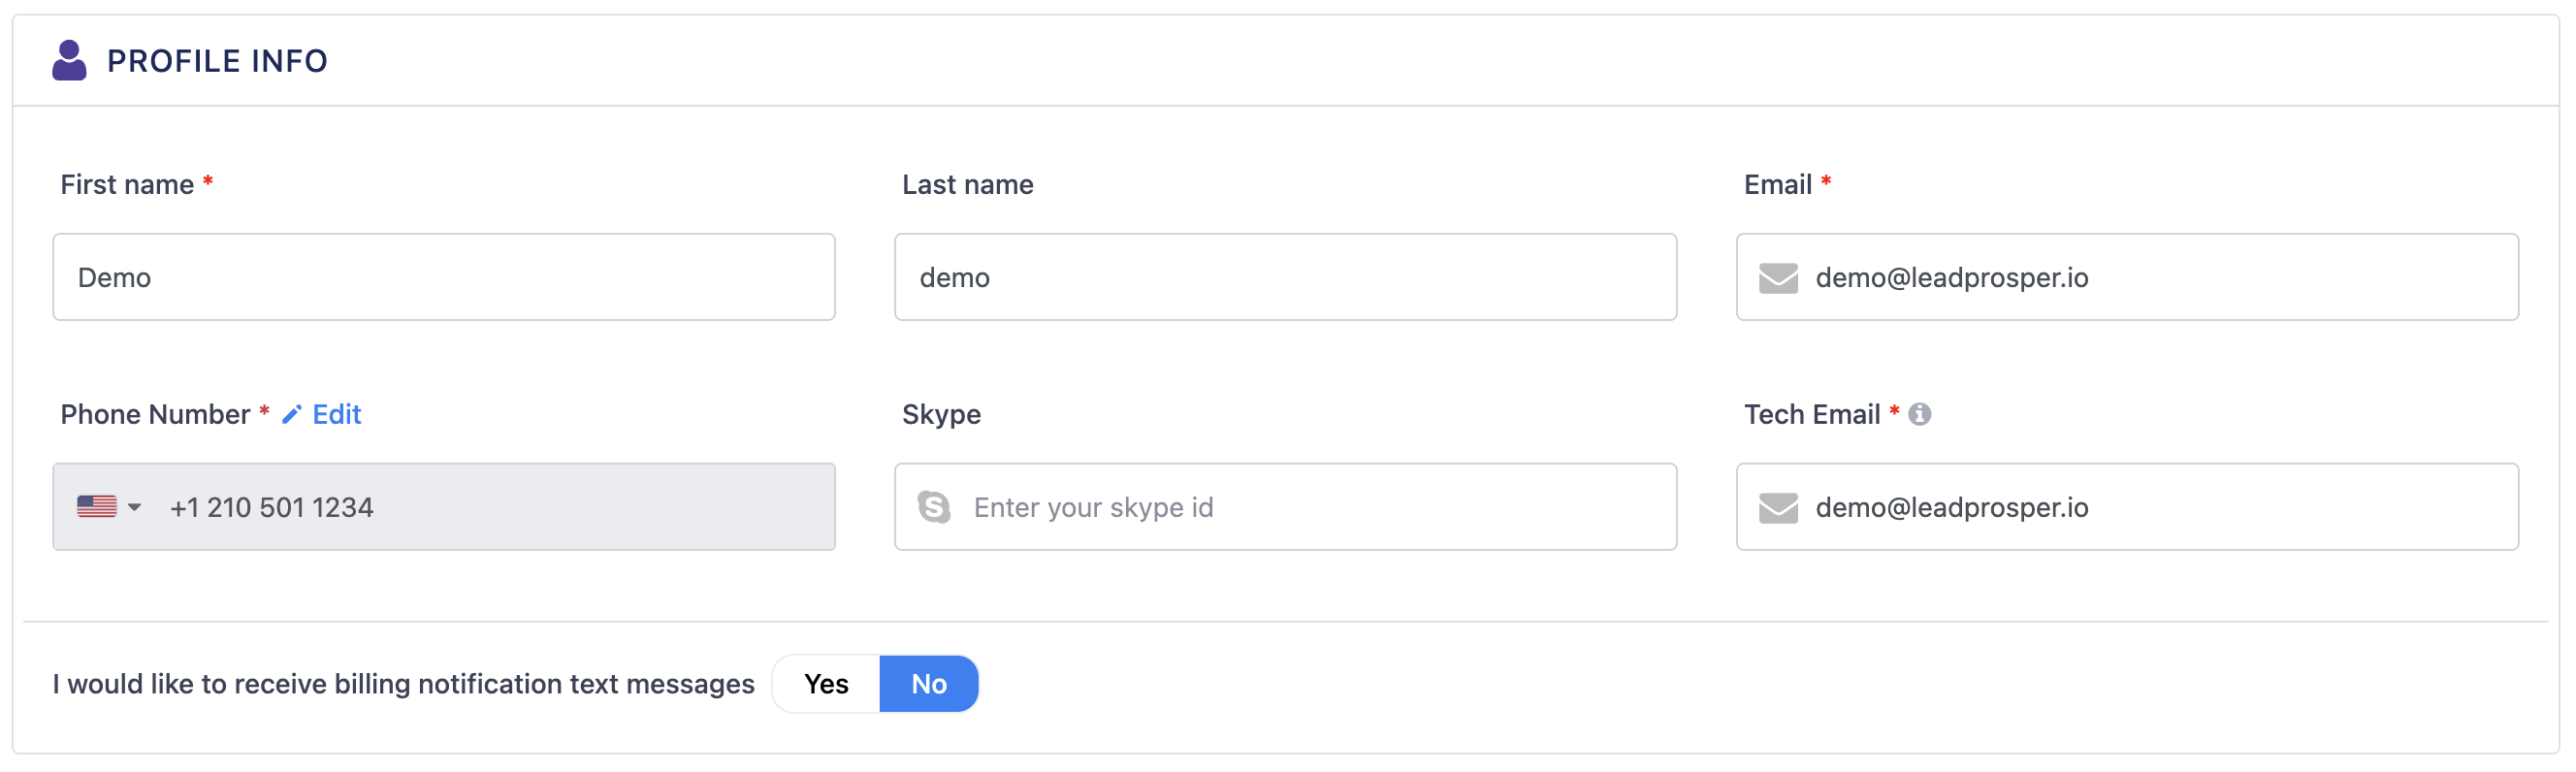
Profile Info
Here you can update and manage your account profile details, including First Name, Last Name, Email Address, Technical Email Address, Phone Number, and Skype ID.
The Phone Number is also what will be used if you choose to enable Two-Factor Authentication (which we highly encourage you to do).
Currency / Timezone
From this area you can control two very specific parts of your account - the timezone and the currency.
Timezone can be set to any timezone you choose, and this update will be reflected throughout your account - in reporting, lead details, analytics, delayed campaign triggers, and more.
Currency is handled the same way, and is reflected in all aspects of your account where monetary values are stored. This includes on the front end of your account, in the log files, analytics, reporting, etc.

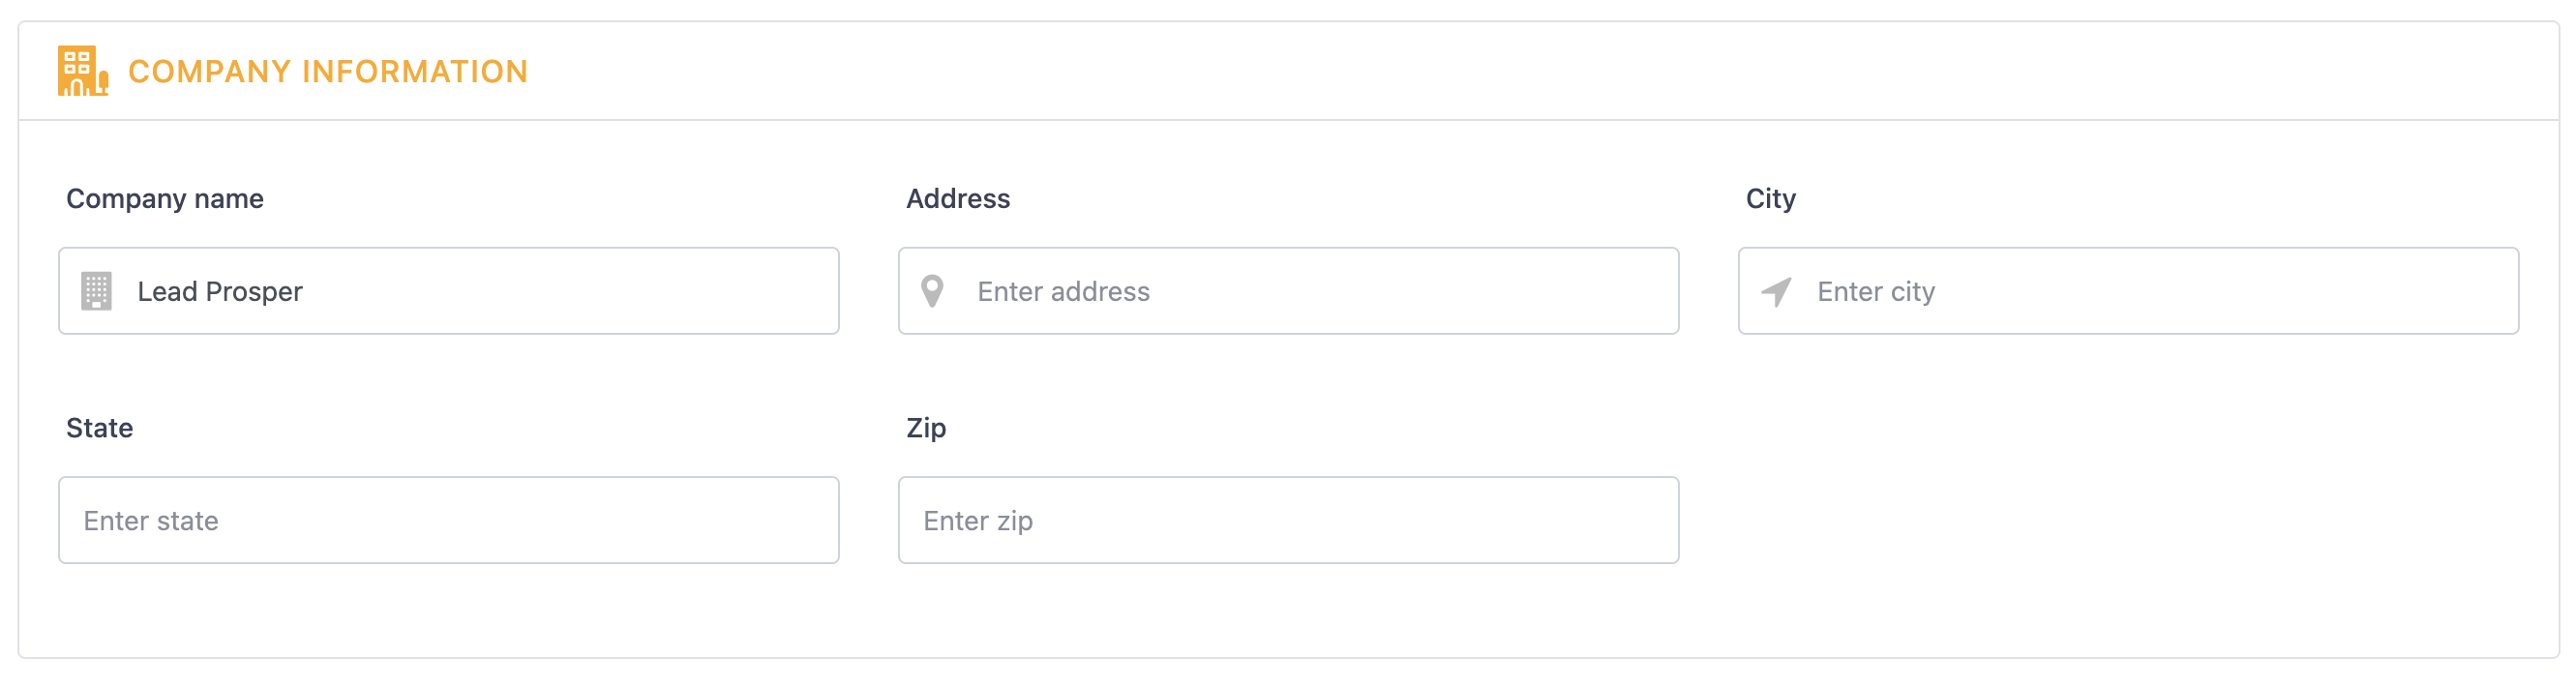
Company Information
Basic information related to your company, which can be used for internal organizational purposes. Fields that can be updated include Company Name, Address, City, State, and Zip Code.
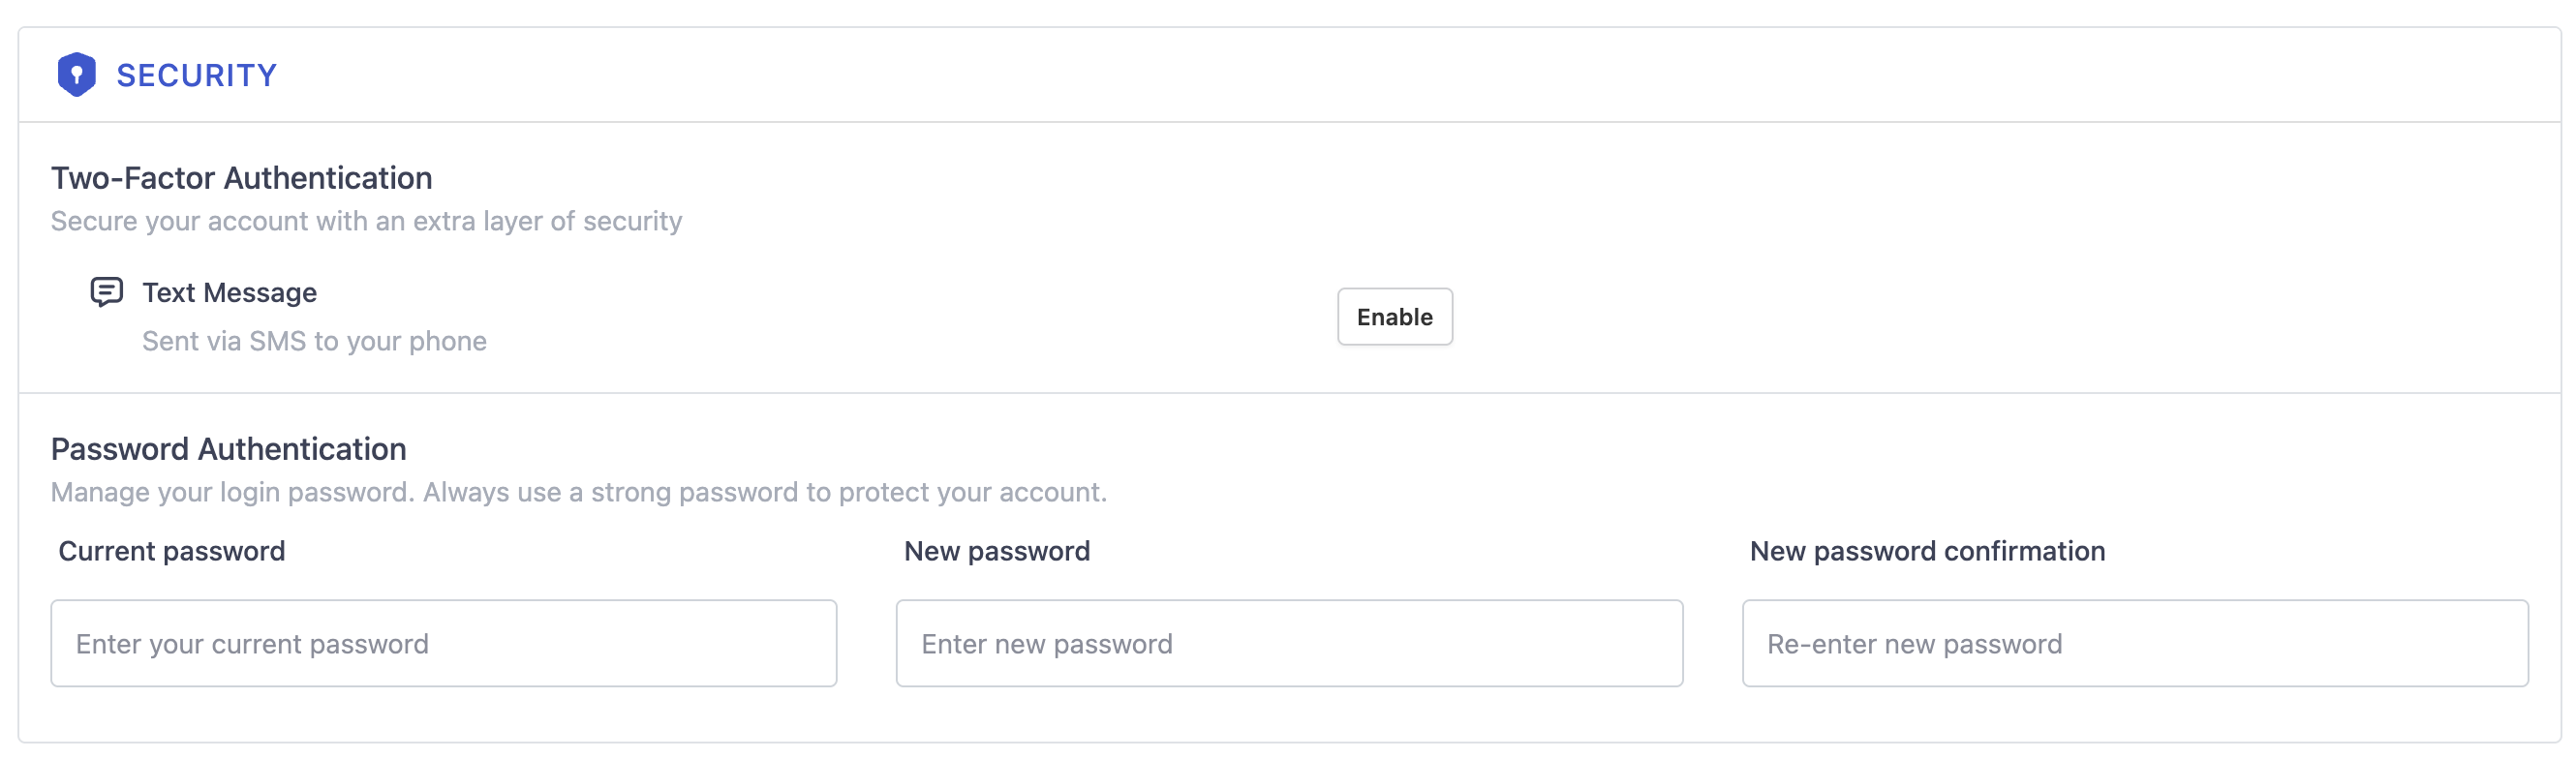
Security
Perhaps one of the most important sections of your account, the security area allows you to do two major functions - enable / disable Two Factor Authentication and reset your account password.
Learn more about Account Settings.
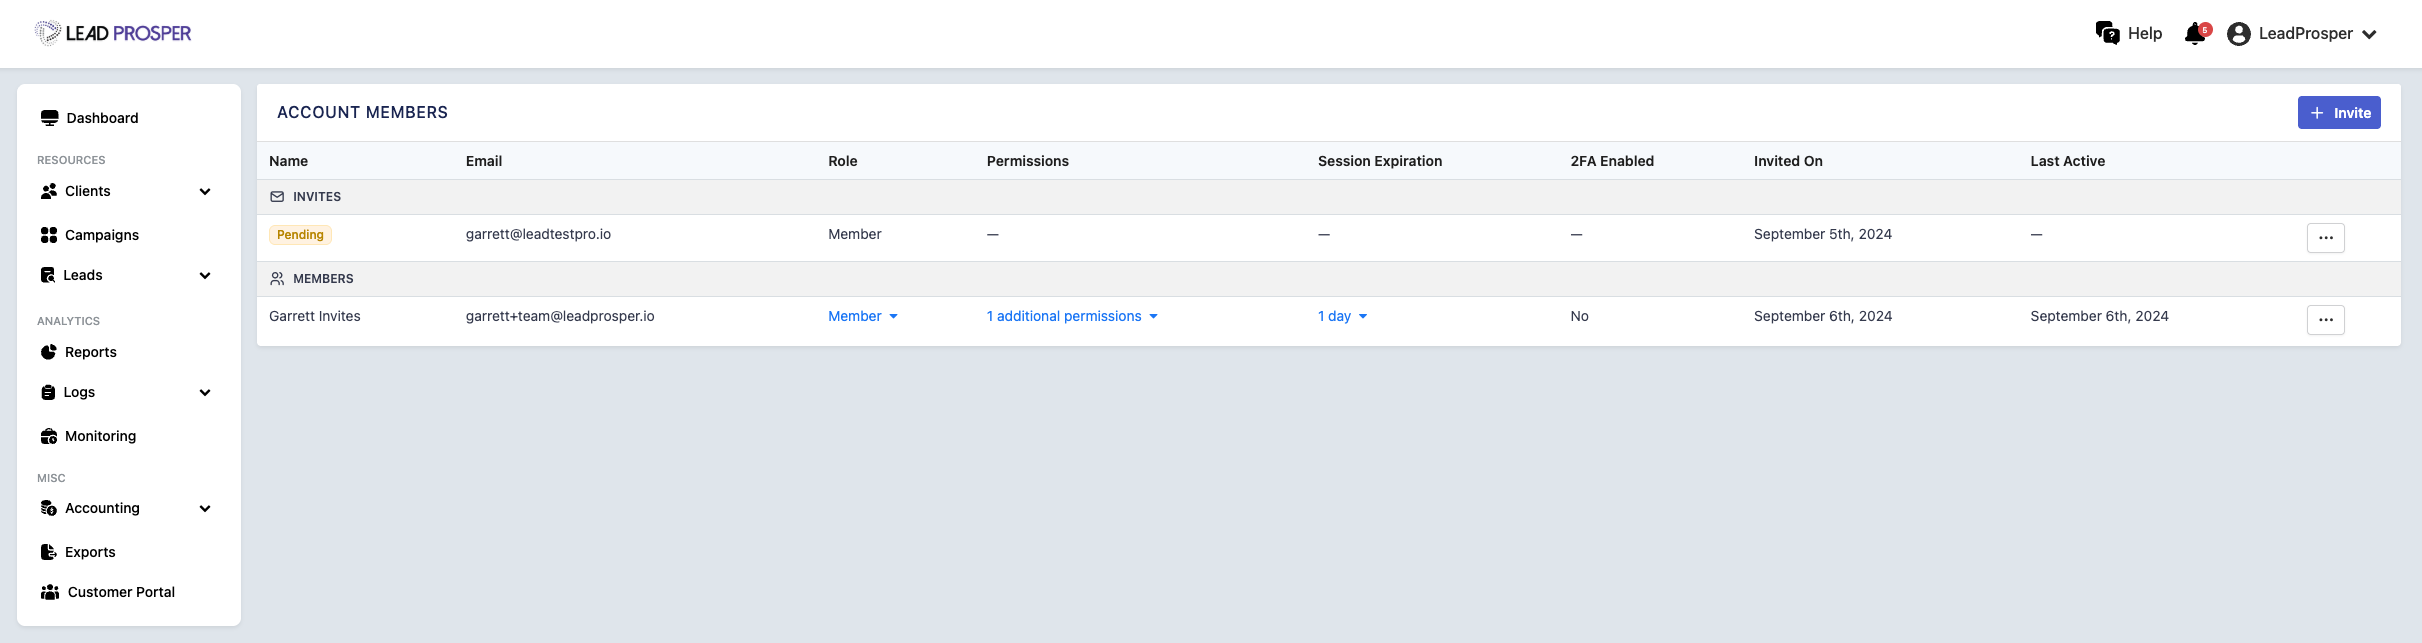
Team Members
The Team Members page allows administrators to manage user accounts for people who need access to the Lead Prosper platform. From this page, you can invite new team members, update roles, adjust permissions, and remove users when necessary. Roles such as Administrator, Member, Viewer, and Billing determine what areas of the platform each user can access and what actions they are allowed to perform.
Administrators can also grant additional permissions—such as the ability to delete data, export data, or access the Customer Portal—and configure default session expiration settings for logged-in users. This page is commonly used when adding new team members, updating access levels, or maintaining security and access control across the account.
Learn more about Team Members.
Change Logs
The Change Logs page provides a complete audit trail of activity across your Lead Prosper account. It allows you to see what changes were made, when they occurred, who made them, and exactly what was updated. This page is ideal for monitoring account activity, reviewing configuration changes, and maintaining operational oversight.
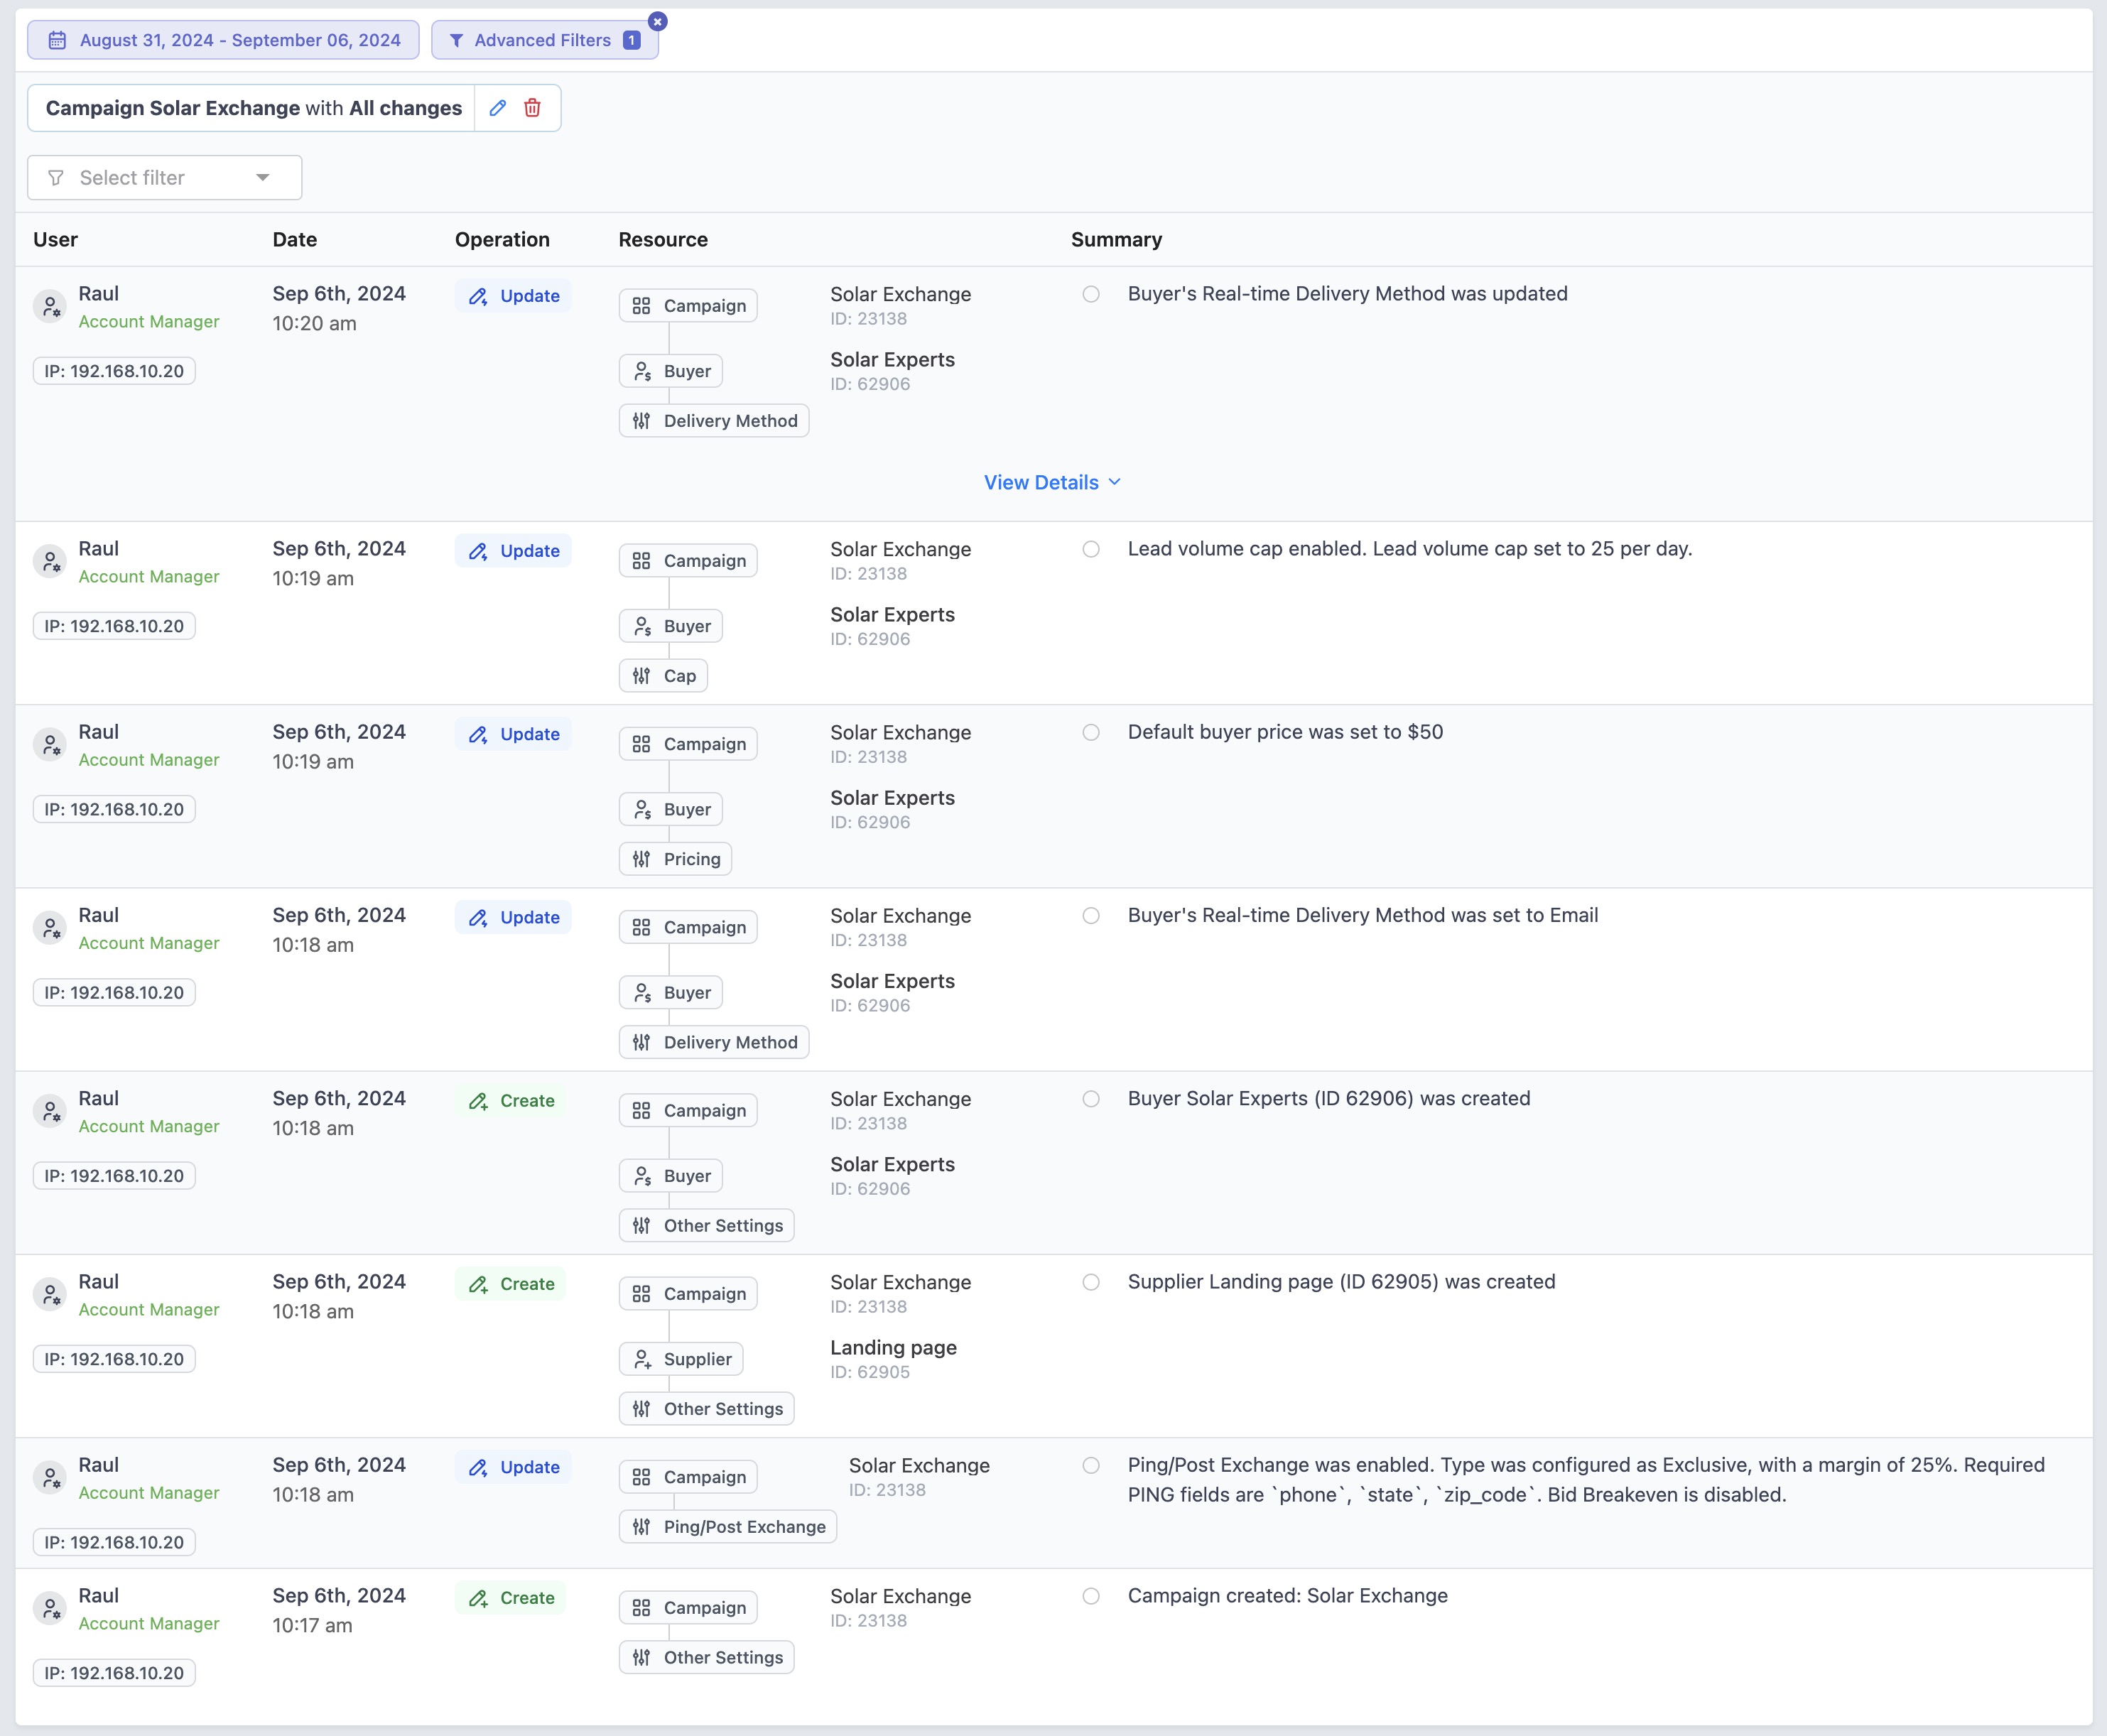
On the Change Logs page, you can:
- View account activity in chronological order
- Filter by date range, user, campaign, client, billing, lead exports, lead returns, or team member changes
- Filter by operation type (Add & Activate, Modify & Update, Remove & Deactivate)
- Filter by IP address
- Compare before-and-after values for any update
For more details on Change Logs please review our support article here - https://support.leadprosper.io/article/638-change-logs-overview-view-system-user-activity
Billing
The Billing page allows Lead Prosper administrators to monitor account usage, review billing activity, and manage payment details. From this page, you can view your current monthly usage, check unpaid invoices, review account credits, and update the payment method associated with your account.
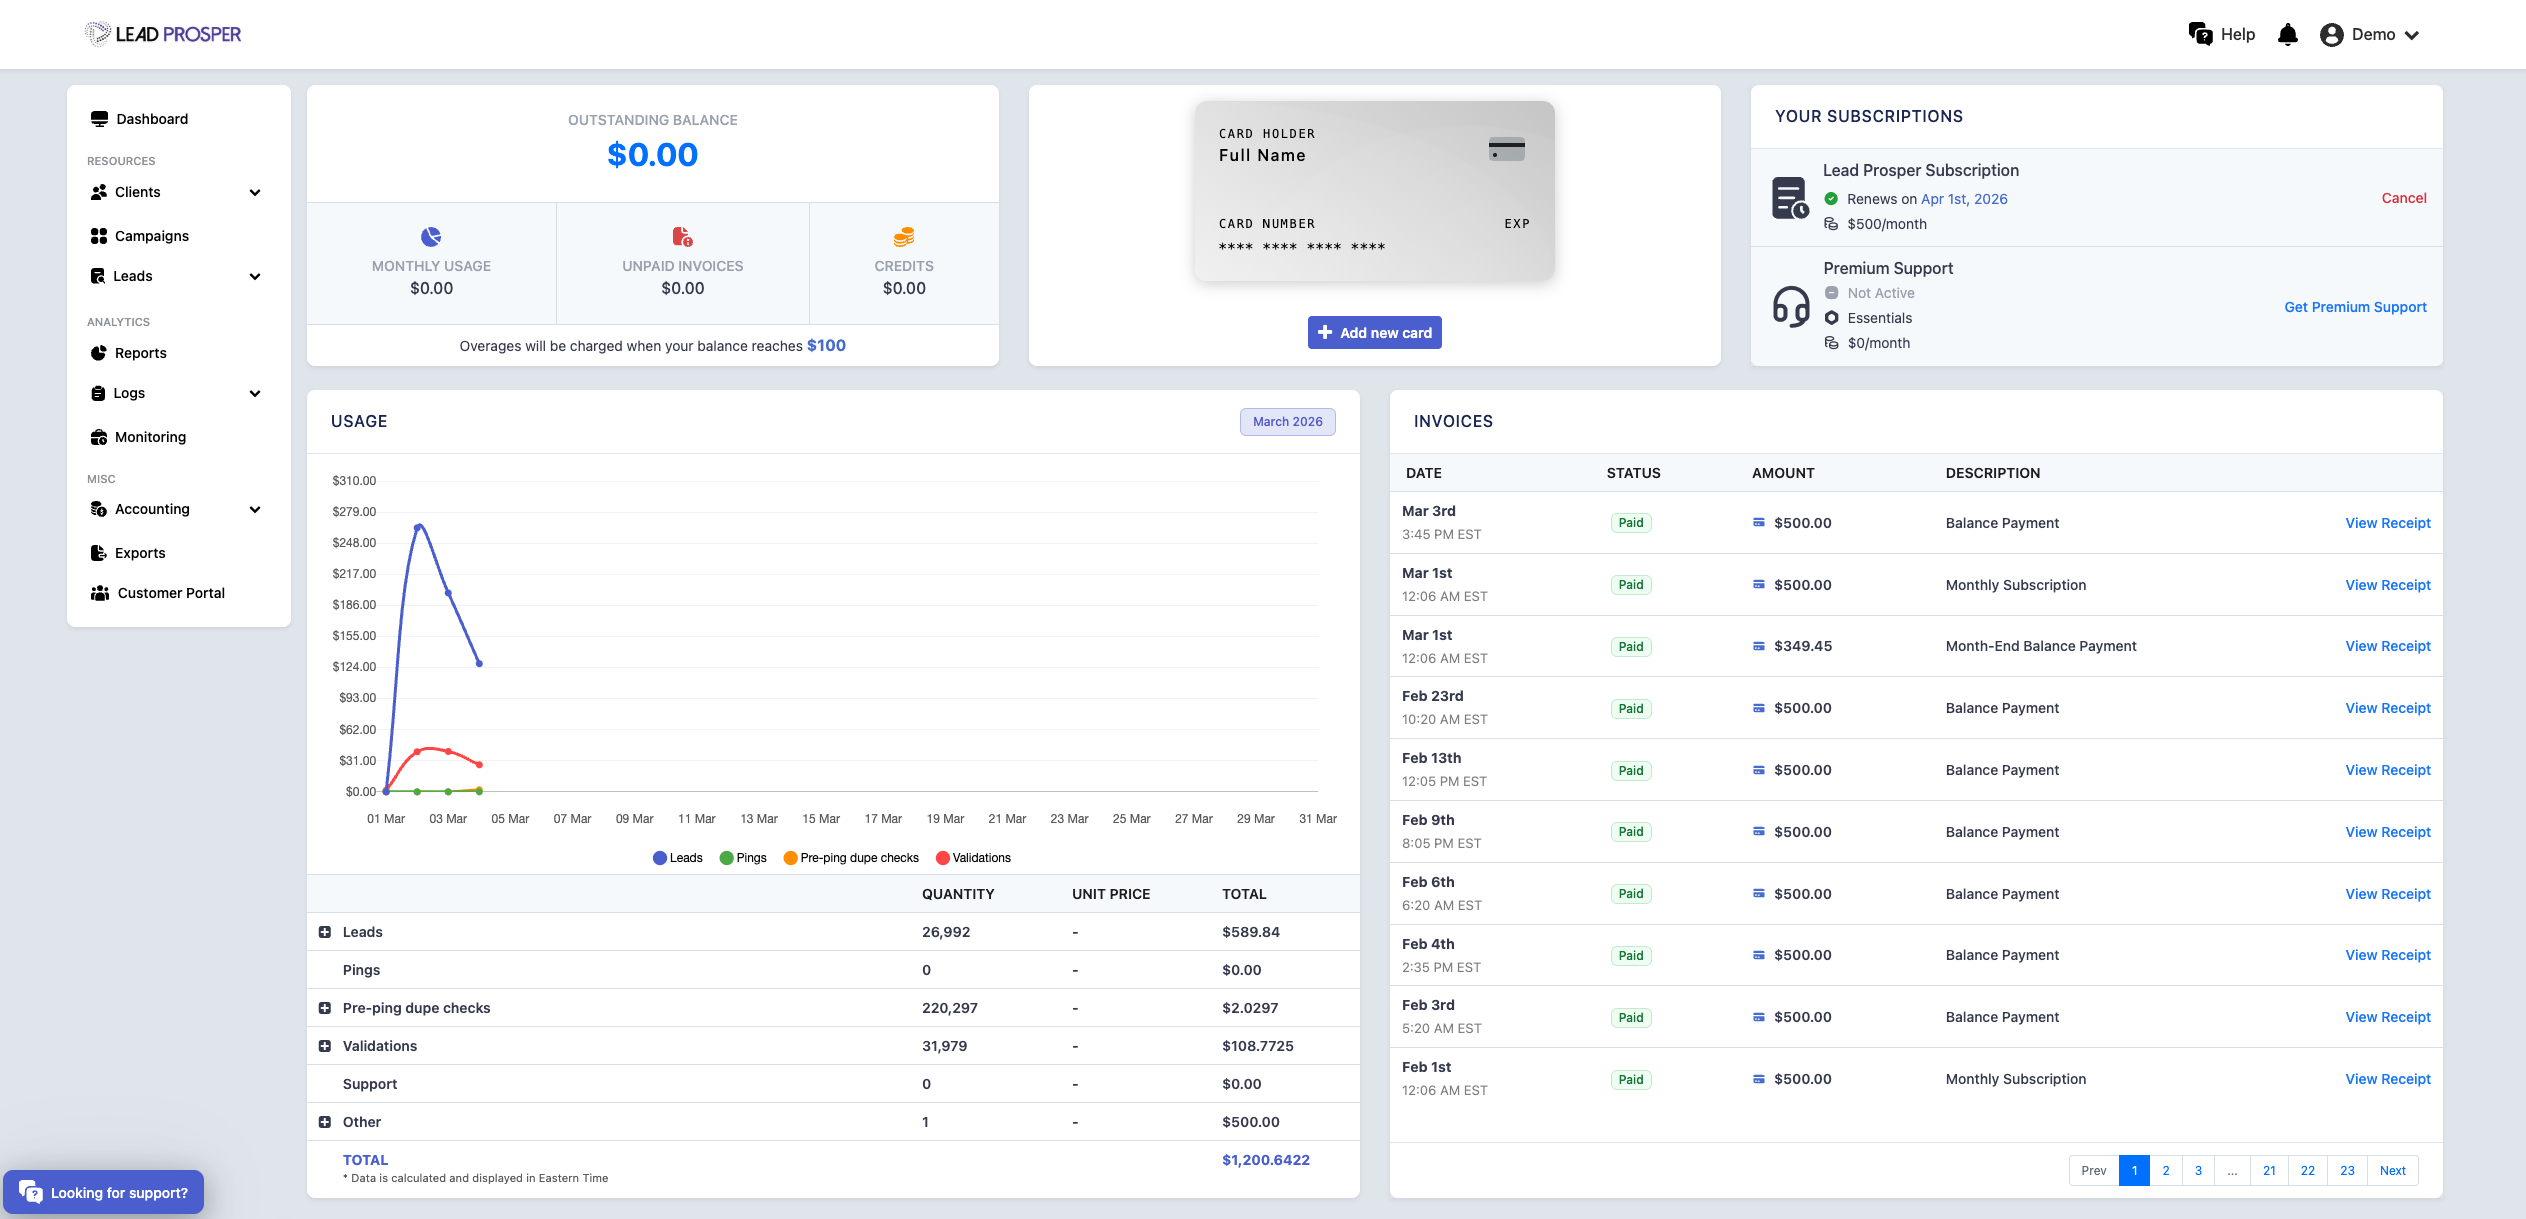
On the Billing page, you can:
- View current billing status, including monthly usage, unpaid invoices, and account credits
- Review a detailed breakdown of account usage for the selected billing period
- See totals for activity such as leads, pings, pre-ping duplicate checks, validations, and more
- View and download billing invoices
- Manage your payment method, including editing or removing the card on file
- Cancel your Lead Prosper account if needed
Learn more about the Billing Page.
Third Party Integrations
The Integrations page allows you to manage the third-party services connected to your Lead Prosper account. From this page, administrators and team members can enable or disable integrations, update API credentials, and manage connections with supported services.
Lead Prosper supports a wide range of integrations that help automate validation, compliance checks, fraud prevention, and data workflows throughout your lead distribution process.
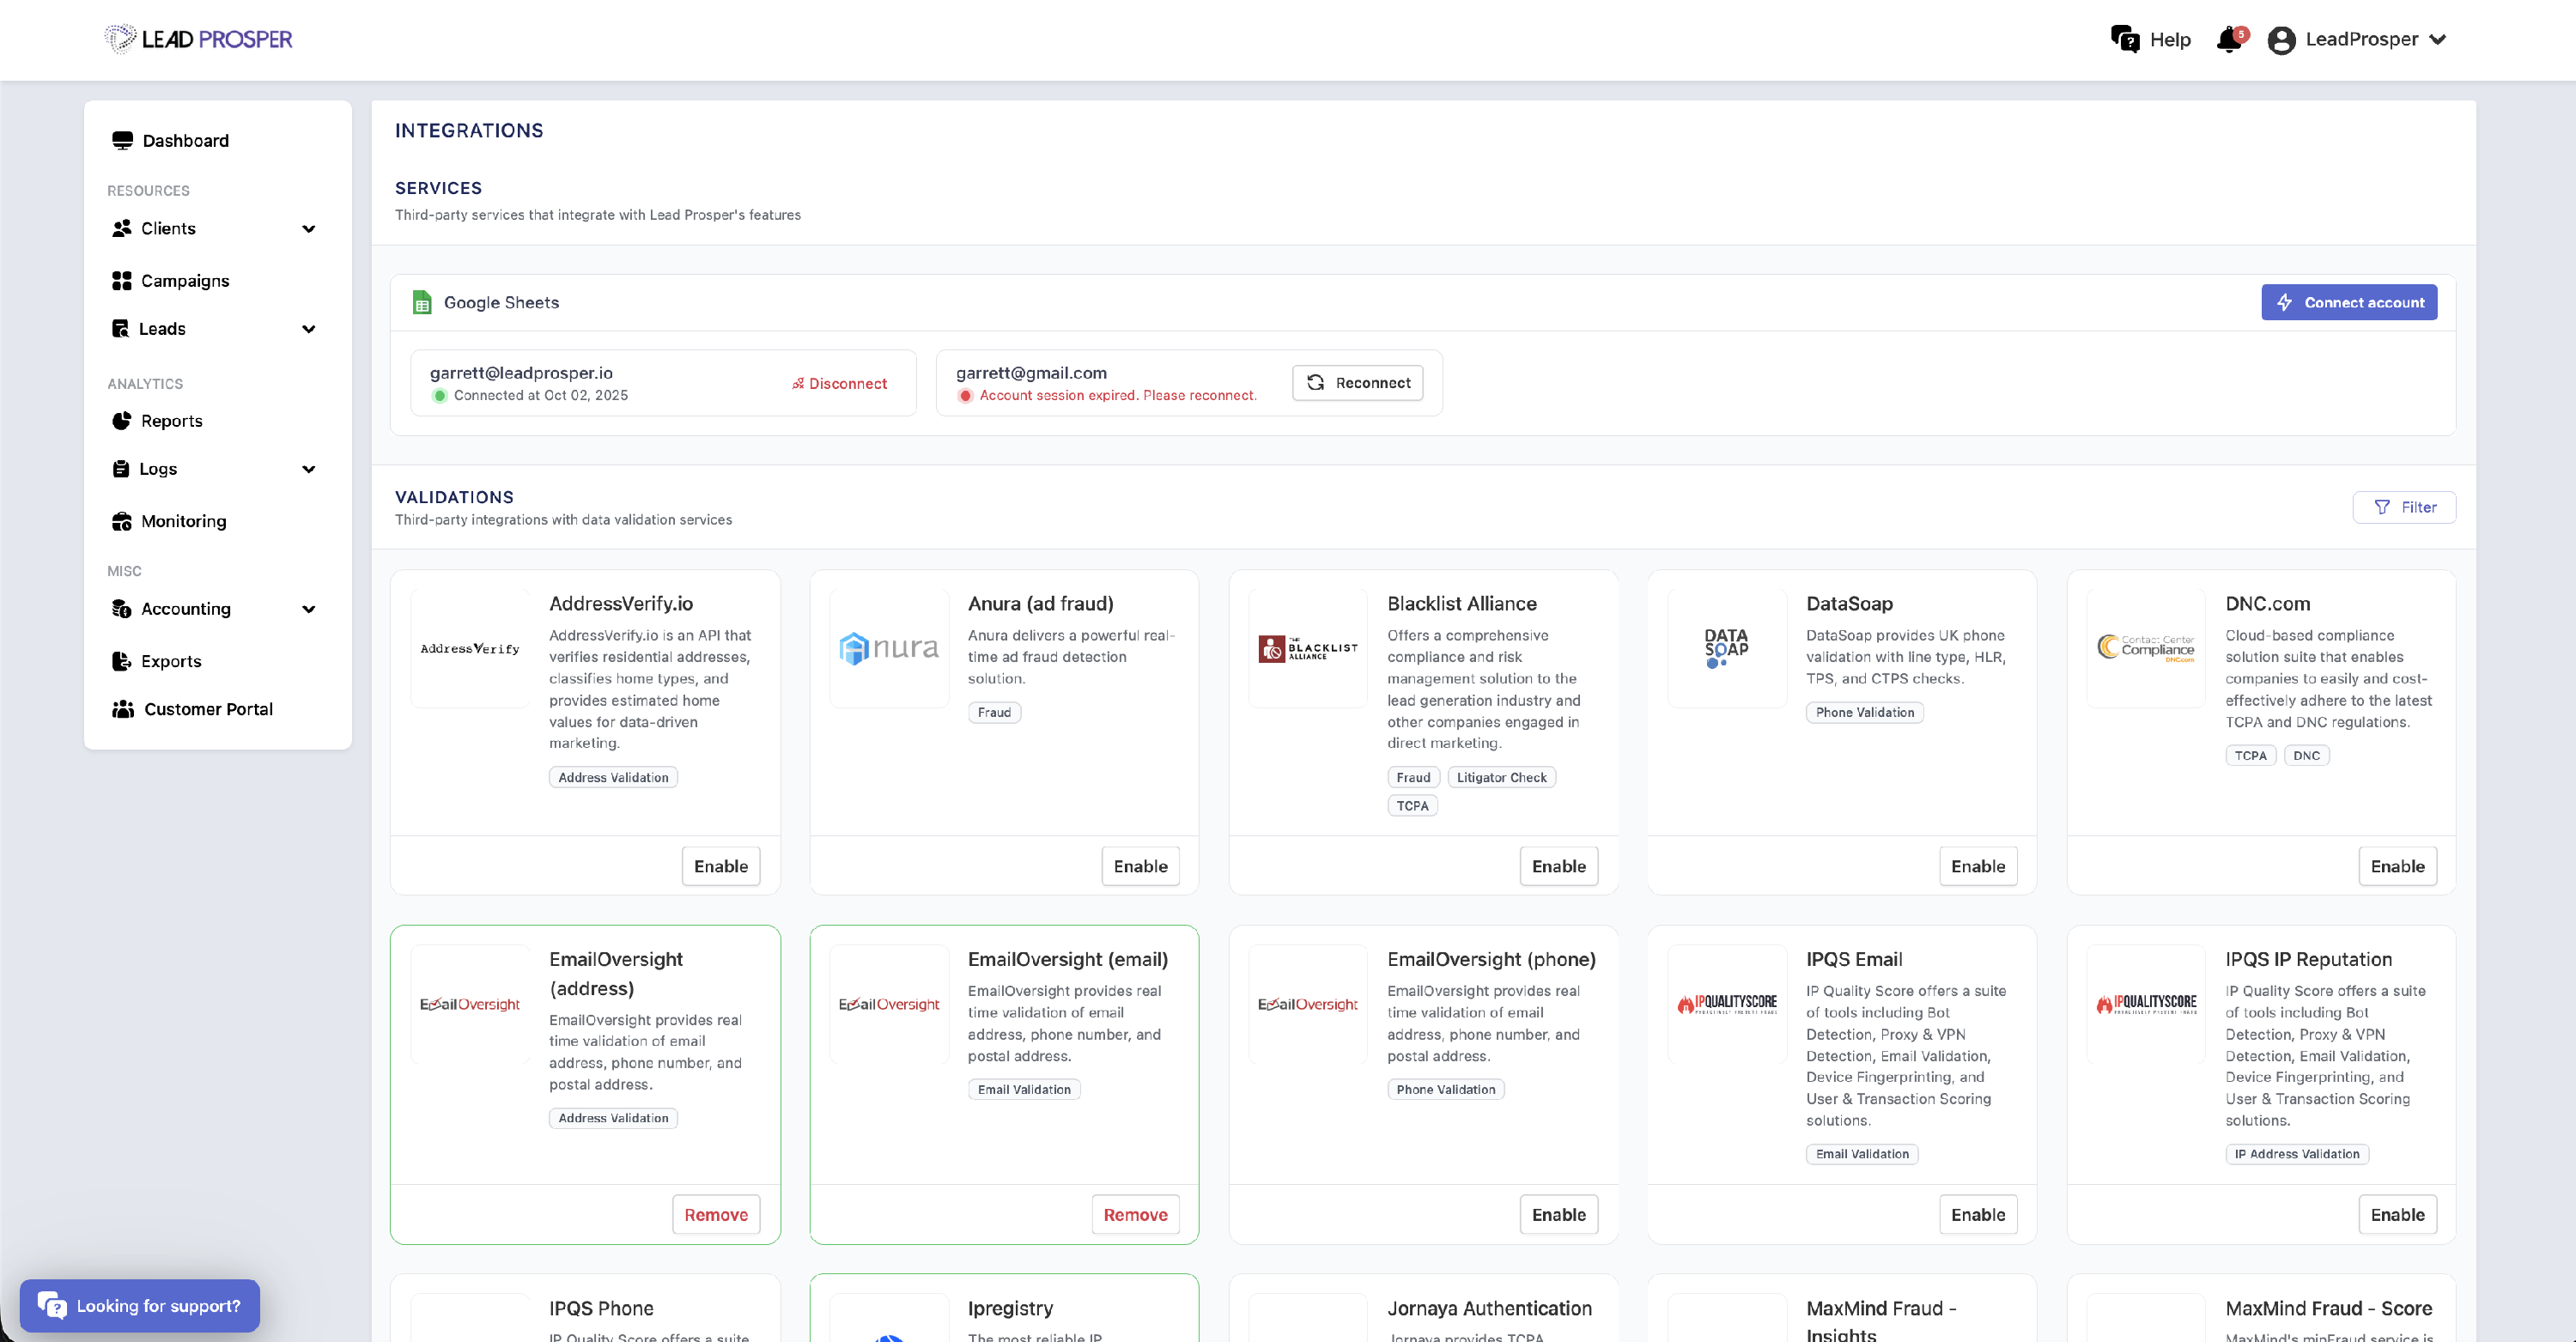
On the Integrations page, you can:
- Enable or disable available third-party integrations
- Add or update API keys and credentials required for integrations
- Connect, reconnect, or disconnect Google accounts used for Google Sheets integrations
- Manage integrations used for validation, compliance, fraud protection, and automation
Learn more about our Third Party Integrations.
Developer API Key
The Developer API Key provides access to your Lead Prosper account’s API key. This key is used to authenticate connections between Lead Prosper and external services such as Zapier or custom applications using our public APIs.
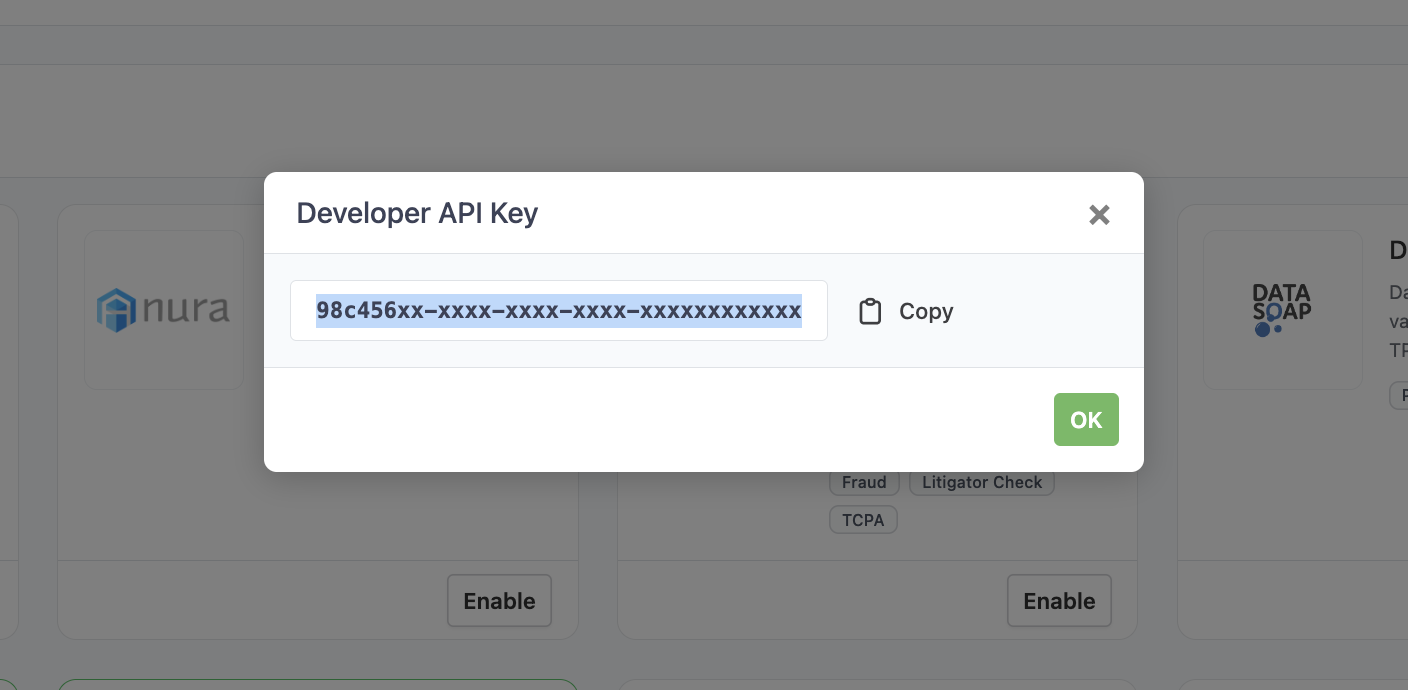
You can access the Developer API Key through the top right menu by selecting Developer.
Click these links to learn more about our Analytics & Accounting API or How To Connect Zapier to your Lead Prosper Account.