Connecting LeadCapture To Your Lead Prosper Campaign
LeadCapture makes it simple to send leads directly from your form into a Lead Prosper Direct Post campaign. Follow these steps to get set up.
LeadCapture has a more in depth step by step regarding the actual LeadCapture set up in their support area which you can read here.
To get started you’ll need a LeadCapture Form, a campaign set up in Lead Prosper, and Supplier API Specs for that campaign.
Step 1: Create Your Lead Prosper Campaign
Before connecting LeadCapture, make sure you already have a standard Lead Prosper campaign created.
Step 2: Add the Lead Prosper Integration
First thing in LeadCapture that you'll need to do is add the Lead Prosper integration.
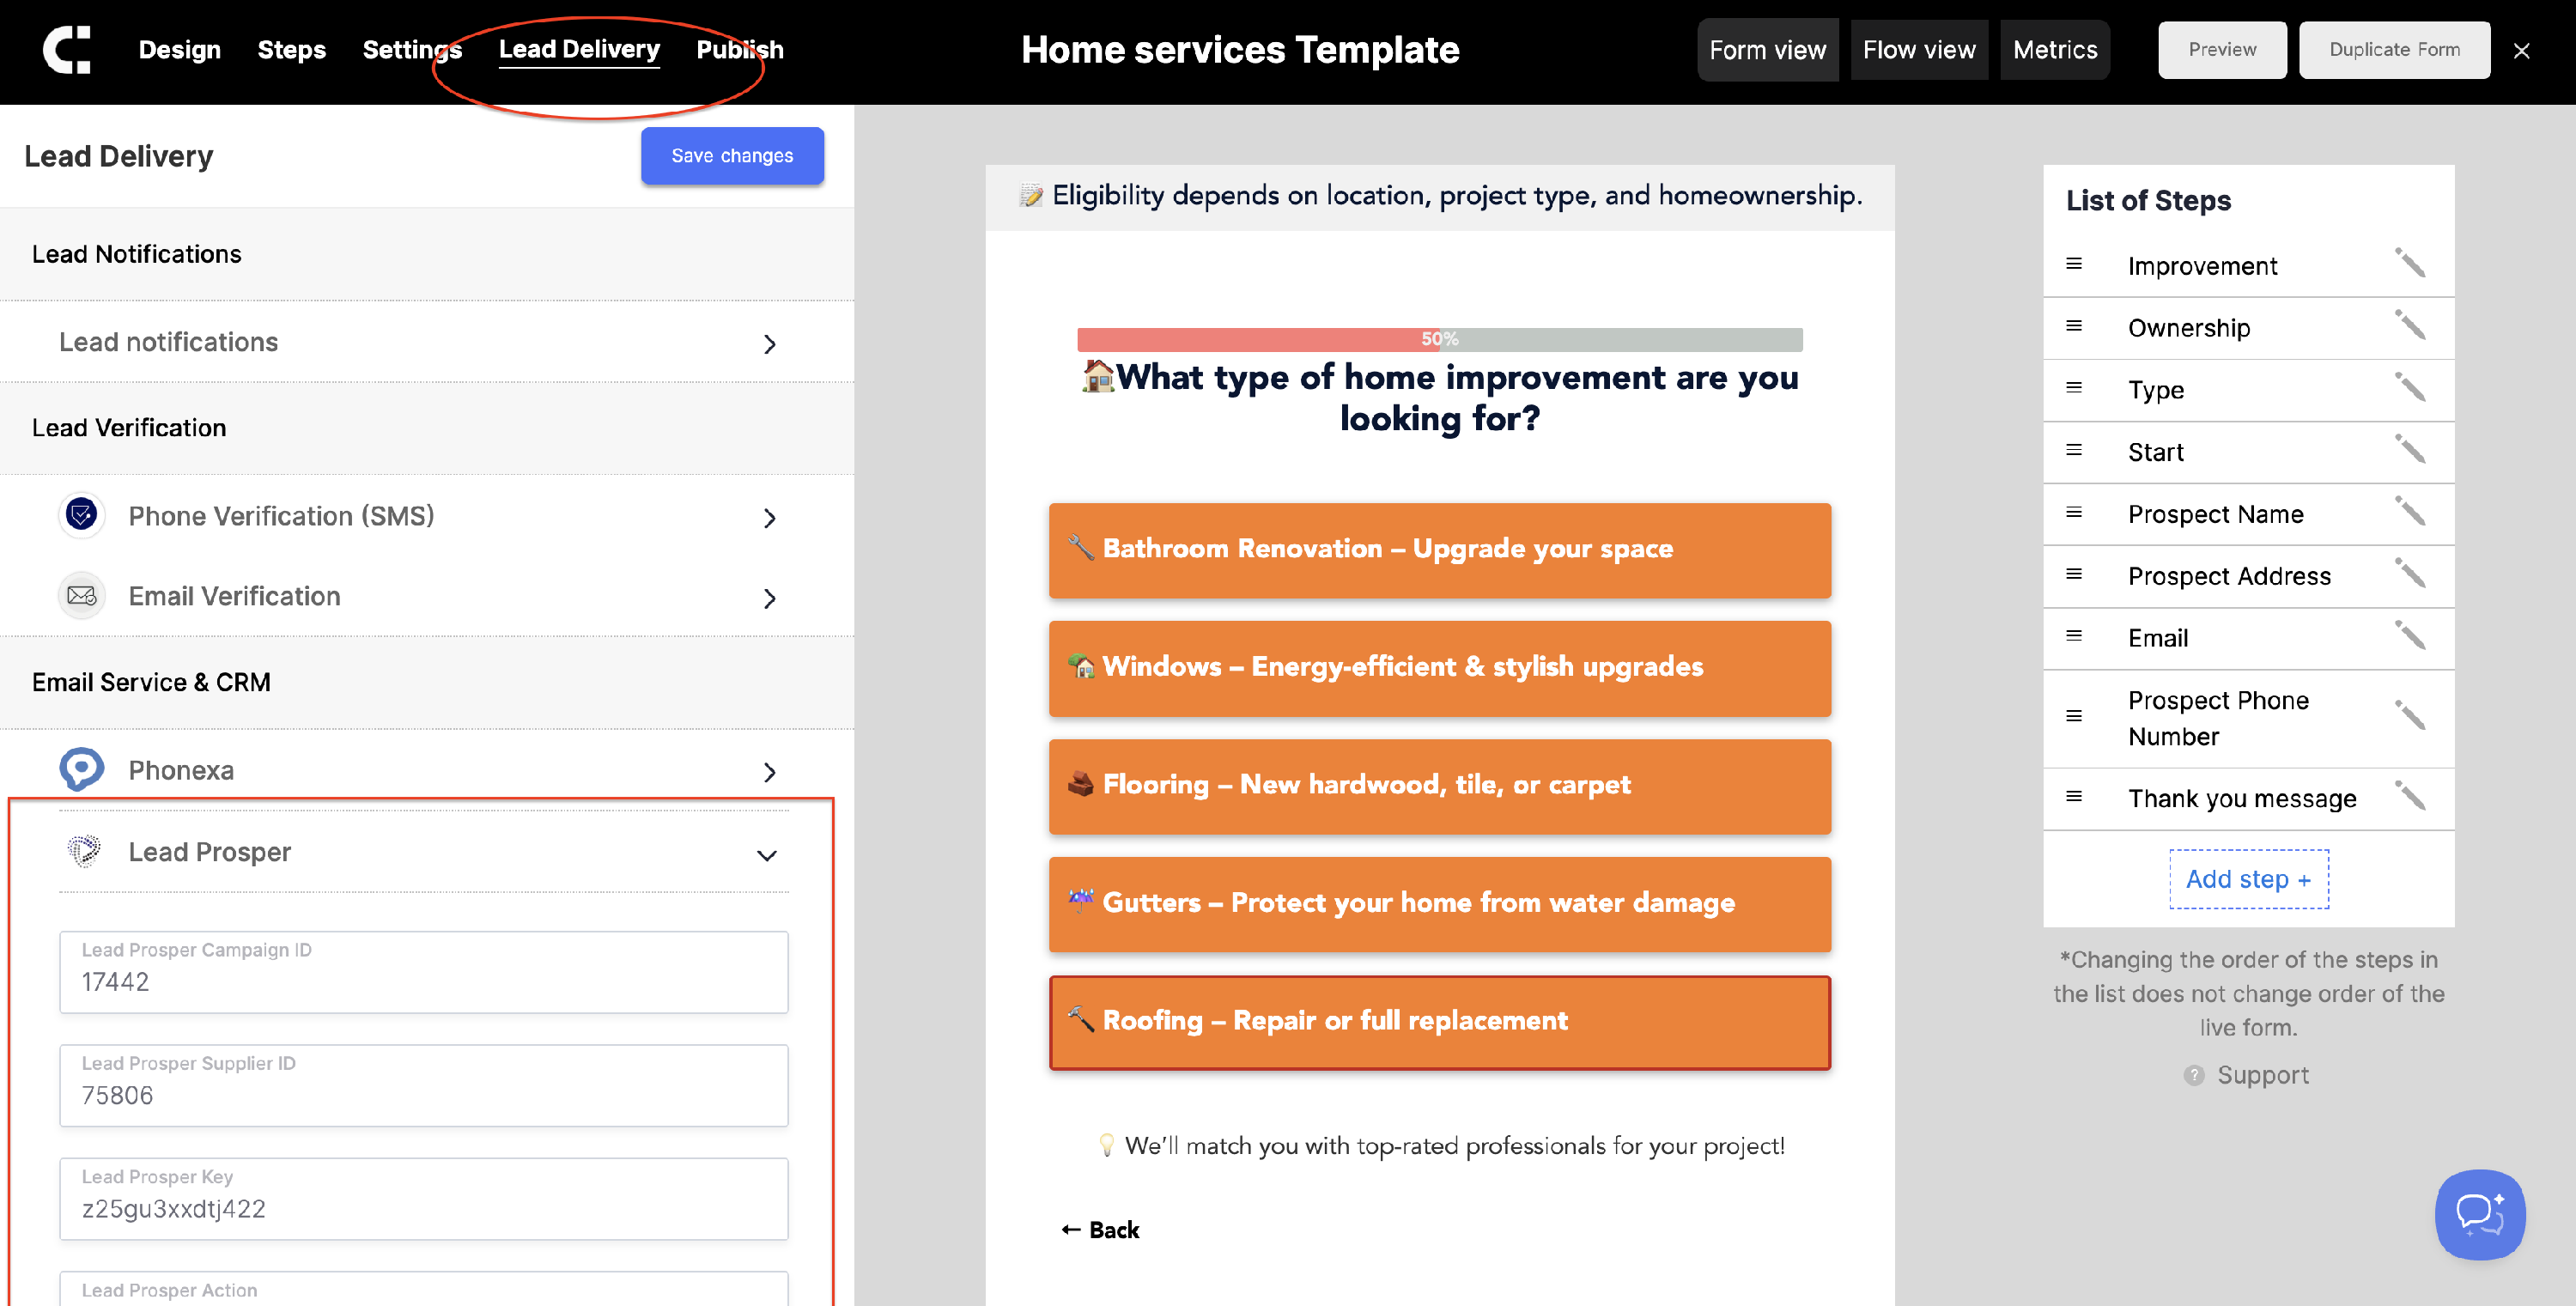
- In your LeadCapture form builder, go to the Lead Delivery tab.
- Under Email Service & CRM, select Lead Prosper.
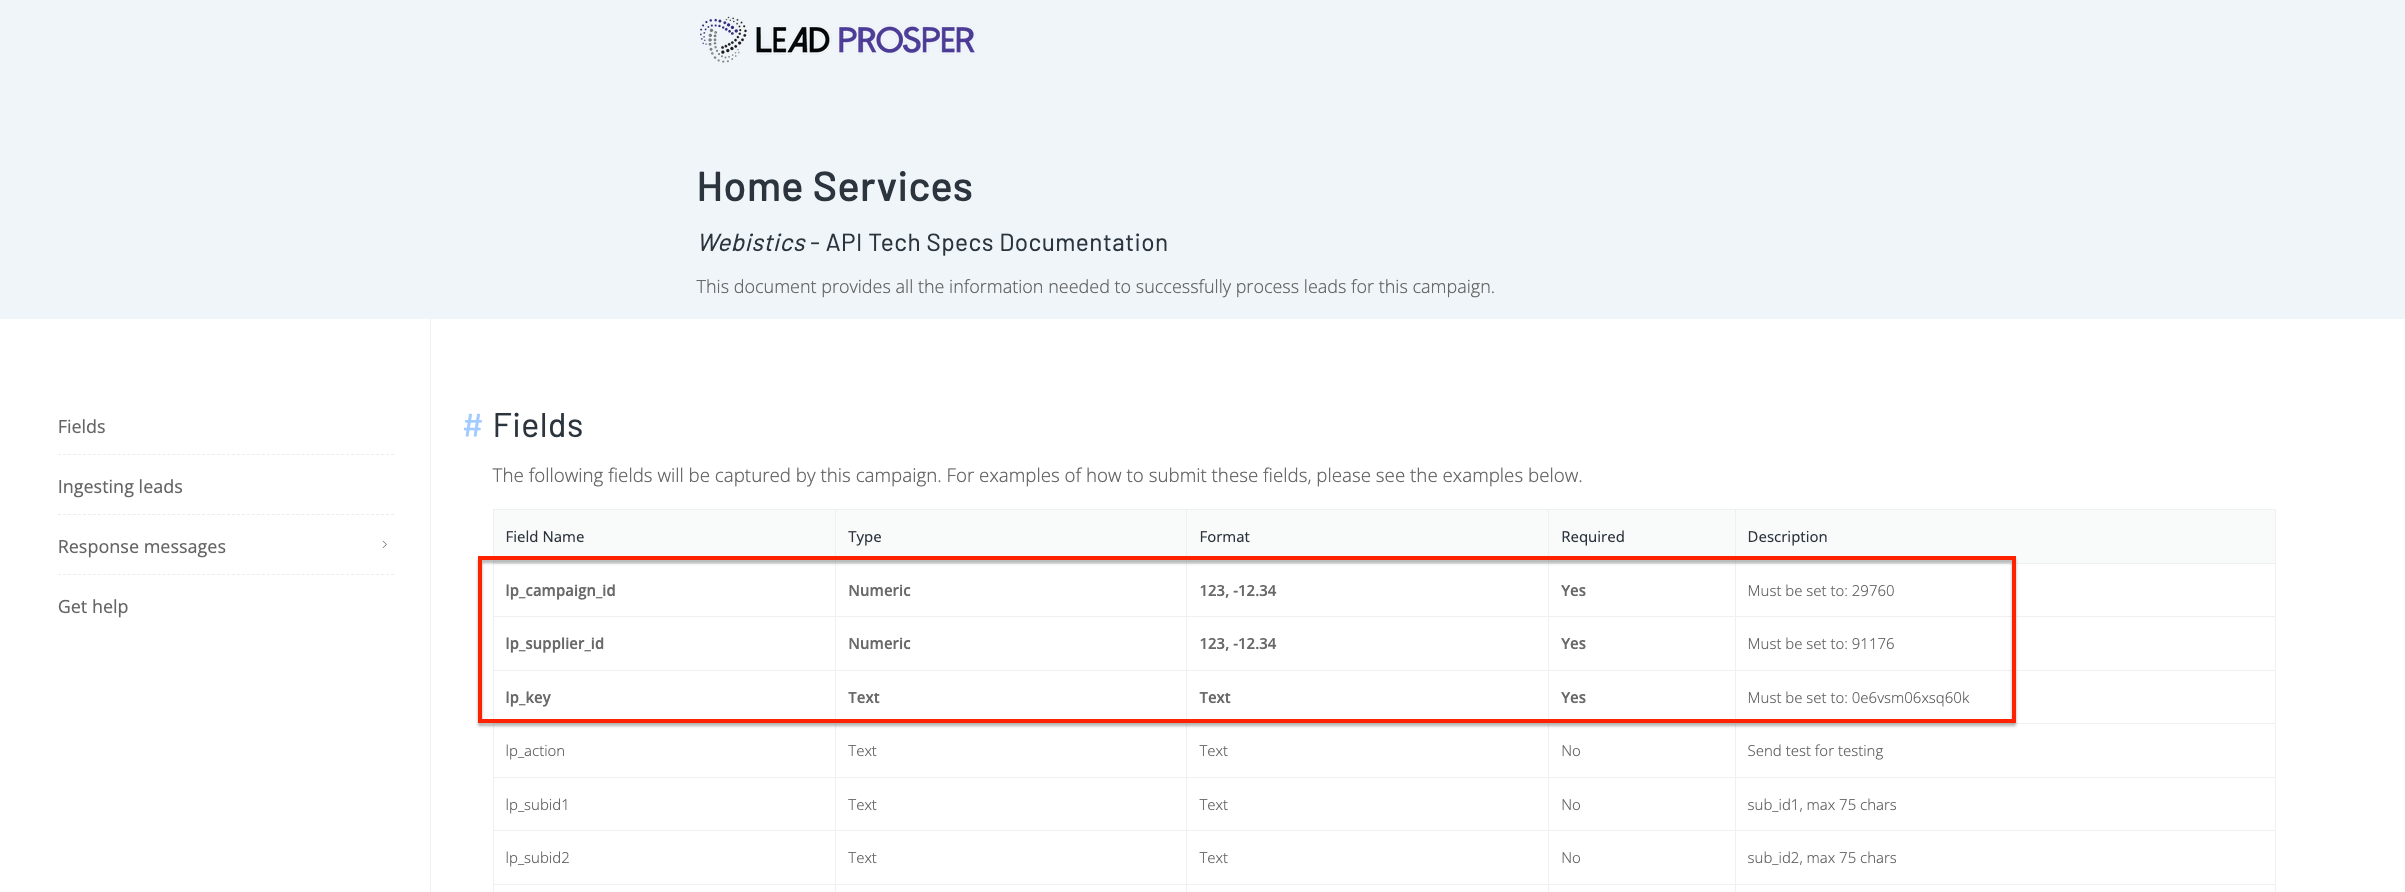
- Open your Lead Prosper Supplier API Specs and copy the following values into their matching LeadCapture fields:
- lp_campaign_id → Lead Prosper Campaign ID
- lp_supplier_id → Lead Prosper Supplier ID
- lp_key → Lead Prosper Key
Step 3: Configure Optional Fields
While setting up the initial Lead Prosper integration you can also customize the integration with these optional settings:
- Action: Set this to test if you want to send a test lead and your Supplier is not already in Test Mode.
- Redirect URL Field: If your Supplier API Response returns a redirect URL, enter the field name here.
- Redirect Fallback Step: If you’re using redirect URLs to guide visitors through your form, set a default step to use when no redirect is returned.
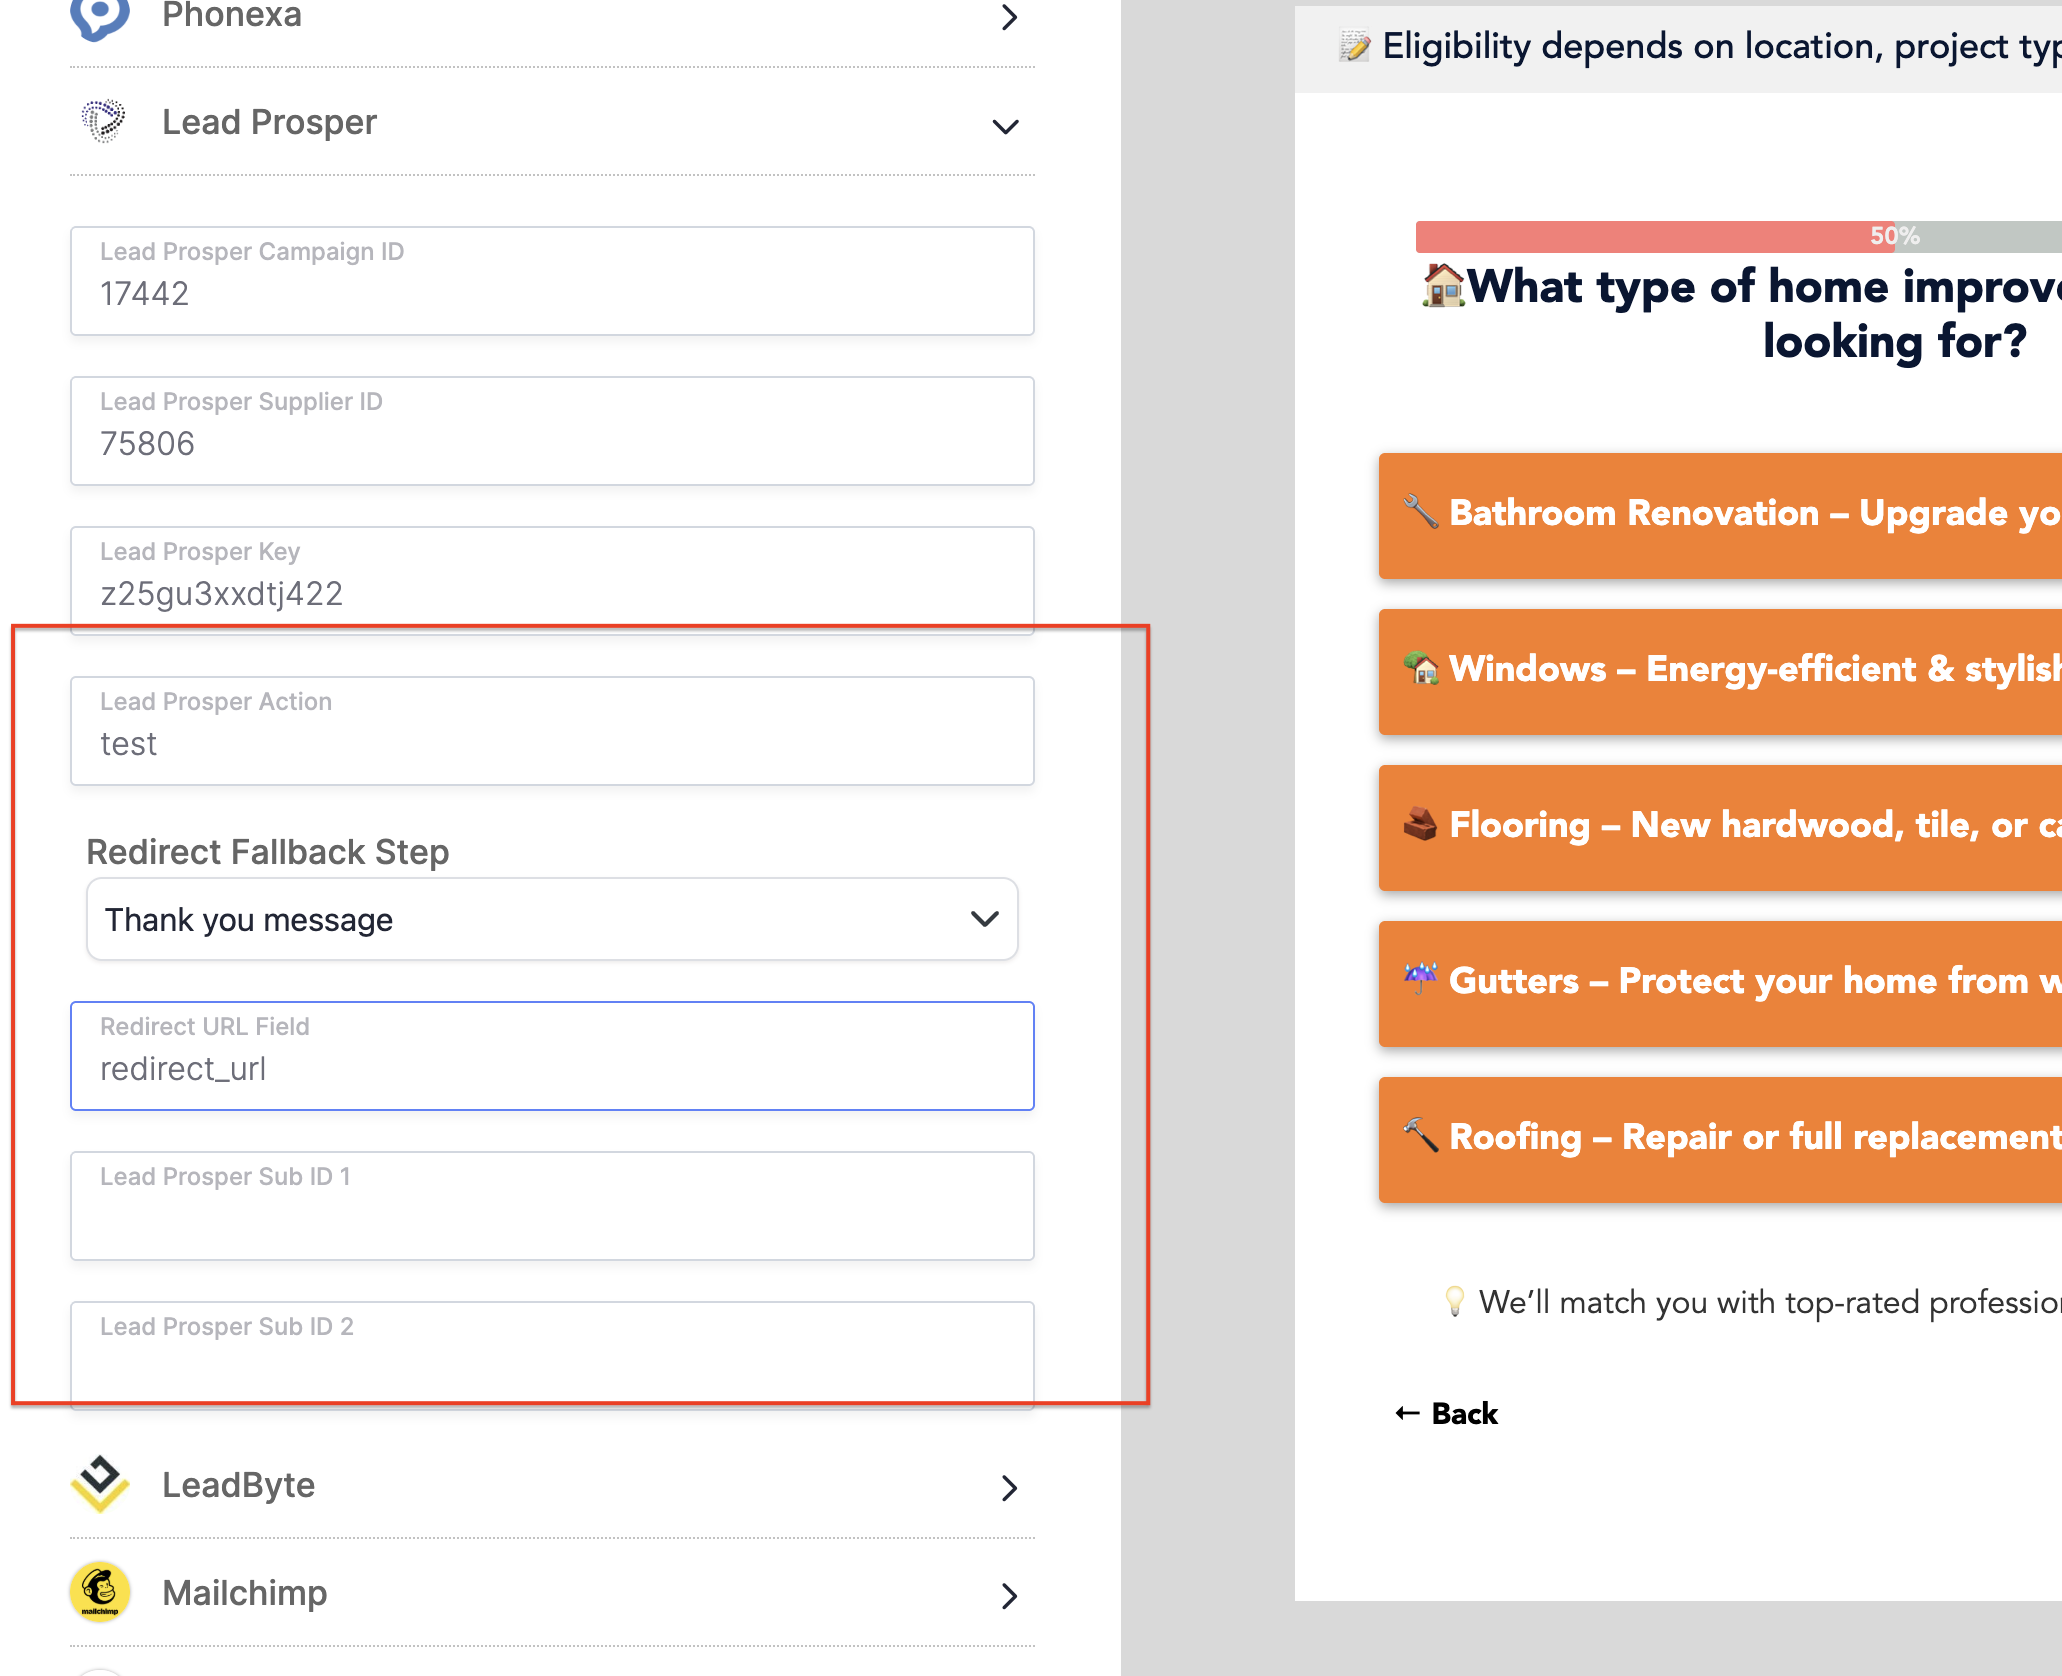
Step 4: Enable Dynamic Redirects (Optional)
⚠ This is an Optional Step. Only complete this step if your Lead Prosper campaign has been set up to pass back a redirect_url in the Supplier API Response.
If you have your Lead Prosper campaign set to pass back a Redirect URL in the Supplier API Response then this is where you can set up redirecting the user based on that redirect URL.
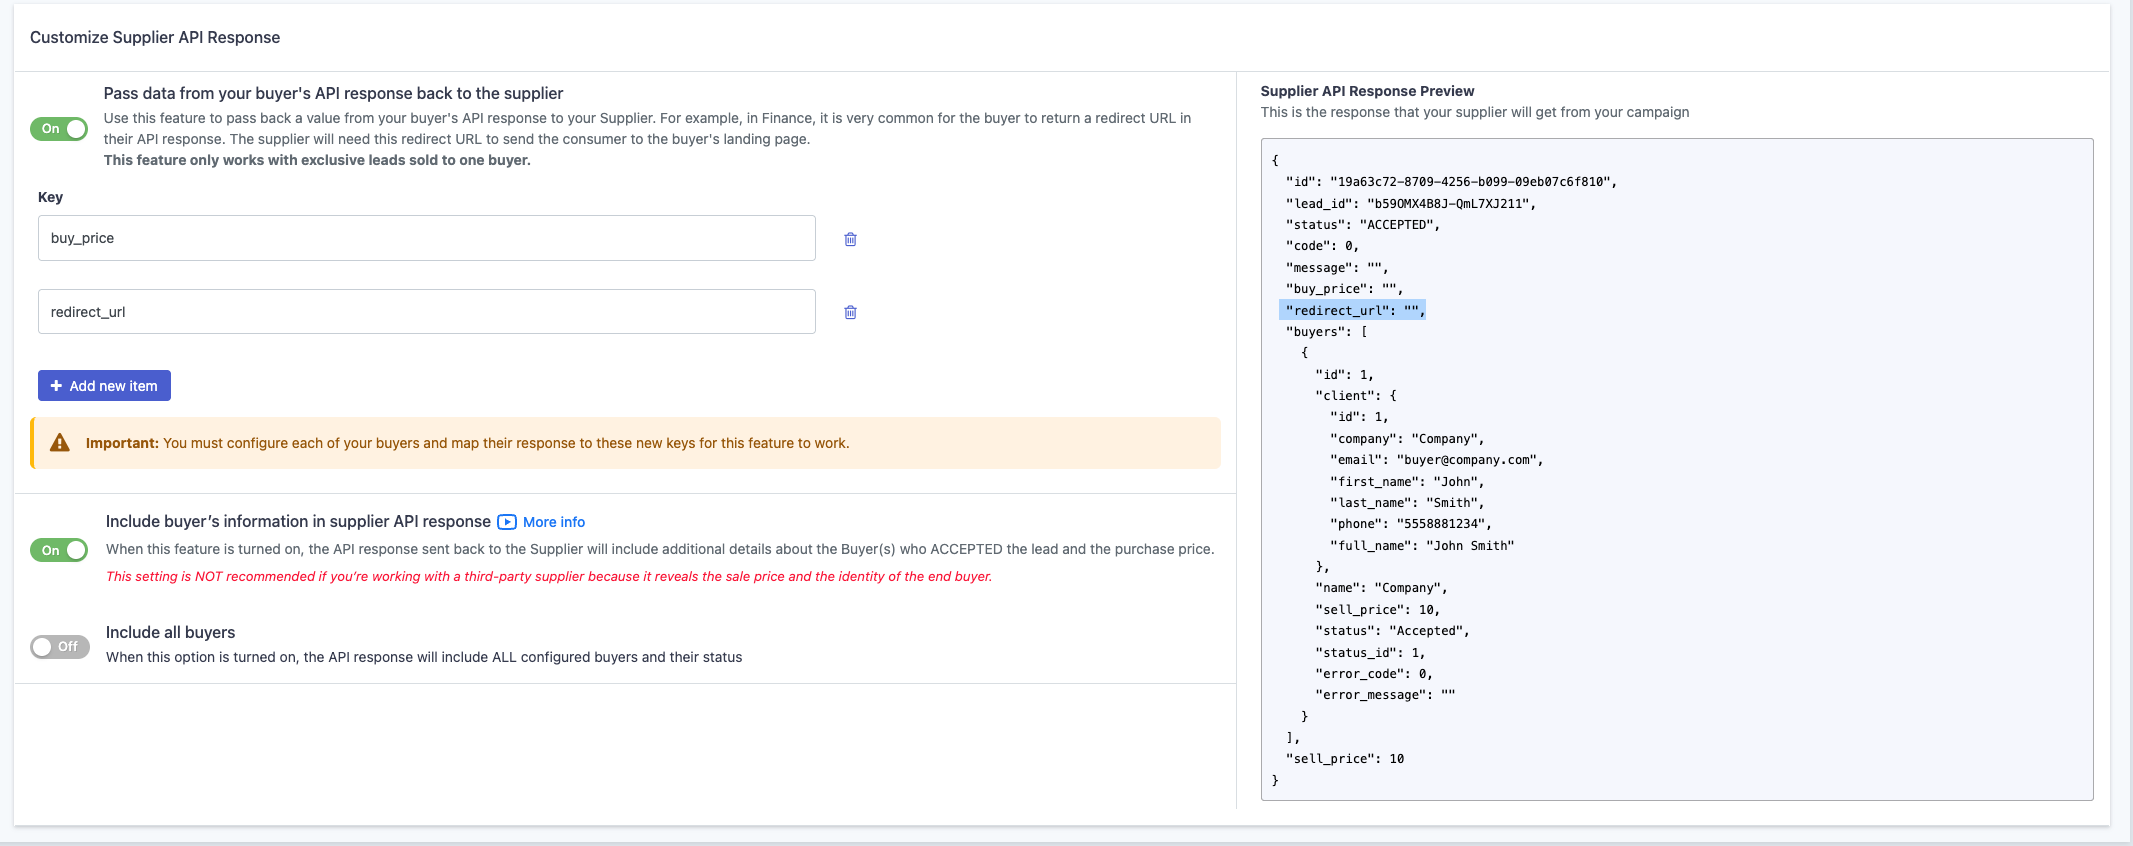
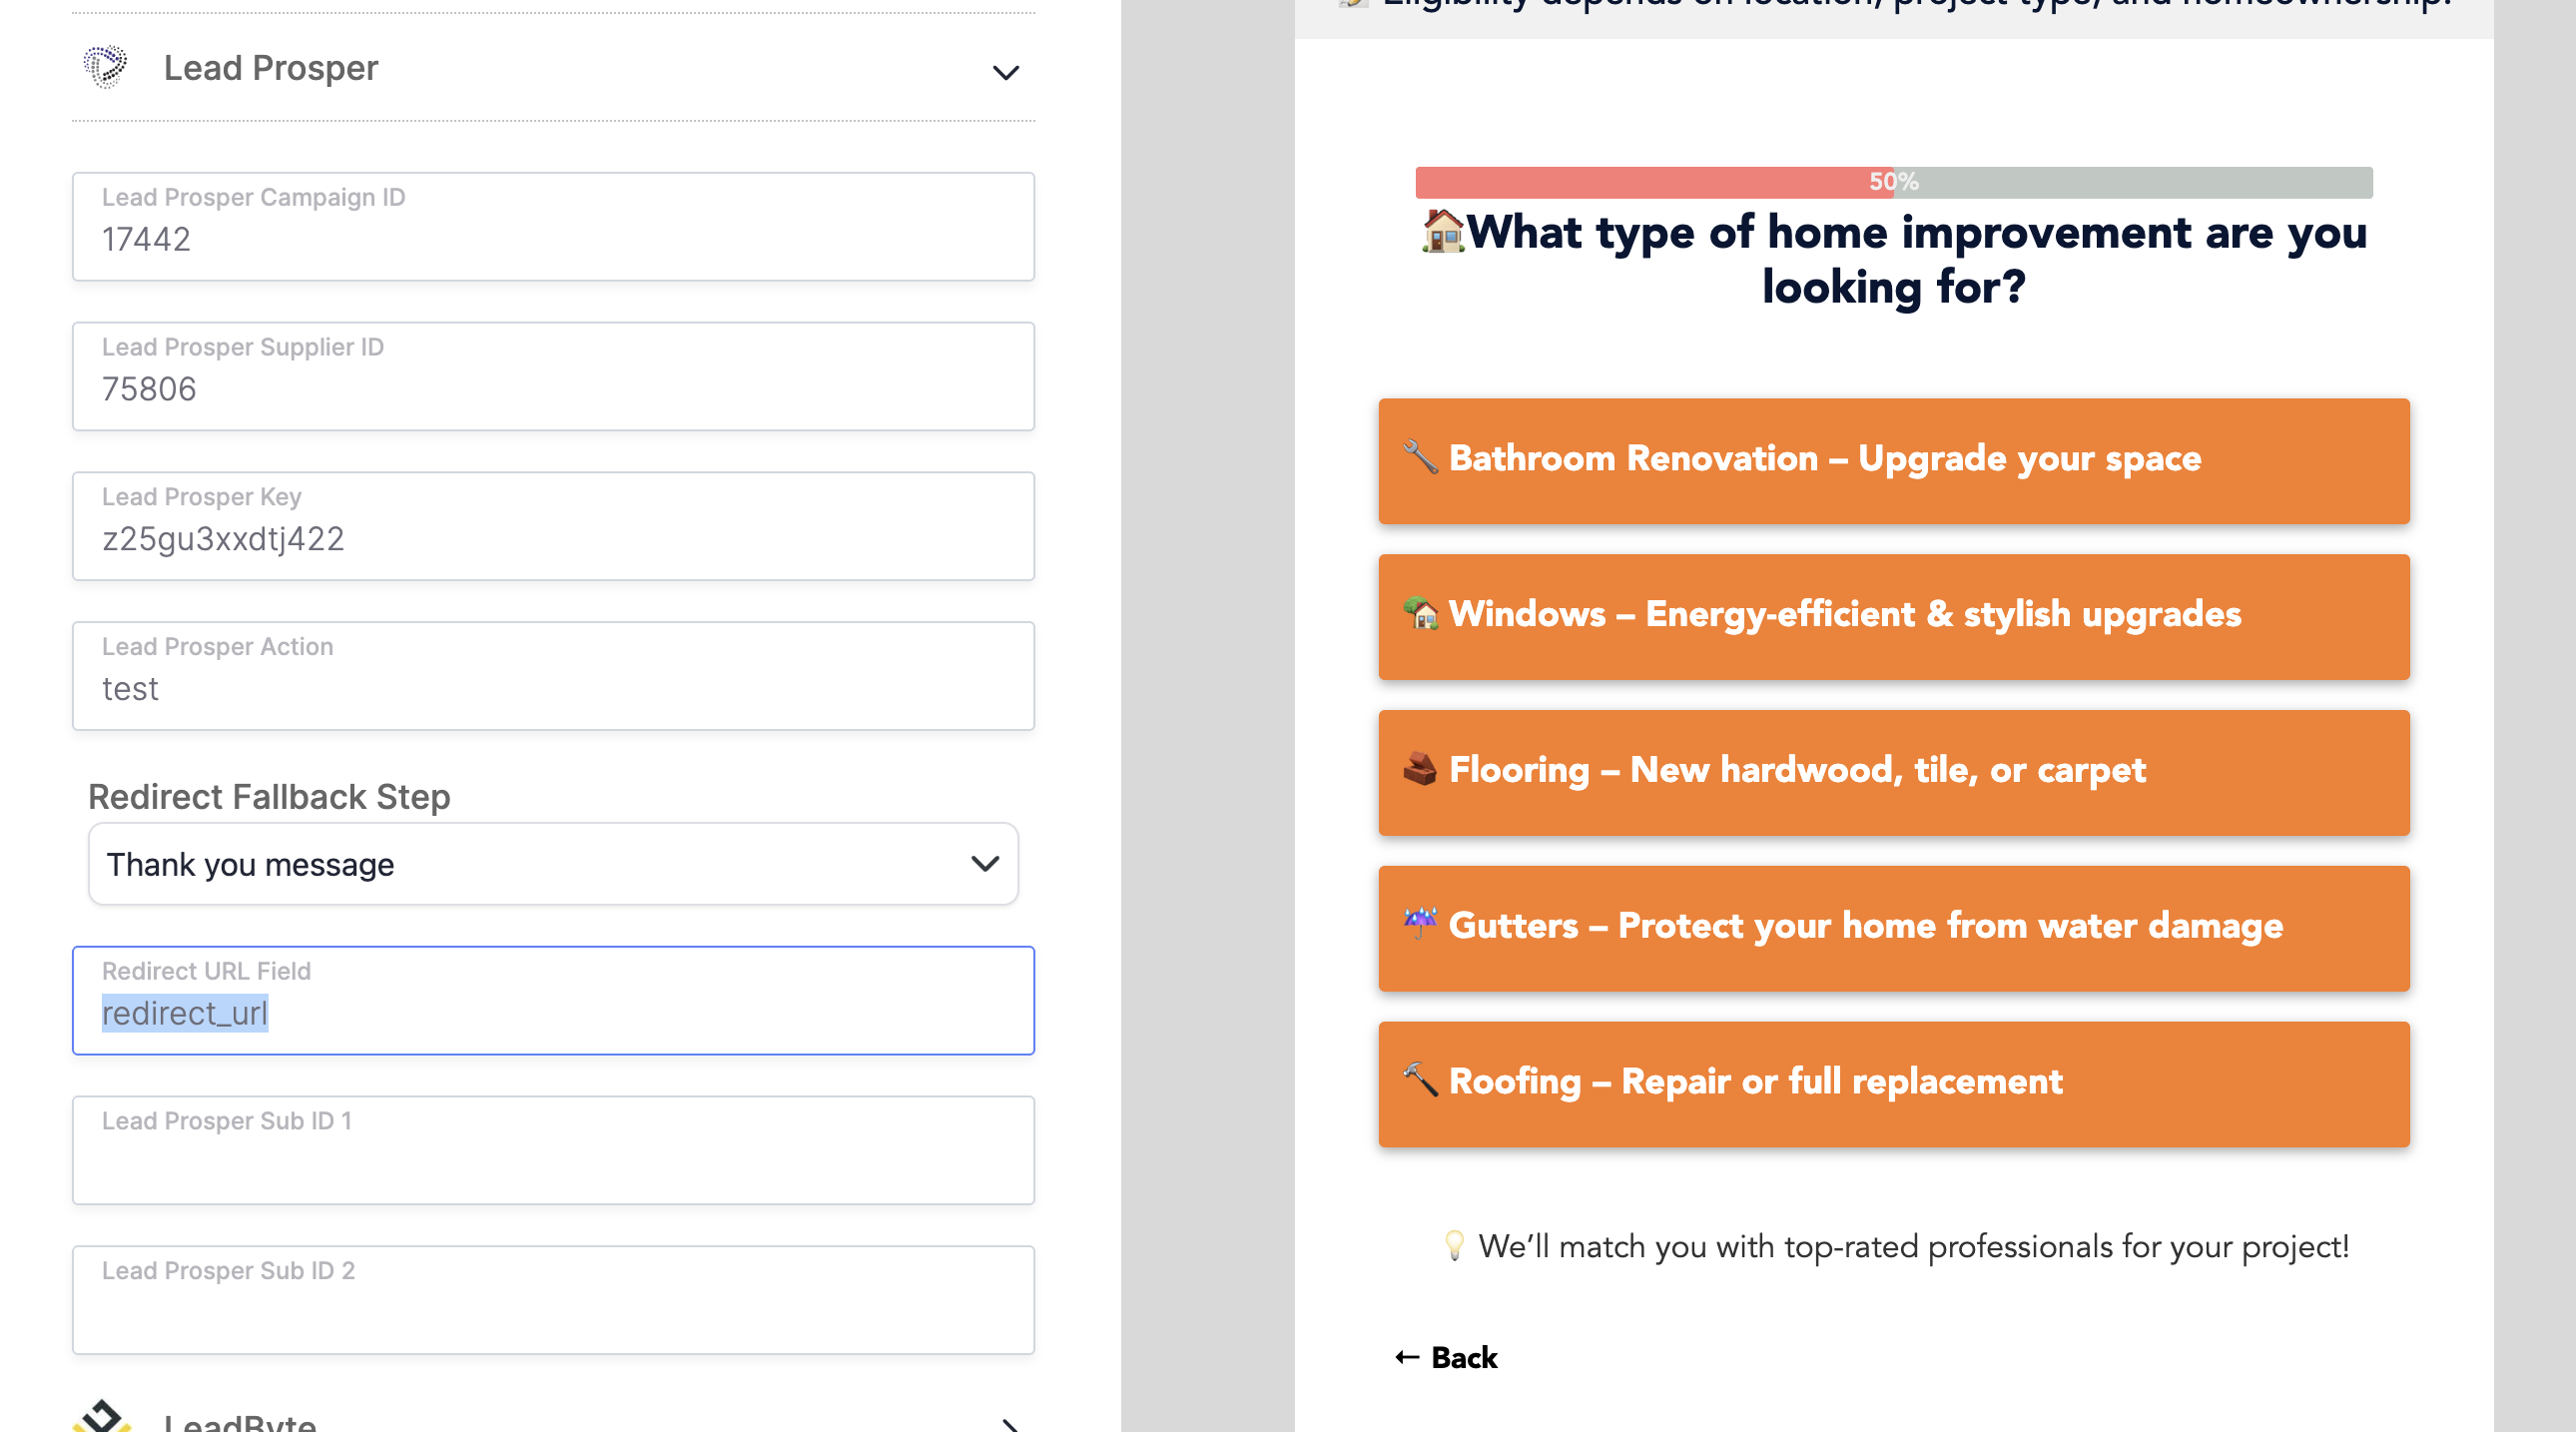
- In the Redirect URL Field, enter the field name used in your campaign’s Customize Supplier API Response settings (e.g., redirect_url).
- Choose a Redirect Fallback Step, which will be used whenever the redirect_url value is empty.
Step 5: Map Your Form Fields to Lead Prosper
Now that the Lead Prosper integration is enabled, the next step is to map your LeadCapture form fields to the correct Lead Prosper fields from your Supplier API Specs. This ensures the right data is passed into your campaign.
Standard Field Mapping
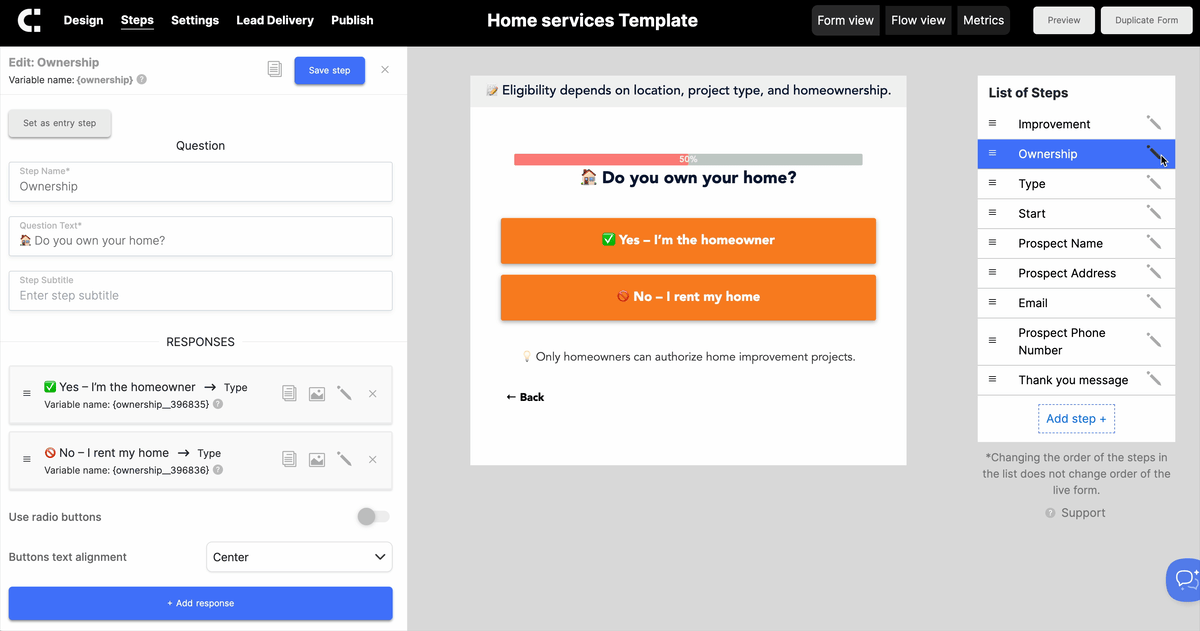
- In your form builder, select each step of your form where you collect user information (e.g., First Name, Last Name, Email, Phone, State).
- Under Form Fields, click the Pencil icon to open the field settings.
- In the settings, go to the Lead Prosper section and enter the exact field name from the API specs.
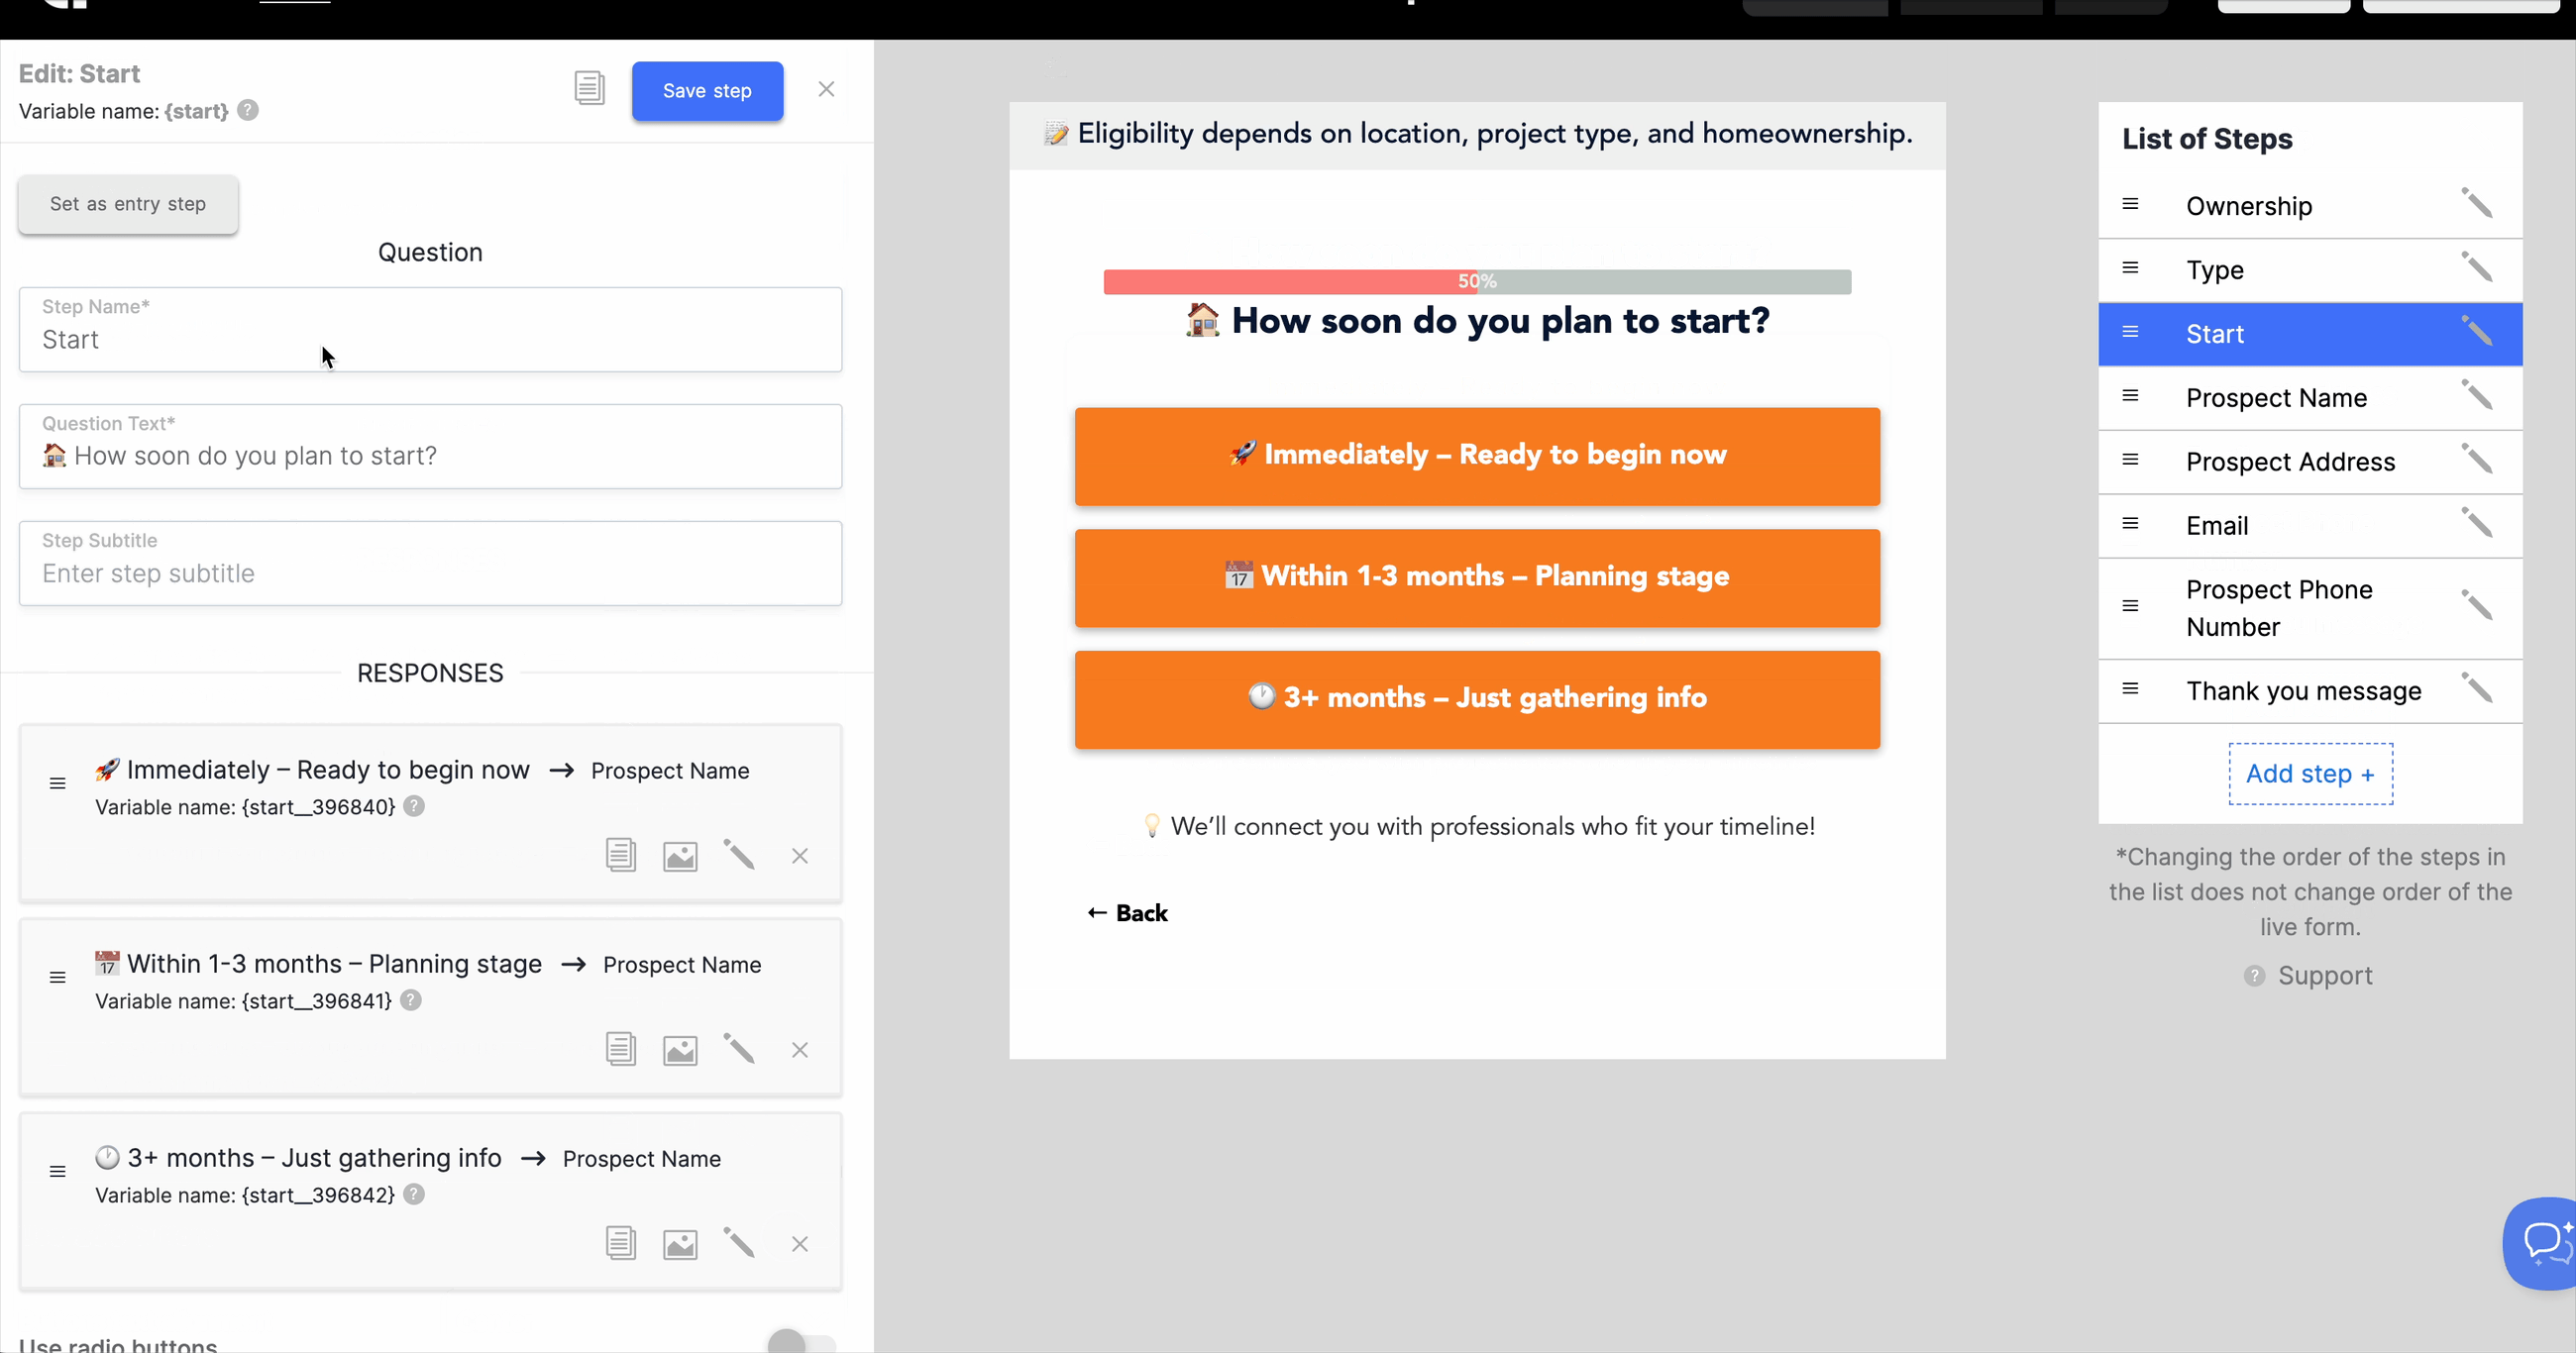
Question / Response Field Mapping (Advanced)
If your form uses question-style steps (e.g., multiple-choice questions), you’ll need to map those responses through the Advanced Options.
- Go to the Steps tab in your form.
- Open the Advanced Options section.
- Expand the Lead Prosper settings and enter the correct field name from your API specs into the text box.
State Field Formatting
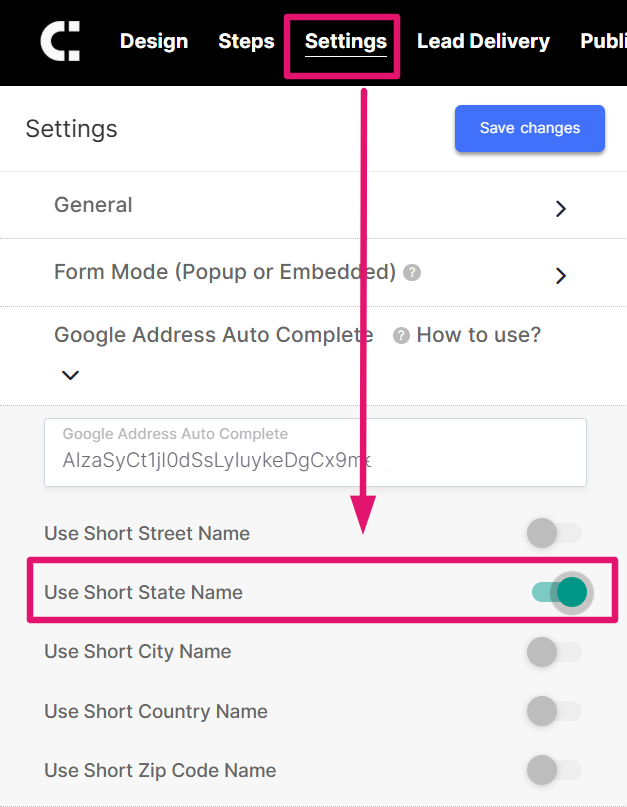
If you are using the Google Address Auto Complete field in your LeadCapture form by default it will use the full State name. In order to convert the state to the 2-letter abbreviation do the following:
- Go to the Settings Tab
- Select Google Address Auto Complete
- Enable the "Use Short State Name" option
- Save
By following these steps, you can seamlessly connect your LeadCapture forms to your Lead Prosper campaigns and ensure every lead is delivered accurately in real time. With your fields mapped and integration complete, you’ll be ready to capture, post, and route leads with confidence—streamlining your workflow and maximizing campaign performance.